Table of Contents
How to Create MySQL Database with AWS RDS
In this post, we will see details steps to create a MySQL database in Amazon Web Services (AWS) on Amazon Relational Database Service (RDS). Creating MySQL on AWS RDS is easy in comparison to installing MySQL on the local server. It will be ready in a few clicks and you can connect to the cloud MySQL database with Any application or MySQL workbench.
How to get the rds pricing before creating the AWS RDS instance
In case if you want to get the aws rds pricing and cost details you can click to AWS service cost calculator. You can select the service name and duration and it will give you approximate bill.
AWS RDS Instance Types
AWS instance type has segregated in two calories :
- General Purpose
- Memory Optimised
AWS RDS Instance creation steps
#1. Login to AWS console using https://aws.amazon.com
#2. Select the AWS region where you want to create the MySQL RDS database service. Check the proximity of your application or your location from where you will connect to the database. Try to choose the nearest region.
| AZ Code | Name and Location |
| us-east-2 us-east-1 us-west-1 us-west-2 ap-east-1 ap-south-1 ap-northeast-3 ap-northeast-2 ap-southeast-1 ap-southeast-2 ap-northeast-1 ca-central-1 eu-central-1 eu-west-1 eu-west-2 eu-west-3 eu-north-1 me-south-1 sa-east-1 |
US East (Ohio) US East (N. Virginia) US West (N. California) US West (Oregon) Asia Pacific (Hong Kong) Asia Pacific (Mumbai) Asia Pacific (Osaka-Local Asia Pacific (Seoul) Asia Pacific (Singapore) Asia Pacific (Sydney) Asia Pacific (Tokyo) Canada (Central) Europe (Frankfurt) Europe (Ireland) Europe (London) Europe (Paris) Europe (Stockholm) Middle East (Bahrain) South America (São Paulo) |
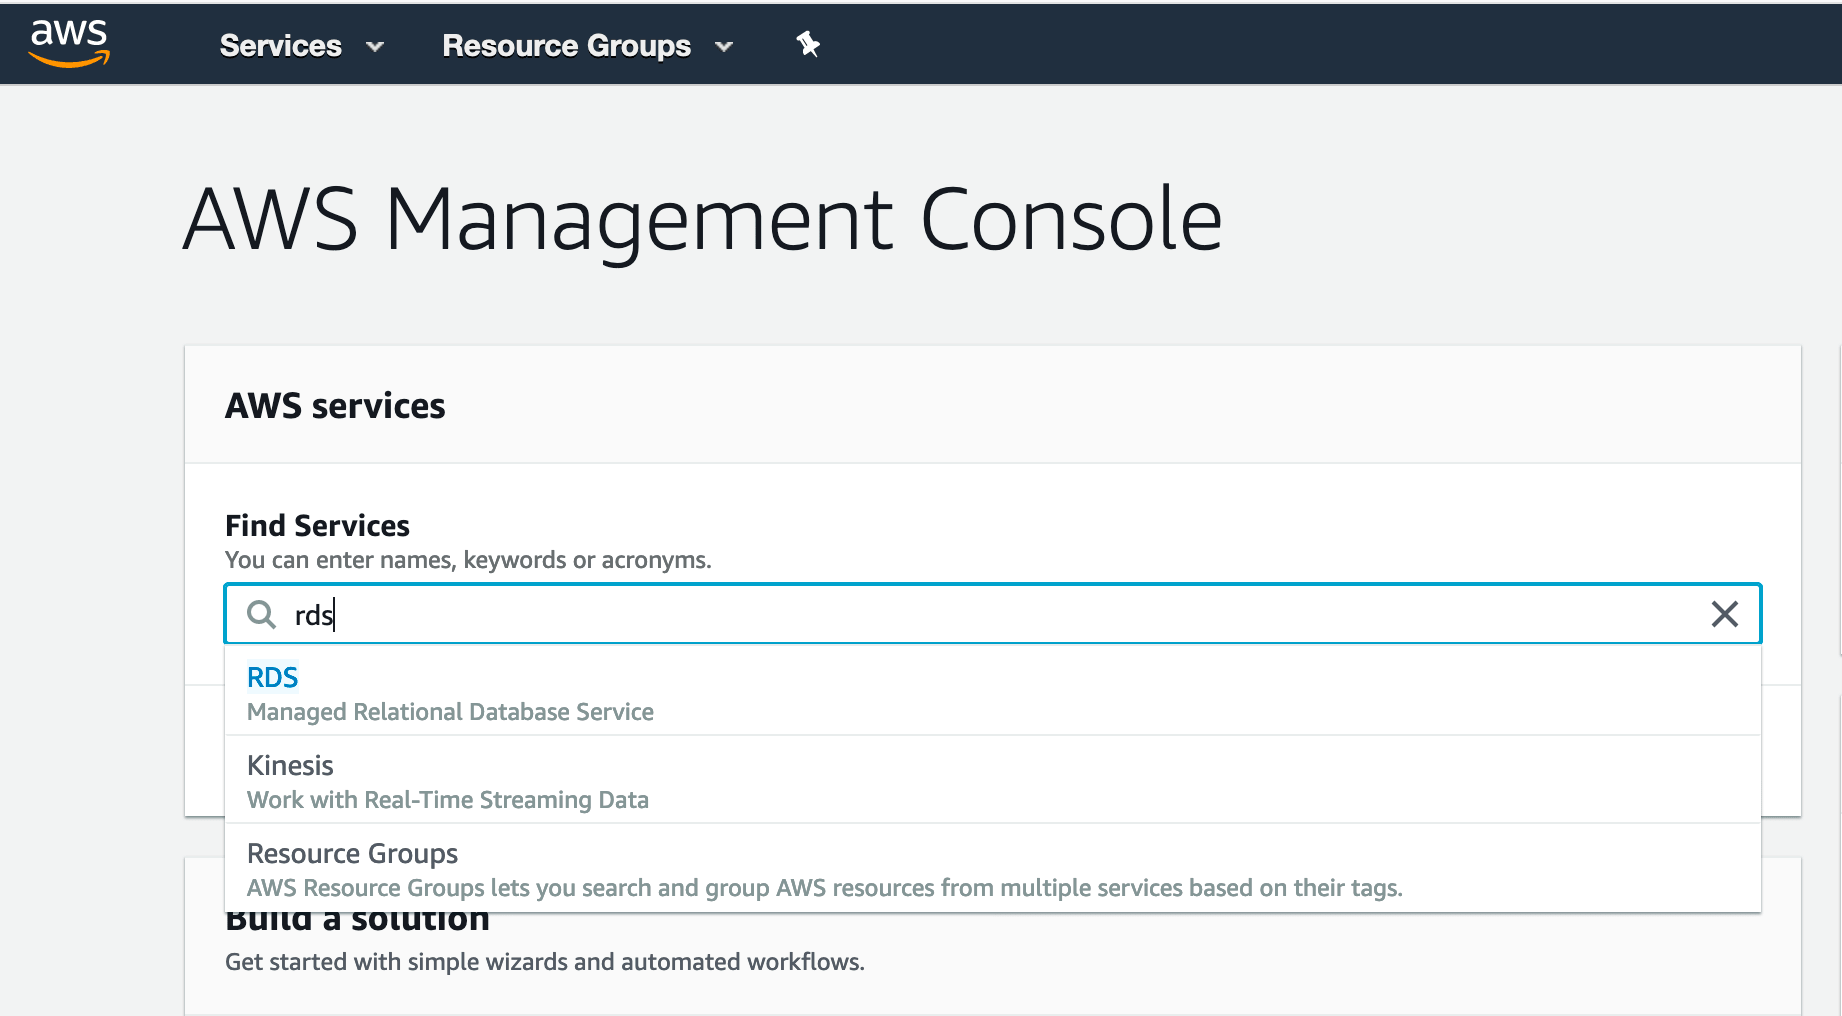
#3. On AWS console search for ‘rds’
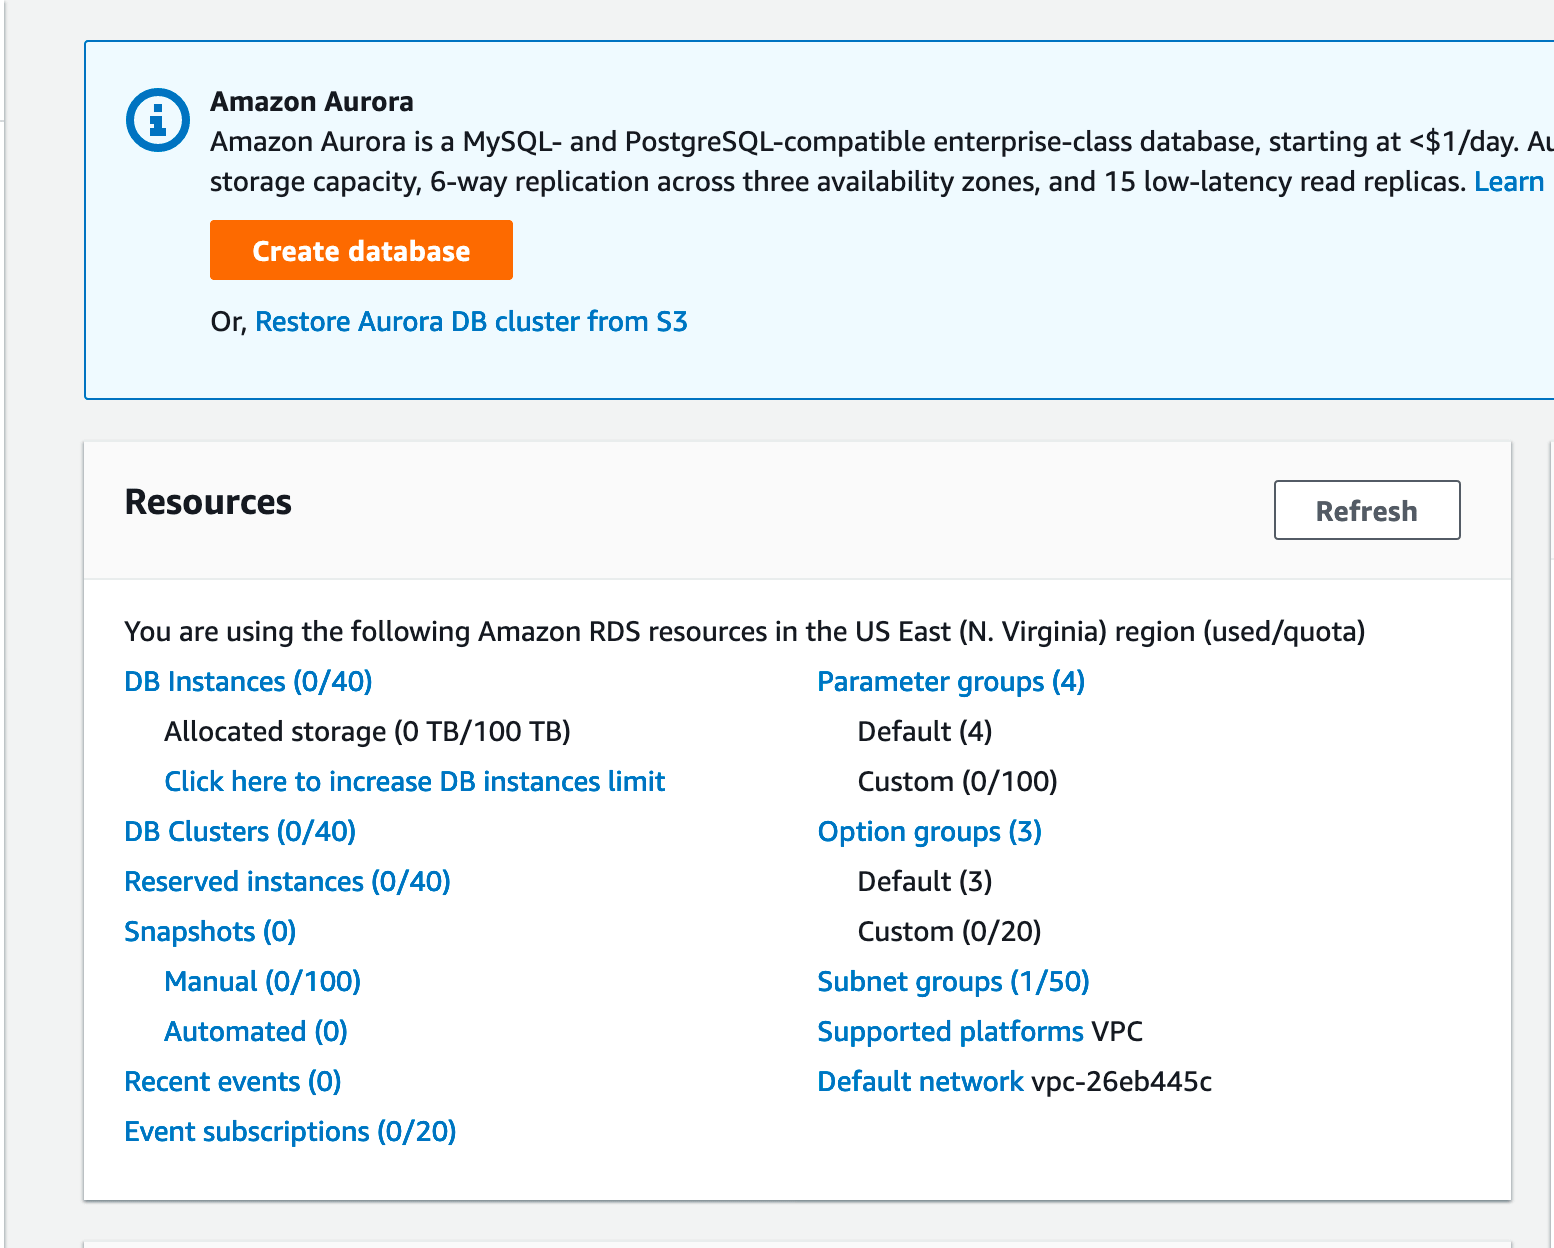
#4. Click on ‘Create database‘
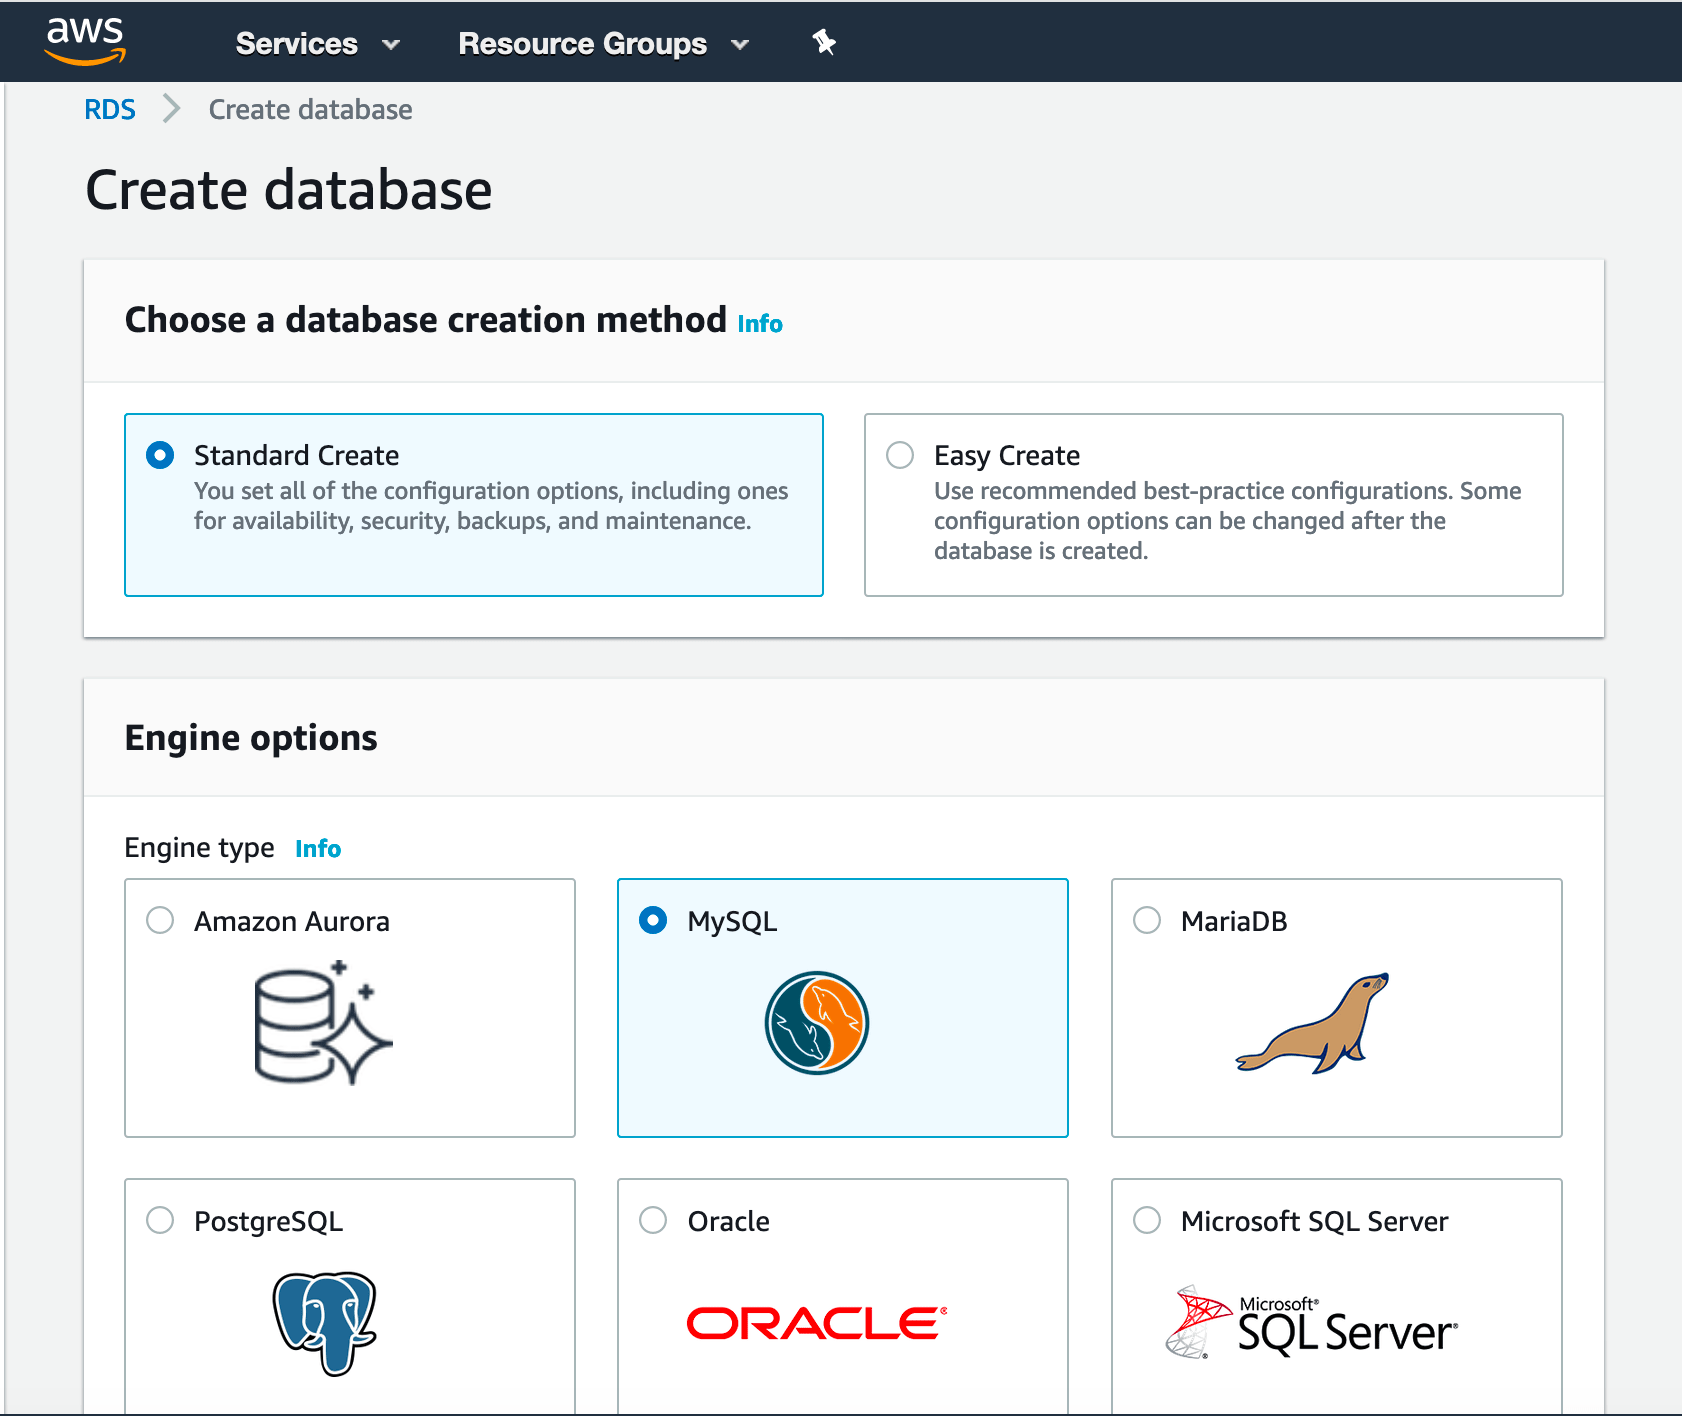
#5. Chose Standard create and MySQL
#6. Chose the MySQL Version and Template which is like Environment types like production, Development/Test and Free tier RDS instance where you won’t get certain features like read replica set etc. It only available in the Production template.

#7. Database Name and Root Password: Enter the database name, Master user name (root) and password.

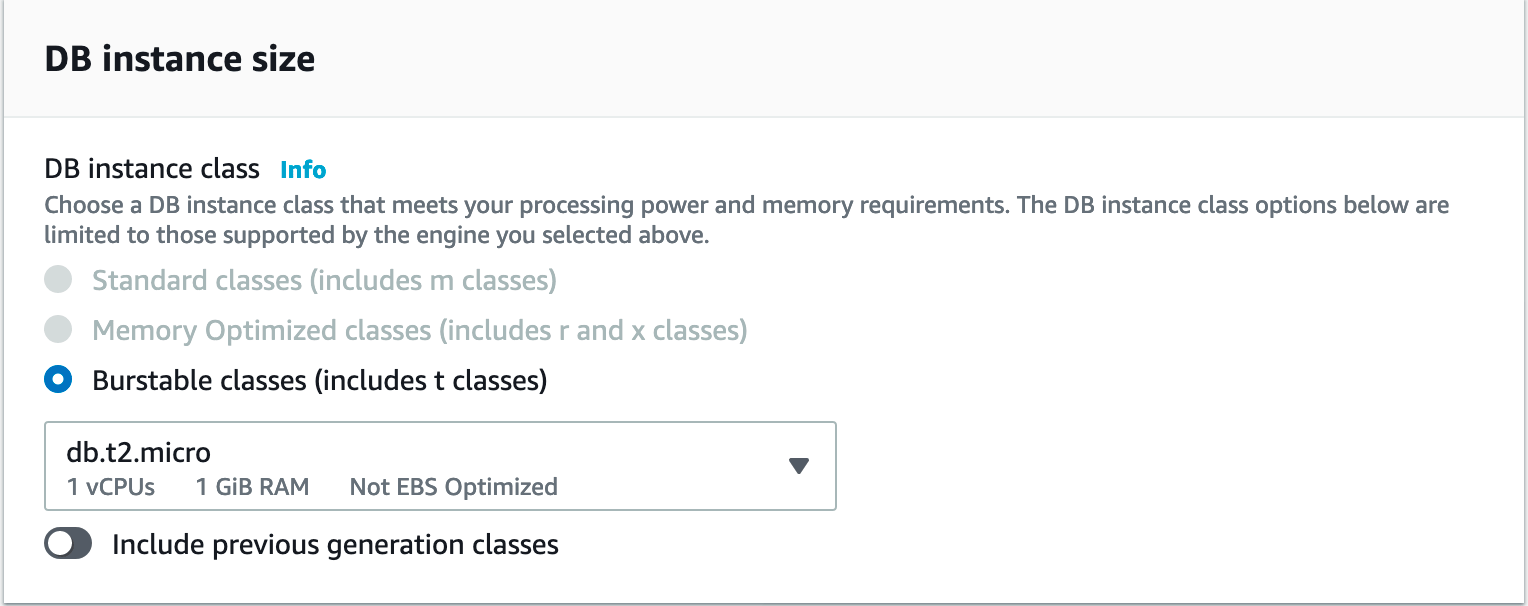
#8. Database Instance Class: Chose the database instance size like space and RAM size. AWS gives you many options based on your database load and application type you can choose it as per your need. And also it can be easily modified in the future if you need more space or RAM for DB.
In free tier, you will get fixed size ram with one CPU and one GiB Ram.
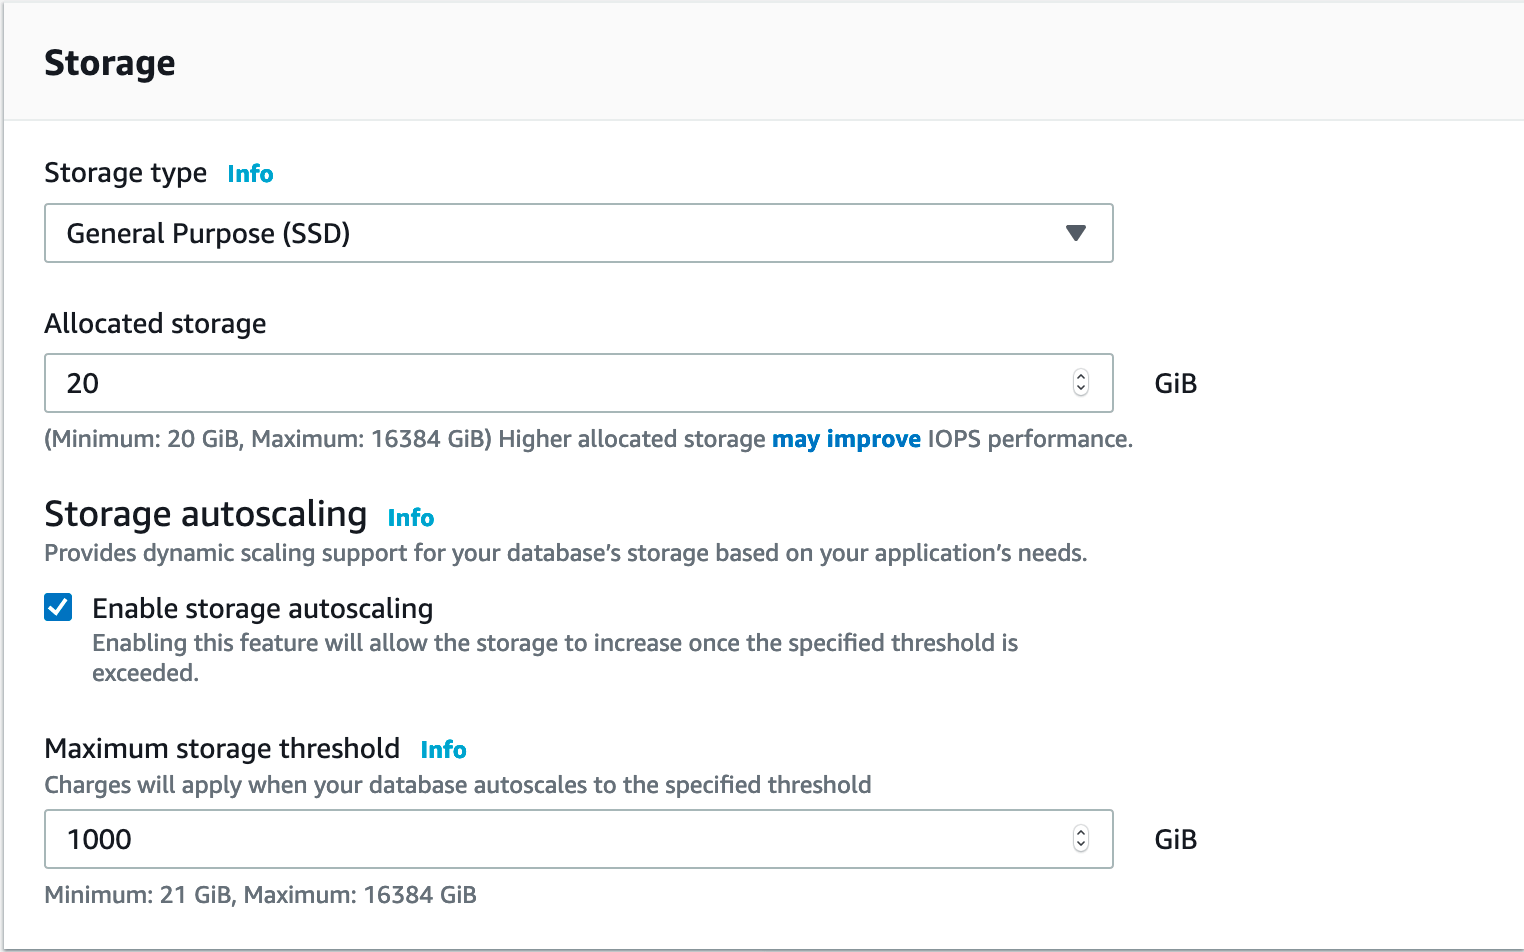
#9. Storage: Select Storage type like SSD (Solid State Hard Drive) and Storage that you need for your database. Like you if you are expecting 100gb of data select 100gb. Make sure you enable ‘storage autoscaling enabled’ so that if the disk is full. AWS automatically adds some space so that the database is not going to hang or unresponsive. It can go up to the ‘Max storage threshold’.
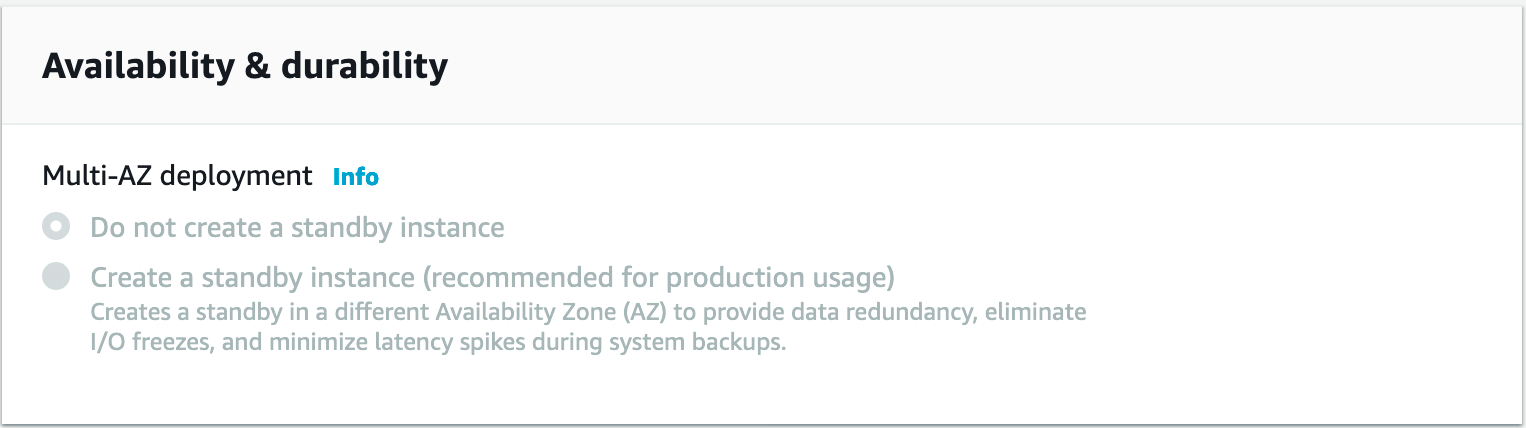
#10. Standby Instance: For a production database, you can create a Standby instance also using these options. However, in the free tier, you can’t use these and they are not enabled.
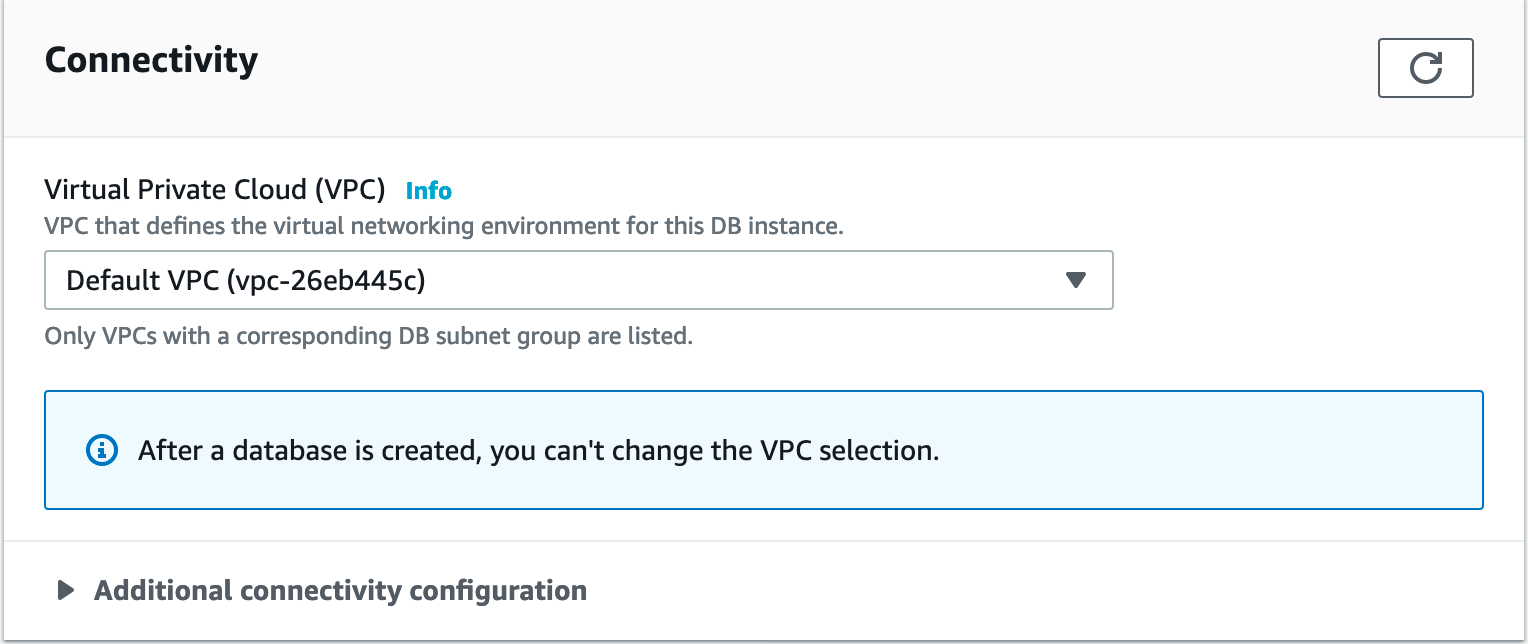
#11. Network: Choose ‘Default VPC’ for the test but in production chose correct VPC option or else Applications won’t be able to reach your database.
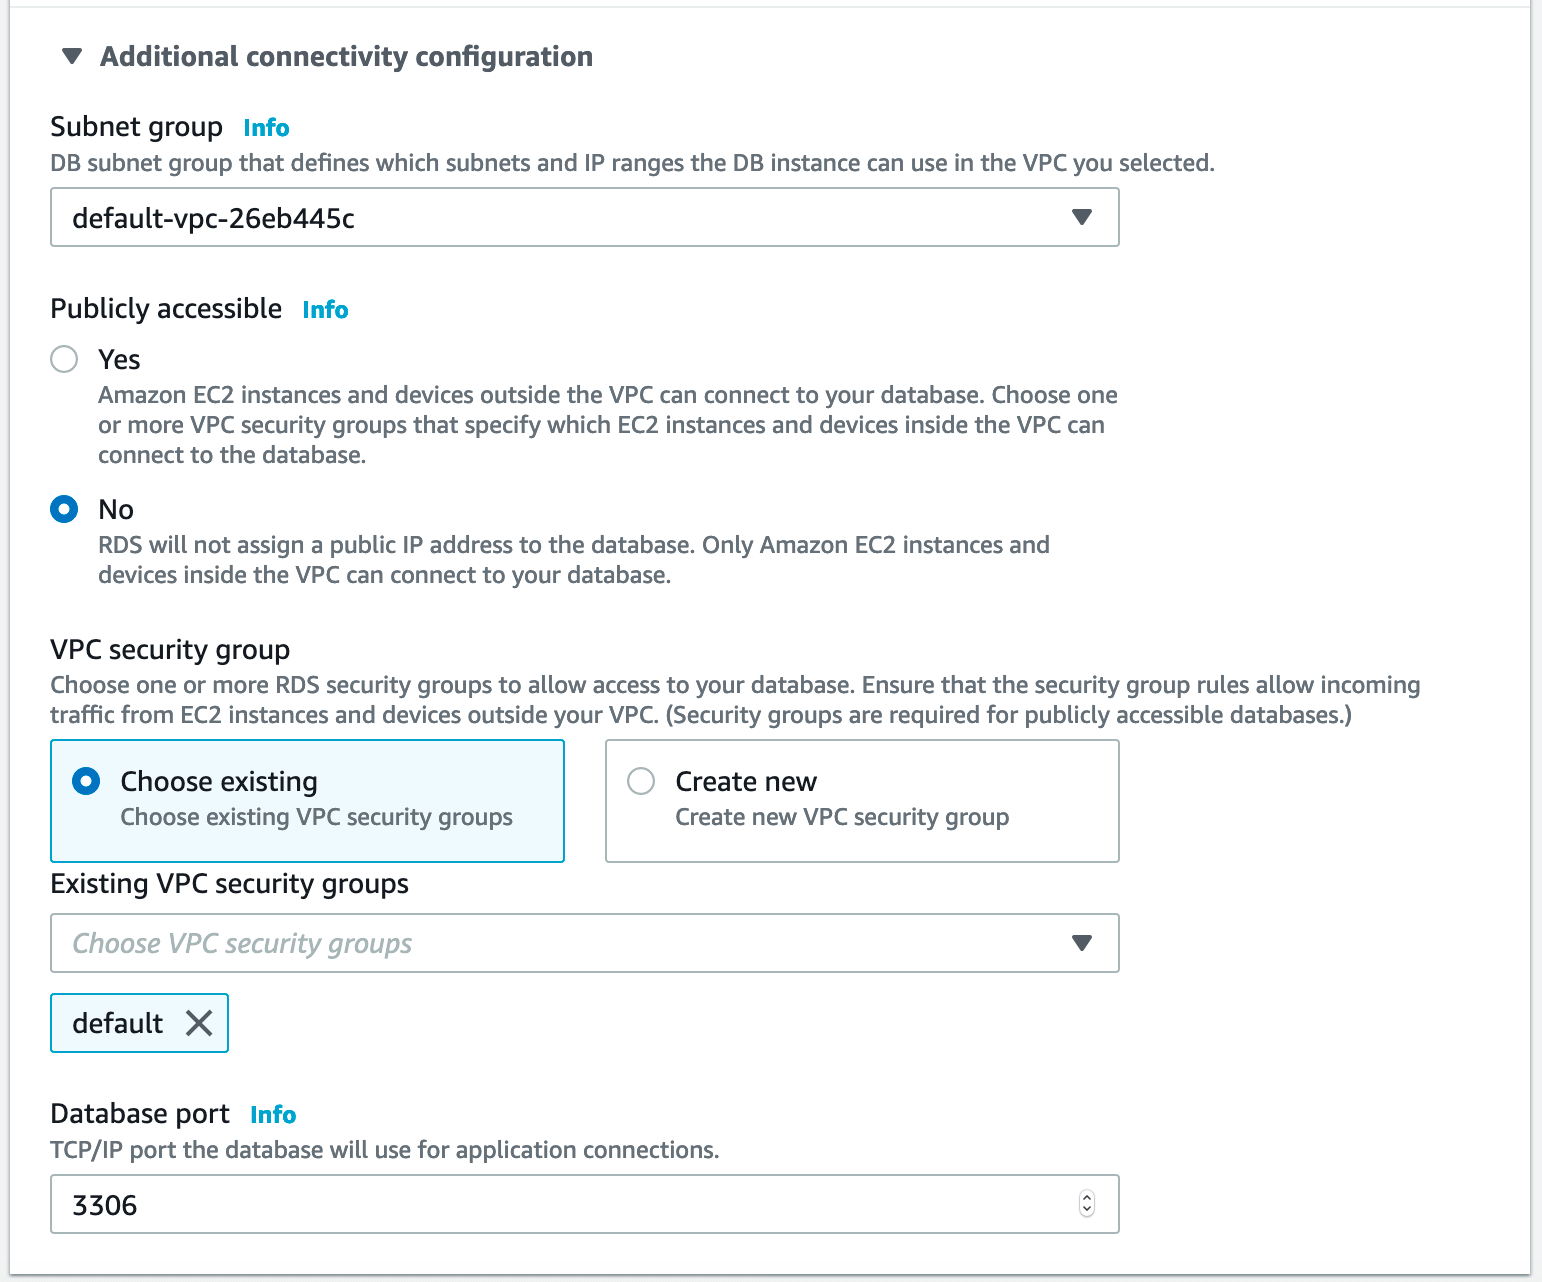
IMP Additional setting
Most of the time I see that people forget to configure ‘Additional connectivity configuration‘ and later spend time on troubleshooting.
Few IMP points to understand :
- Chose correct VPC, if you want to connect from your home or office directly to the database set default VPC and ‘Publicly Accessible ‘ enabled.
- Make sure in your Security group you have proper inbound /outbound rules setup.
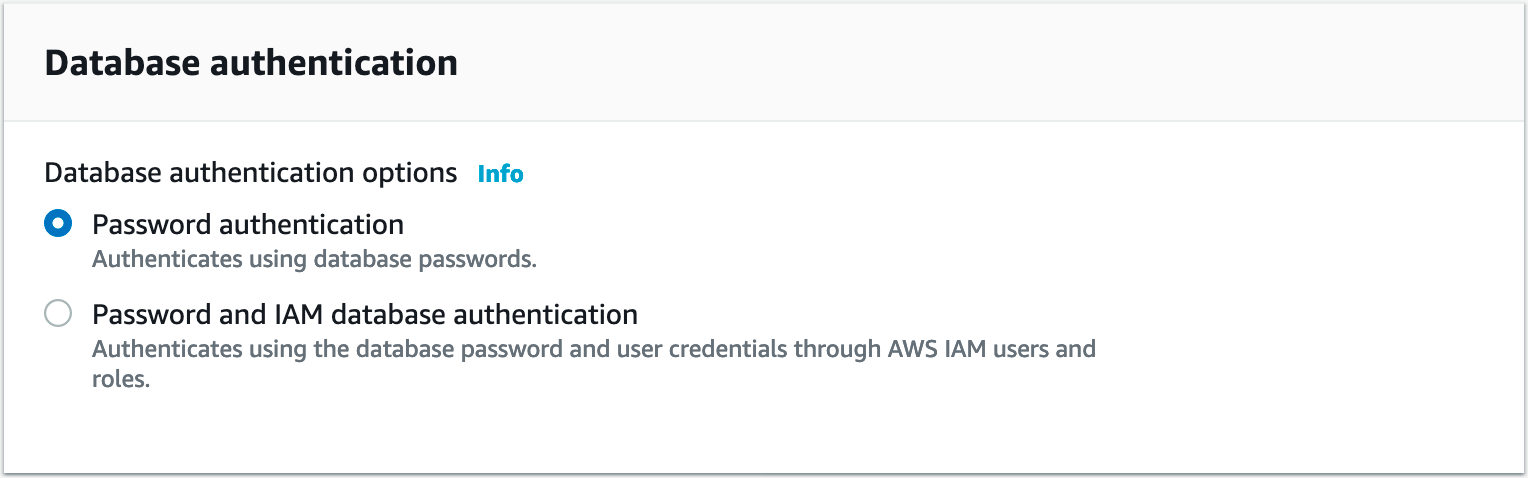
#12. Database Credentials and Authentication: You can get with your own password authentication or IAM authentication method. Password authentication you will give password but in IAM it will be managed by AWS IAM services.
#13. Database Name, Parameter group: Give the database name and Parameter group as per your MySQL database version. It’s mainly important if you have to manage the database parameters.

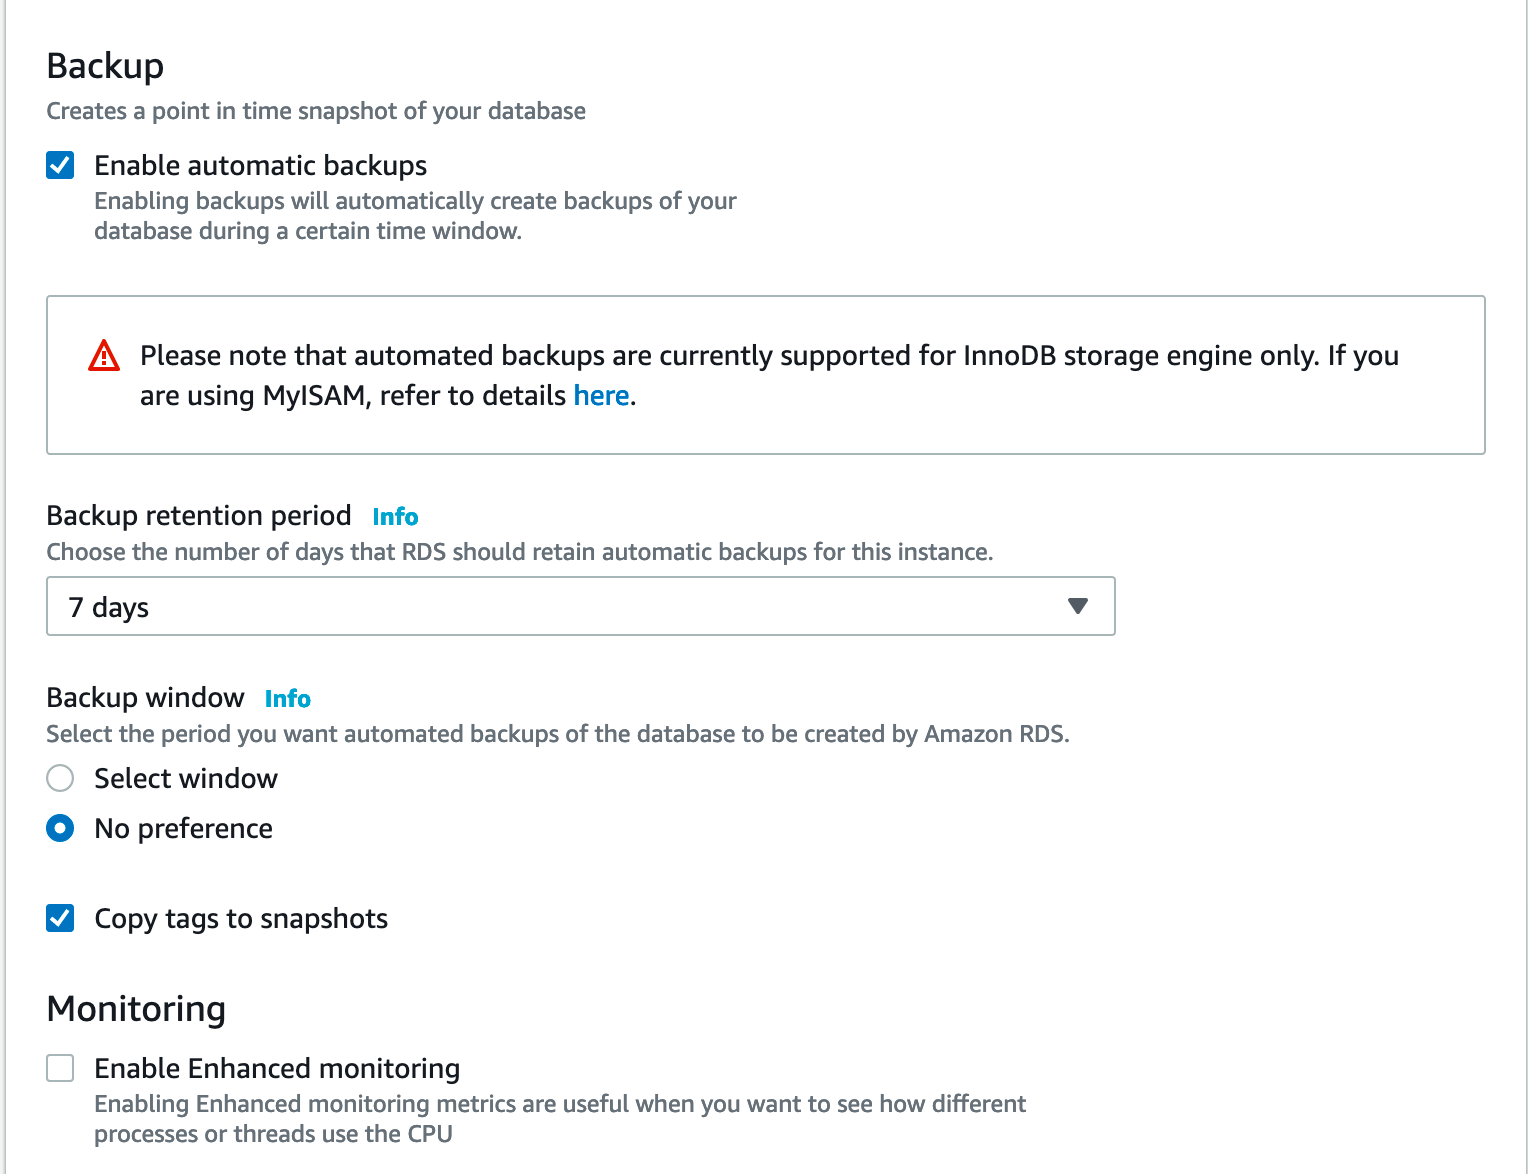
#14. Backup: As its descriptions say it will take the database backup after a fixed time-frequency. Make it enable if you are creating a production database. Also select retention period.
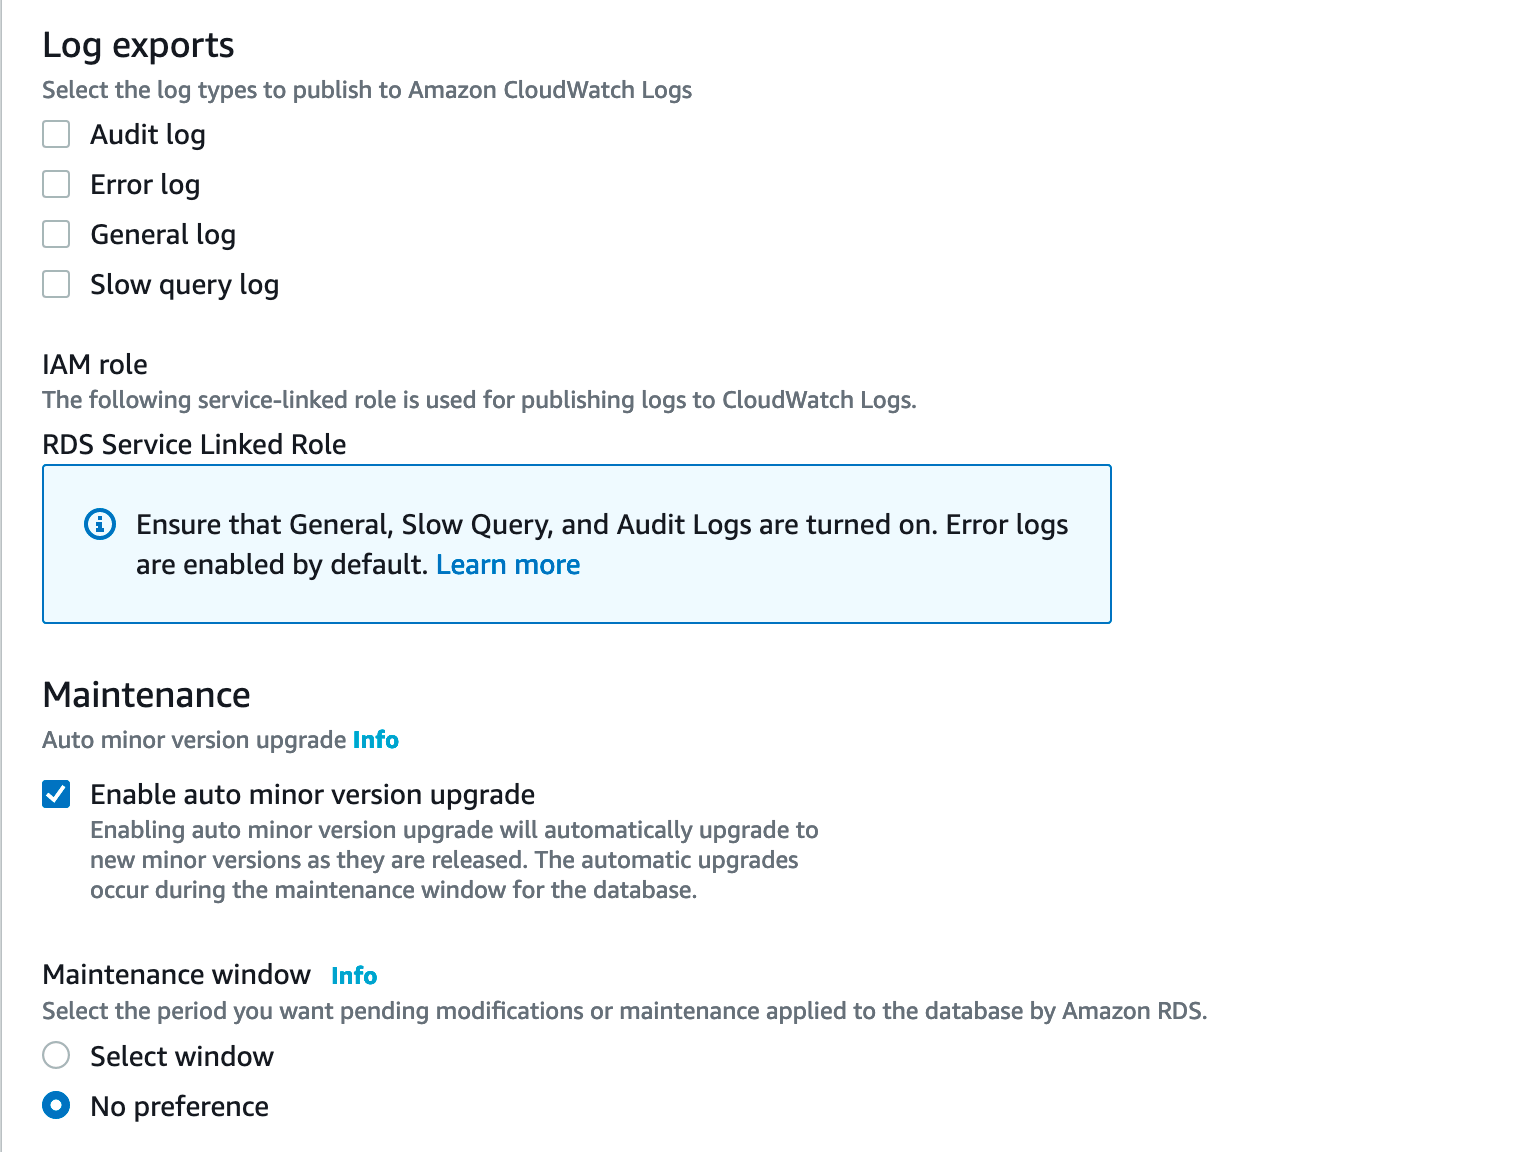
#15. Database logs & Maintenance: You can enable database defaults logs for future debugging. Make sure you enable all the logging options it gives you a lot of information about your database.
[su_box title=”IMP Note” box_color=”#fe2227″ title_color=”#101112″]Enable auto minor version upgrade: Chose this option carefully if its production database AWS will apply all the minor version upgrades to your database without letting you know automatically. It can cause an outage if your application has database version prerequisites or dependencies. [/su_box]
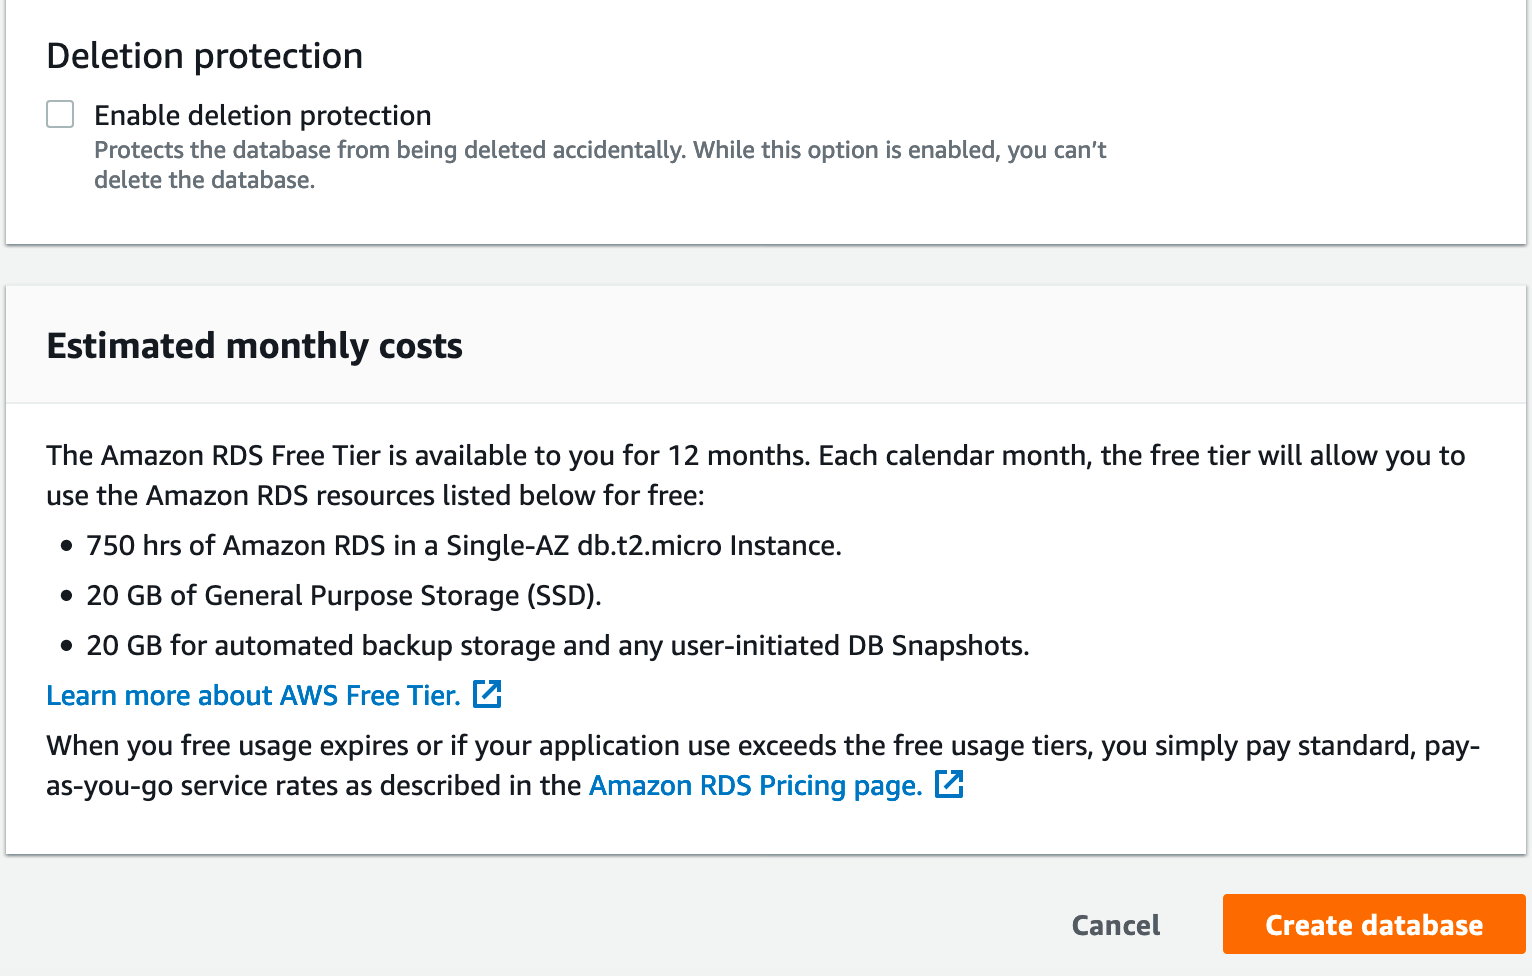
#16. Deletion Protection and Cost: I really like this feature because as it AWS GUI and you have created and delete databases available with few clicks. It is possible that if you are doing multitasking. You might hit the delete database and Production database gone. For the Production database, you can enable it. it will give you extra protection.
If you want to know the cost of RDS instance before creating a database. you can click the ‘Pricing page‘ on the last option and can get all the details.
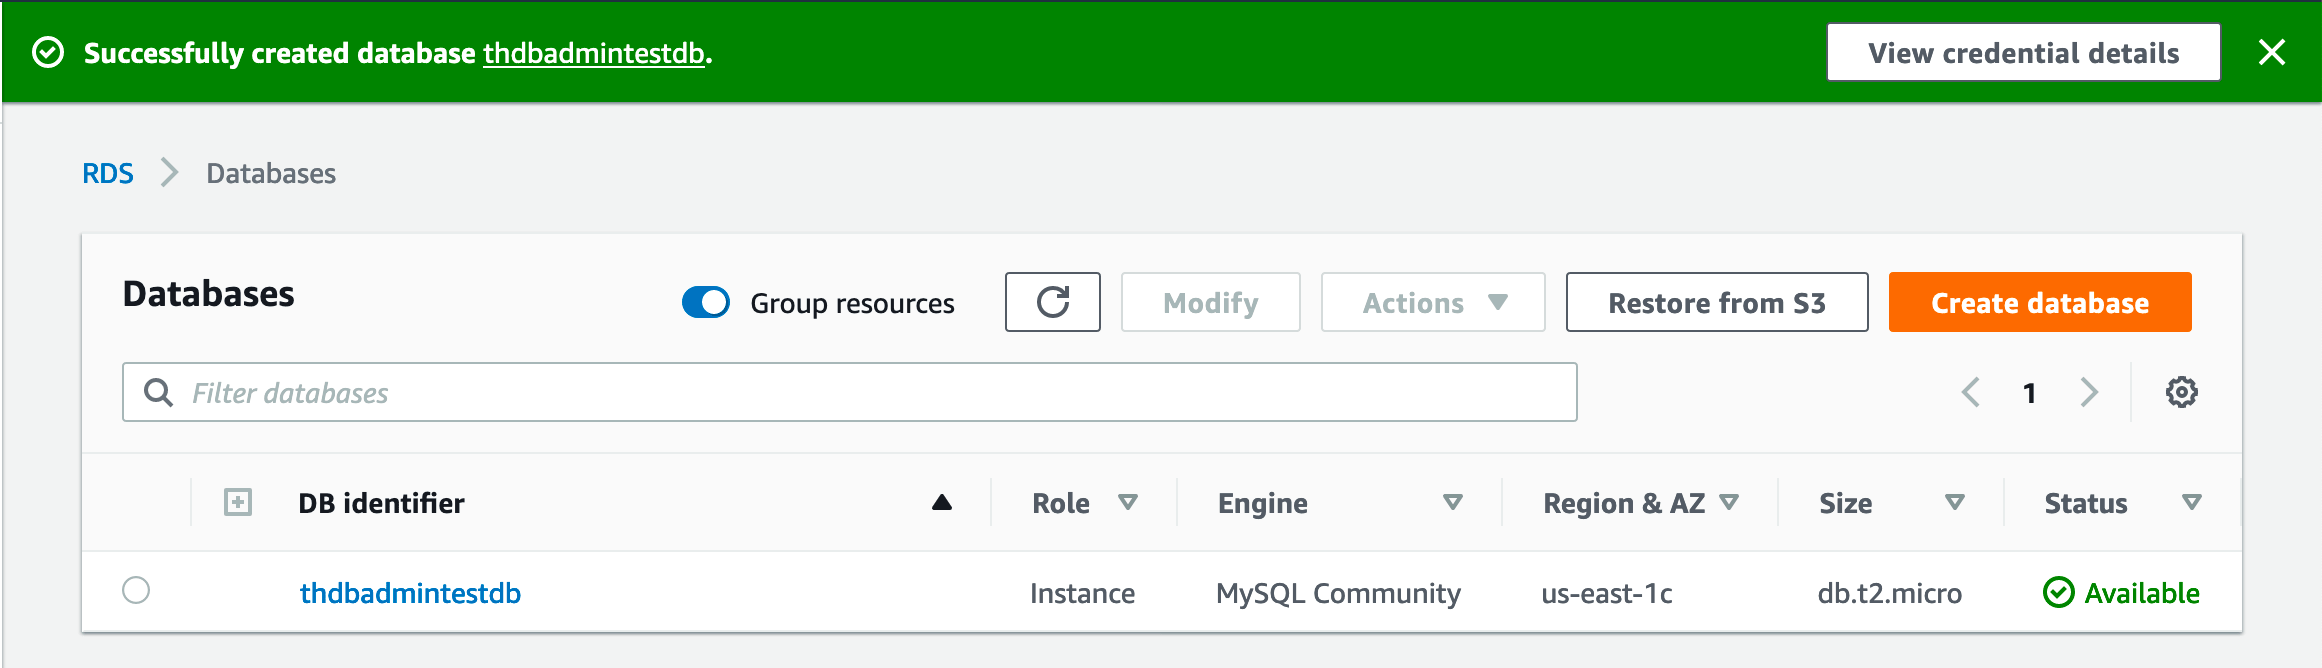
At last, hit create the database. it might take 2 to 3 minutes or more.
#17. Once the database is created you will successfully message like the following snapshot.
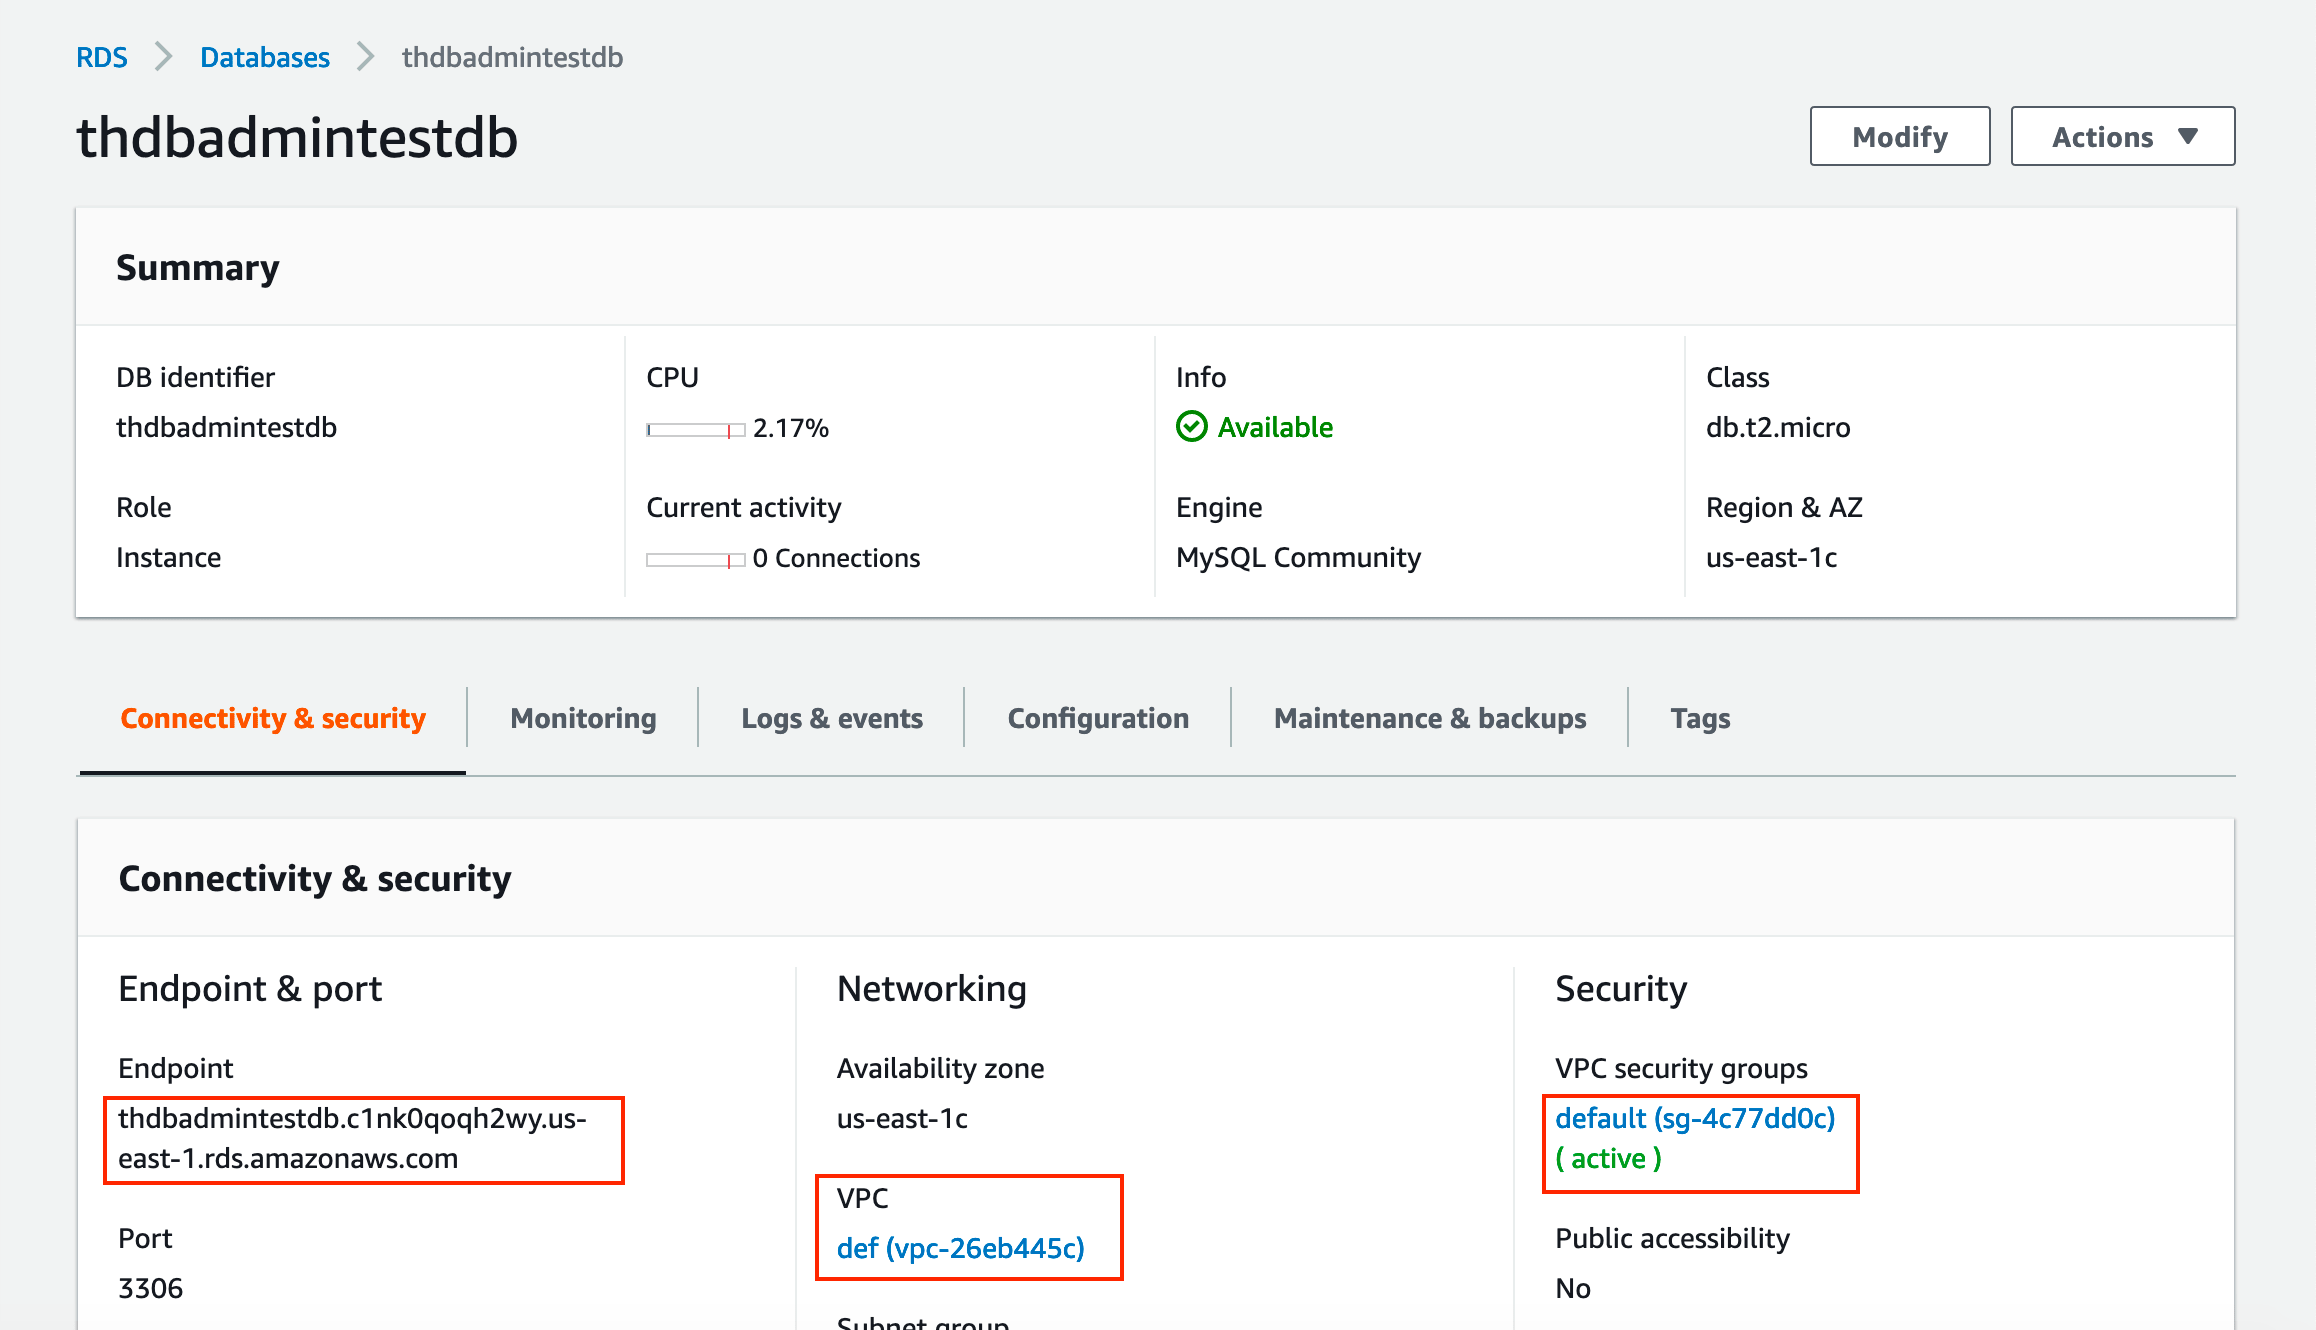
#18. Now MySQL RDS database is ready you can connect it from any application and tools. If you want to connect to MySQL RDS database from MySQL workbench see my post.
How to get RDS Database Details for connection?
Navigation: AWS Console/ RDS / Database
Endppint name / VPC / Security group
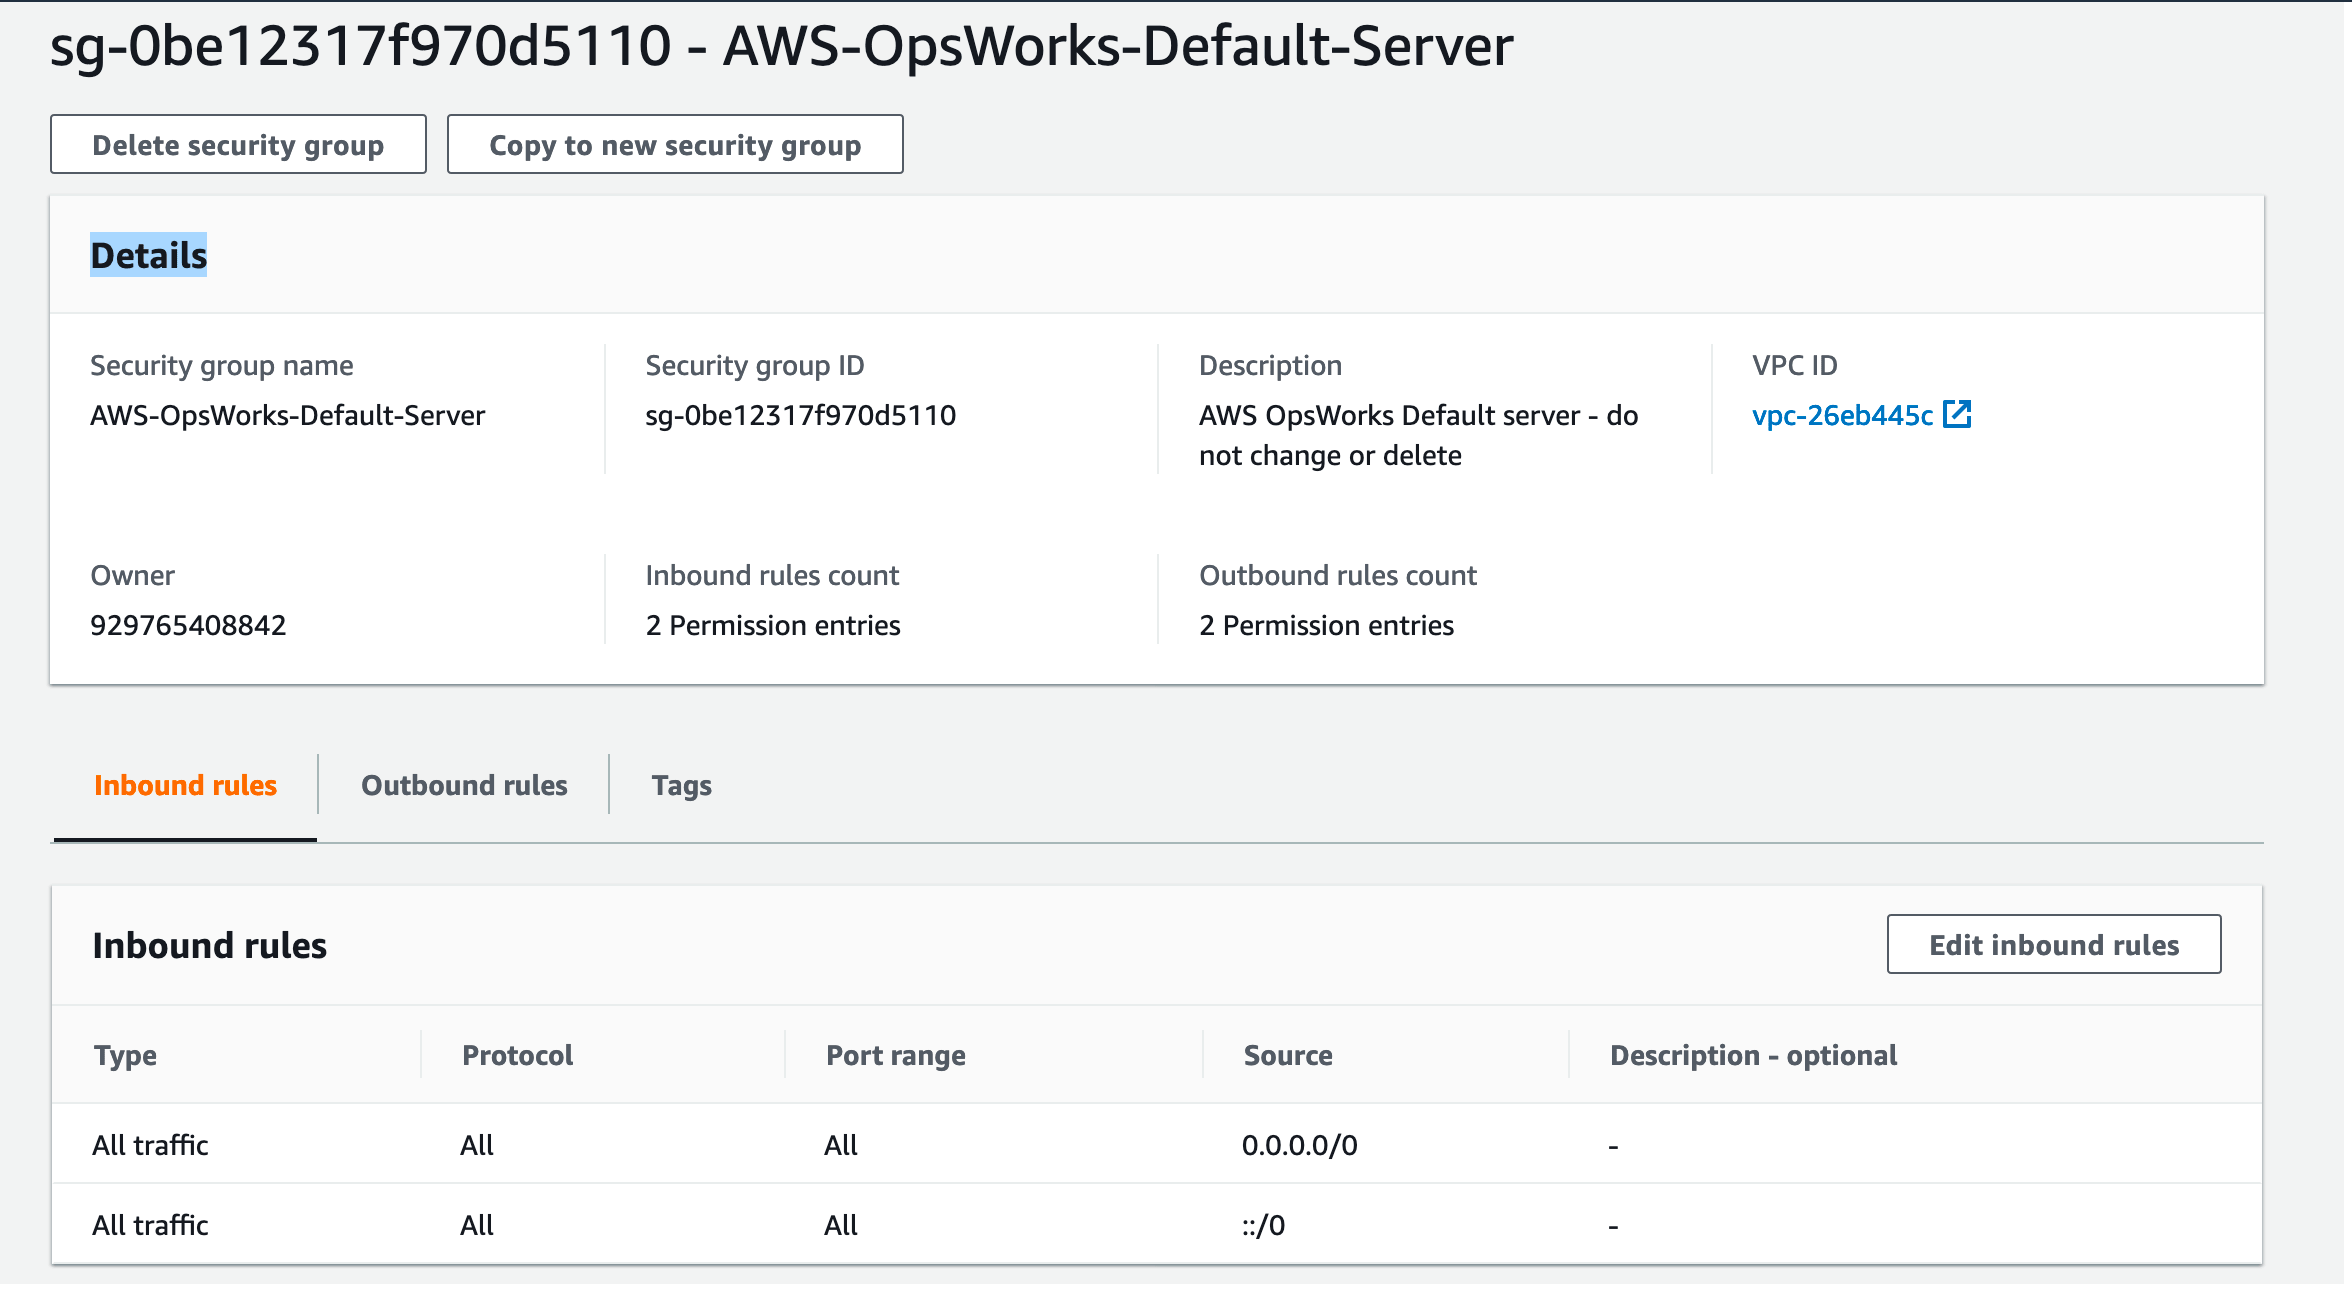
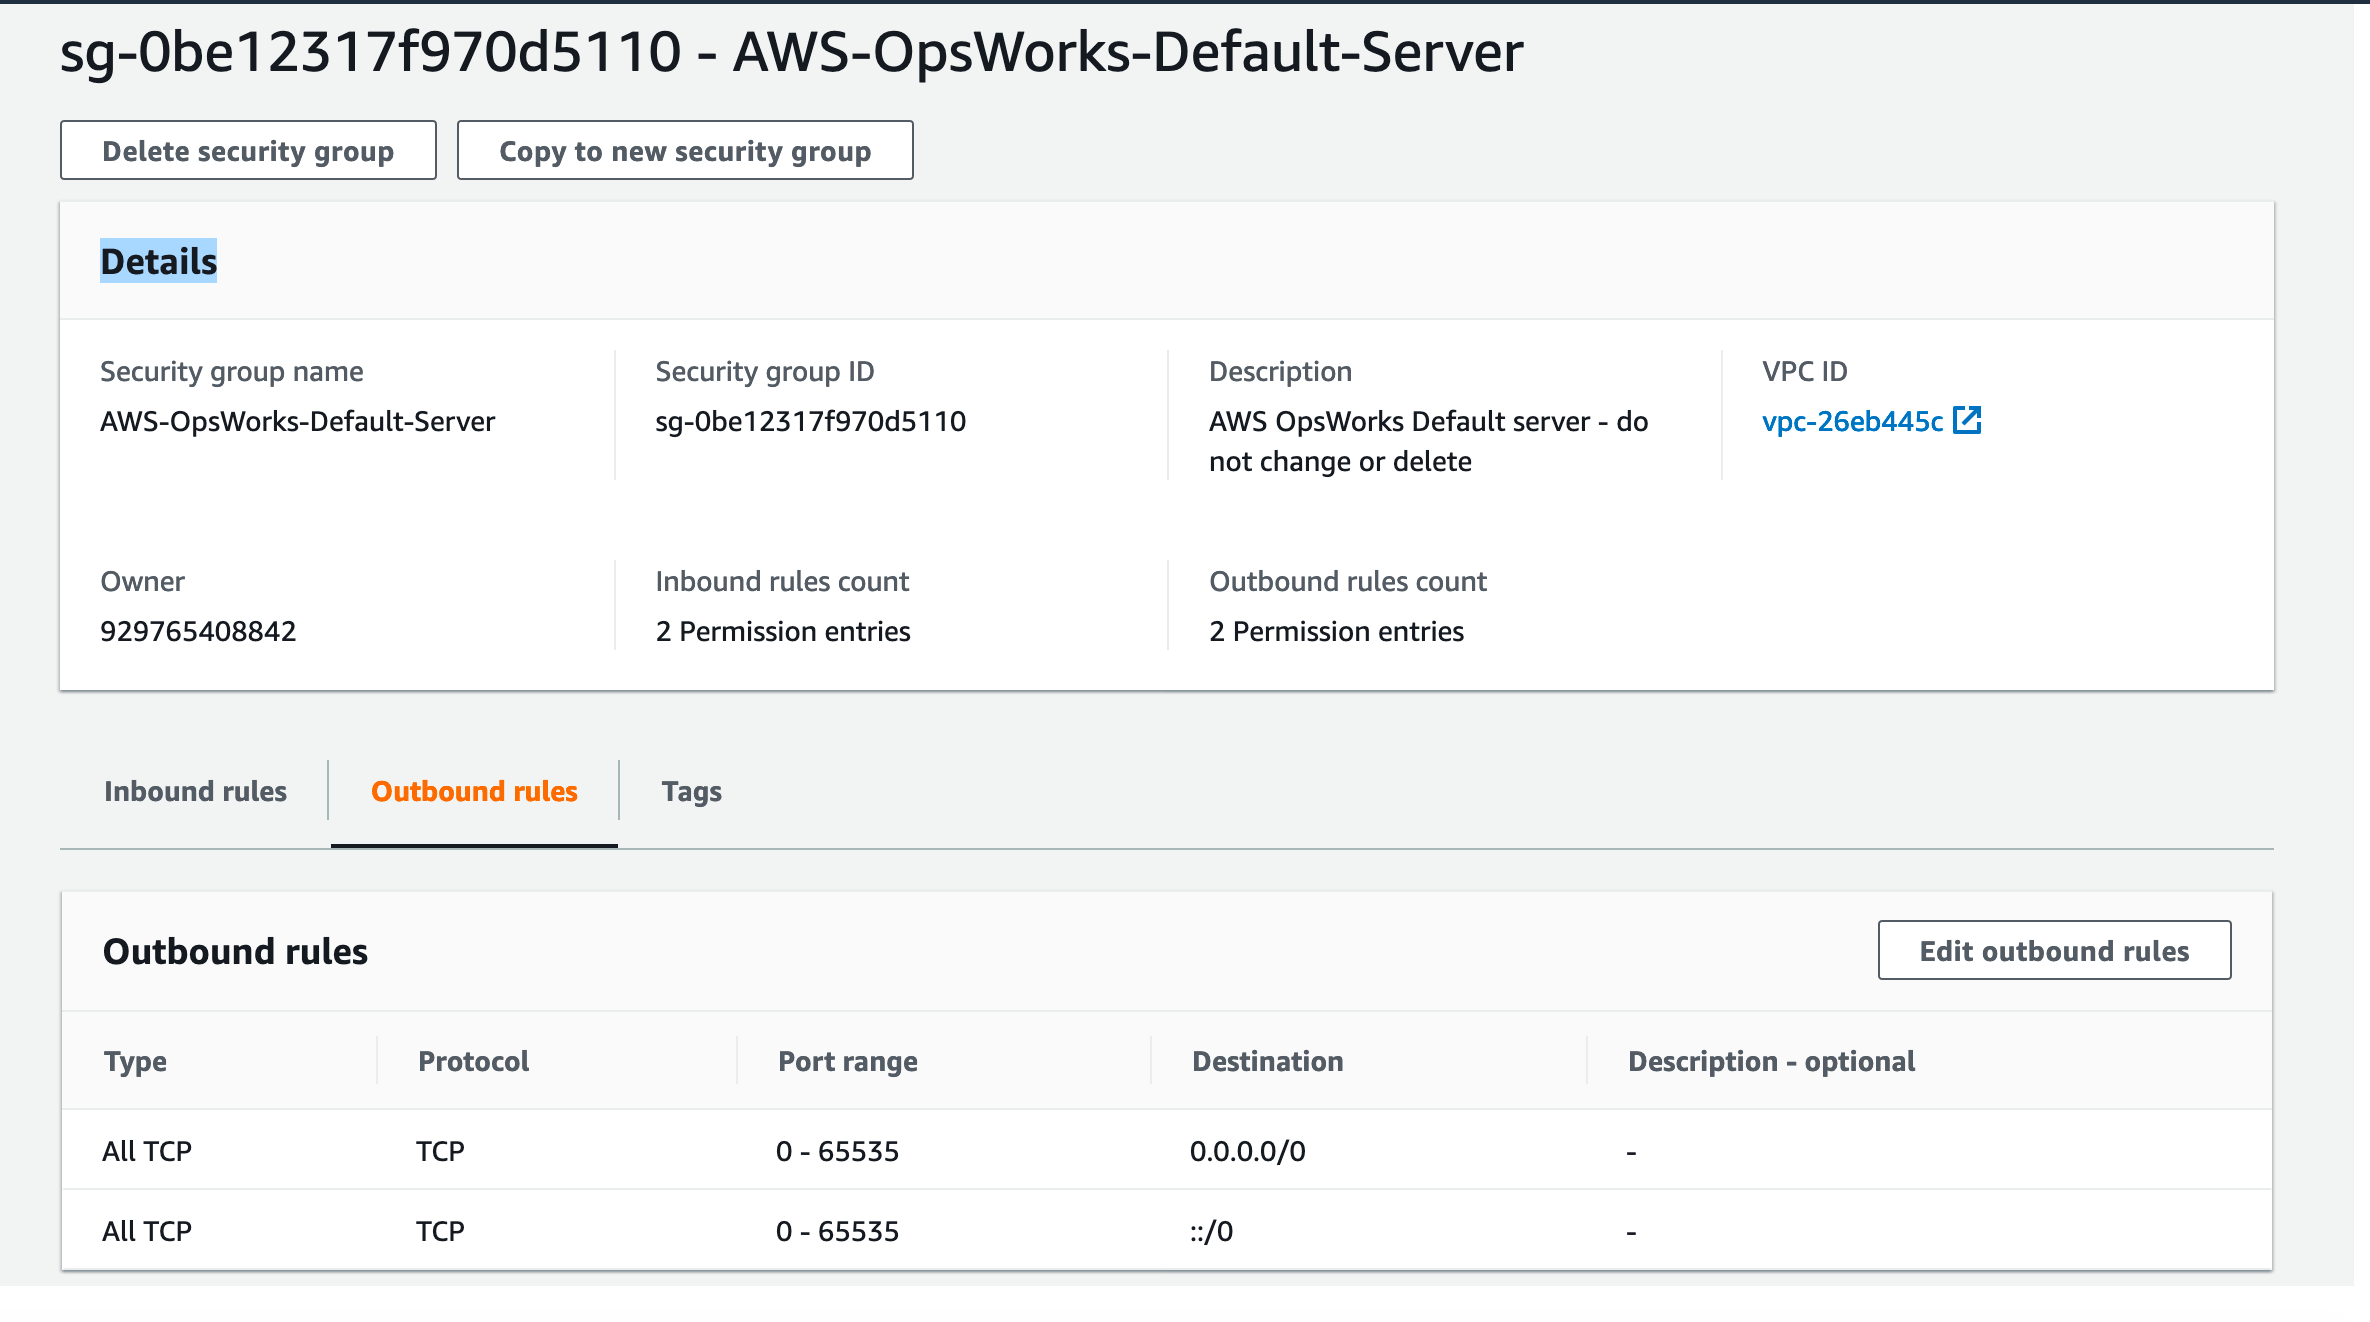
Not able to connect to the database from local Computer or Application
In case if you are not able to connect to the RDS database from your application or local computer over the internet. Add the following inbound / Outbound rules and you will be good. They are just for test setup. If you configuring it for production make sure you add proper database rules over port 3306.
Inbound Rules
Outbound Rules
Hope you will like the article.
Please like our Facebook page and share it in your network.
Read More
How to Become Oracle apps DBA?
What does DBA mean?
150 Oracle DBA Interview Questions
Top 5 Future Technologies for Database Administrators (DBA) to learn in 2020
Top 5 Software Technology Trends in 2020 List
