In this article, we will discuss how DBA can run a MongoDB instance using docker-compose. It’s very easy and quite flexible to handle. According to my opinion docker-compose removes all the installation and configuration pain when you need a test instance immediately. In a non-production environment for proof of concepts (POC) environment, you can easily use MongoDB on docker-compose.
High-Level Steps for Installation & Configuration
- Install Docker
- Install Docker compose
- Take the docker-compose code with MongoDB
- Run the docker-compose
- Connect to MongoDB Database
- Connect From MongoDB from Docker bash
Prerequisites
mkdir -p /opt/docker_com_repo
cd /opt/docker_com_repo
vi docker-compose.yml
Copy Below docker compose code for MongoDB and paste in side the docker-compose.yml
IMP: Remove all the comments with “< abc>” From compose code
mkdir -p /opt/mongo/datafiles/db
mkdir -p /opt/mongo/configfiles
Docker Compose Code
version: ‘3.3’
services:
mongodb_container:
container_name: mongodb4.0
image: mongo:4.0 < Container Image>
environment:
MONGO_INITDB_DATABASE: thedbadmin
MONGO_INITDB_ROOT_USERNAME: root < Database Admin username>
MONGO_INITDB_ROOT_PASSWORD: oracle < Database Admin Password>
ports:
– 27017:27017
volumes:
– /opt/mongo/datafiles/db:/data < Persistent Volume for Data files>
– /opt/mongo/configfiles:/etc/mongod < Persistent volume for MongoDB configuration file>
Ruing Docker Compose
cd /opt/docker_com_repo
docker-compose up -d
Check if the MongoDB instance started?
[root@master01 mongodb]# docker-compose ps
Name Command State Ports
———————————————————————————————–
mongodb4.0 docker-entrypoint.sh mongod Up 0.0.0.0:27017->27017/tcp,:::27017->27017/tcp
Test Database connection
[root@master01 mongodb]# telnet localhost 27017
Trying ::1…
Connected to localhost.
Escape character is ‘^]’.
if looks good than go for the next step or stop the Linux firewall
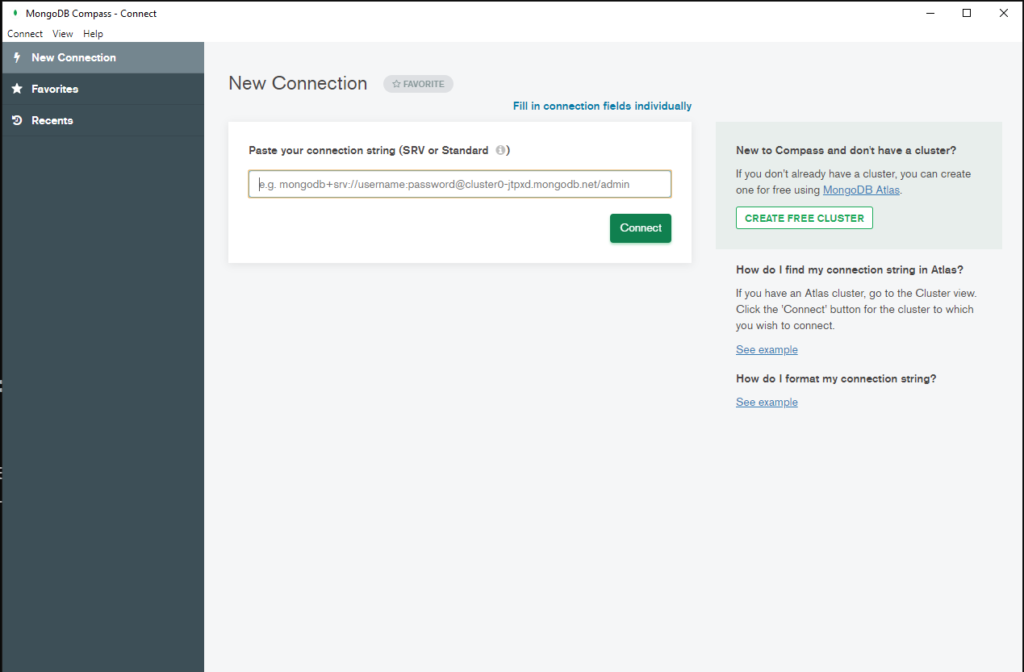
Open MongoDB compass and connect to Database. Follow the screenshots
Click on “Fill in connection Fields individually“
Change the hostname as per your server or machine
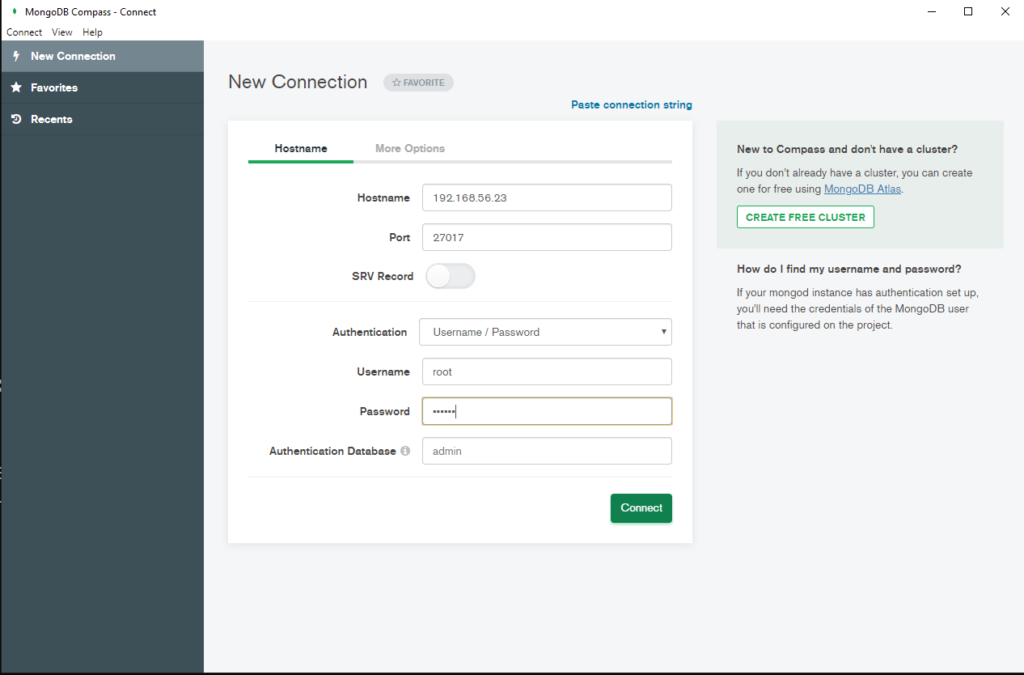
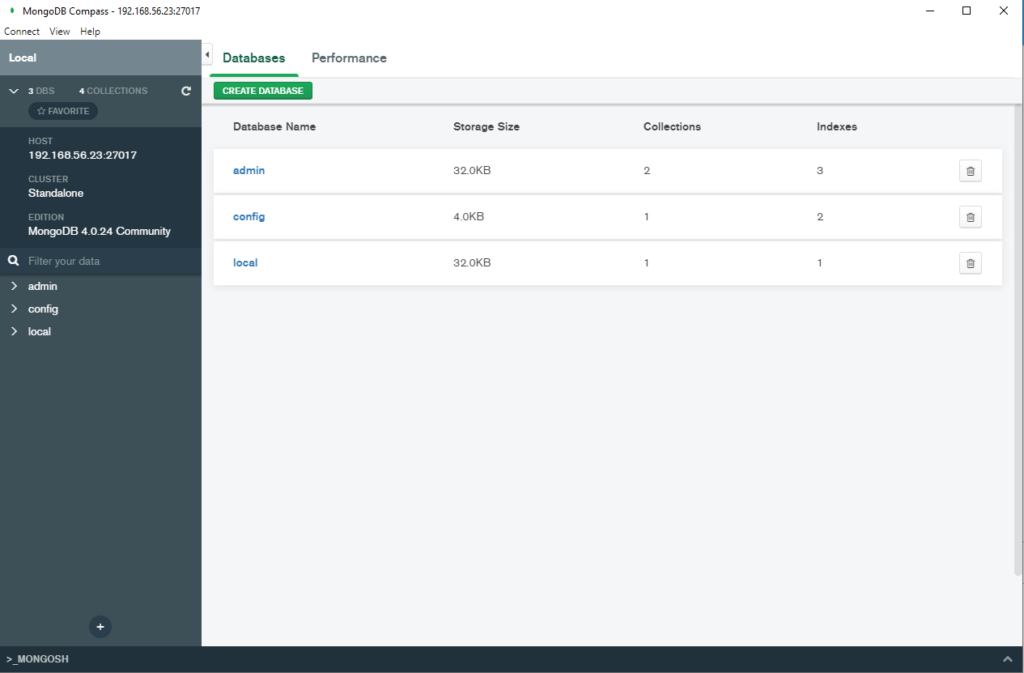
You can hit Create database and start using MongoDB
Connect MongoDB from the command Line
[root@master01 mongodb]# docker exec -it mongodb4.0 bash
root@58054f03c382:/# mongo -u root -p
MongoDB shell version v4.0.24
Enter password:
connecting to: mongodb://127.0.0.1:27017/?gssapiServiceName=mongodb
Implicit session: session { “id” : UUID(“0d7bb9a1-9549-491c-89c3-dfc9caab7547”) }
MongoDB server version: 4.0.24
Server has startup warnings:
2021-10-02T09:05:13.292+0000 I CONTROL [initandlisten]
2021-10-02T09:05:13.293+0000 I CONTROL [initandlisten] ** WARNING: /sys/kernel/mm/transparent_hugepage/enabled is ‘always’.
2021-10-02T09:05:13.293+0000 I CONTROL [initandlisten] ** We suggest setting it to ‘never’
2021-10-02T09:05:13.293+0000 I CONTROL [initandlisten]
2021-10-02T09:05:13.293+0000 I CONTROL [initandlisten] ** WARNING: /sys/kernel/mm/transparent_hugepage/defrag is ‘always’.
2021-10-02T09:05:13.293+0000 I CONTROL [initandlisten] ** We suggest setting it to ‘never’
2021-10-02T09:05:13.293+0000 I CONTROL [initandlisten]
—
Enable MongoDB’s free cloud-based monitoring service, which will then receive and display
metrics about your deployment (disk utilization, CPU, operation statistics, etc).
The monitoring data will be available on a MongoDB website with a unique URL accessible to you
and anyone you share the URL with. MongoDB may use this information to make product
improvements and to suggest MongoDB products and deployment options to you.
To enable free monitoring, run the following command: db.enableFreeMonitoring()
To permanently disable this reminder, run the following command: db.disableFreeMonitoring()
—
> show databases;
admin 0.000GB
config 0.000GB
local 0.000GB
Stay Tuned For latest Database, Cloud & Technology Trends
Read More >>
Elevate Your PostgreSQL Skills: The Ultimate Guide to Database Administration Certification
Introduction PostgreSQL is a robust, open-source database management system renowned
Monitor Database Server using Prometheus & Grafana
Prometheus is an open-source monitoring system that collects metrics from
How to Test Disk Throughput on Linux using shell script
Here is a shell script that you can use to
Linux Command List most used by Database Administrator (DBA)
ls – Lists the contents of the current directory.
Automate Postgresql Daily Database Backup using Pgbackreast and bash
#!/bin/bash # Set the backup directory BACKUP_DIR=/backups # Set the
How to Take PostgGreSQL Database Backup on AWS S3 bucket using PGBackRest ?
[global] log-level-console=info repo1-path=/pgbackrest repo1-retention-full=2 repo1-retention-archive=1 repo1-s3-bucket= repo1-s3-endpoint= repo1-s3-key= repo1-s3-key-secret= repo1-s3-region=
How to Take Full Database Backup using PGBackRest
pgbackrest backup –type=full –db-include= –target= PGBackRest backup for multiple Databases
What is the pgbackrest in PostGreSQL?
How to Install PgBackRest ? The installation process for PGBackRest
How to Configure SSL on PostgreSQL
openssl req -new -x509 -nodes -out server.crt -keyout server.key This
RPA (Robotic Process Automation) for Database Administartor (DBA)
How to Become an Efficient, Prompt and Successful Database Administrator (DBA)
How to Start and Stop the PostgreSQL Database
AWS aws rds start-db-instance –db-instance-identifier aws rds stop-db-instance –db-instance-identifier Linux
awscli Command to Find PostgreSQL rds Free and Used Space
To determine the free and used disk space of a
How to Resize PostgreSQL rds Disk Size Using awscli commands
To resize the disk size of a PostgreSQL RDS instance
