fbpx

How to Fix Pg_ctl command not found

Sometimes after a fresh PostgreSQL install if we want to start or stop from PostgreSQL rather than controlling the PostgreSQL instance start and stop from the root. And when we run the pg_ctl from the command prompt as a PostgreSQL Linux user we see the error bash: pg_ctl: command not found… 

In this article, lets learn how to fix it

As PostgreSQL check your pg base directory 


And now add this PostgreSQL to the Linux path so that it’s always available. I would recommand to create a postgresql env. file so that it more easy to handle rather than messing with other systems runing on linux operating system.

				
					--Step 1 
-bash-4.2$ echo $PGDATA
/var/lib/pgsql/10/data

--Step 2
-bash-4.2$ echo "PATH=/usr/pgsql-10/bin:$PATH">>~/.postgre_10.profile

--Step 3
chmod 777 .postgre_10.profile

--Step 4 
. .postgre_10.profile

--Step 5
Check pg_ctl now

-bash-4.2$ pg_ctl --version
pg_ctl (PostgreSQL) 10.17
-bash-4.2$


HA Proxy For MySQL Master – Slave

There are scenarios where we have to provide the high ability to MySQL database instances and we use the Master and Slave replication method of MySQL database.

In the same case to segregate the Read and Write database traffic. We widly use HA- Proxy. It is a feature rich open source Load blancing tool with many unique features like reverse proxy but in out case we are going to use it only for Hight aviliblity purpose.

				
					root@haproxy01:~# haproxy -v
HA-Proxy version 2.0.13-2ubuntu0.3 2021/08/27 - https://haproxy.org/


How to Install it?

You simply use yum or apt commands to install it

				
					sudo apt install -y haproxy


Check  the version 


Install Mysql Client for HA Proxy Node to communicate with mysql master and slave databases.


					apt-get install -y mysql-client
cd /etc/haproxy/
cp haproxy.cfg haproxy.cfg_org
vim haproxy.cfg


					root@haproxy01:~# cat /etc/haproxy/haproxy.cfg
global
	log 127.0.0.1 local0 notice
        log /dev/log    local0
  	user haproxy
	group haproxy

	# Default SSL material locations

defaults
	log global
	mode tcp
        option tcplog
	retries 2
	timeout client 30m
	timeout connect 4s
    	timeout server 30m
	timeout check 5s

listen stats
        mode http
        bind *:9201
        stats enable
        stats uri /stats
        stats realm Strictly\ Private
        stats auth admin:admin

listen mysql-cluster
       bind *:3306
       mode tcp
       option mysql-check user haproxy_user
       balance roundrobin
       server master 192.168.56.205:3306 check
       server slave1 192.168.56.206:3306 check

listen mysql-cluster1
    bind 192.168.1.208:3306
    mode tcp
    option mysql-check user haproxy_user
    balance roundrobin
    server mysql-1 192.168.1.205:3306 check
    server mysql-2 192.168.1.206:3306 check


Create HA proxy user on mysql01/205 on primary node

				
					GRANT ALL PRIVILEGES ON *.* TO 'haproxy_root'@'%' IDENTIFIED BY 'Oracle@123' WITH GRANT OPTION;

flush privileges;


Test the configuration and it should start without error & Target should come up on GUI

				
					haproxy -f /etc/haproxy/haproxy.cfg -db

systemctl restart haproxy.service


Check HA proxy GUI and see all the MySQL target is up and running fine using HA Proxy Admin link:

HA Proxy Link Structure:

http://<localhost or IP/HostName/stats

http://192.168.1.208:9201/stats

Default Credentials : 

UserName : admin

Password: admin

Read More...

How to Fix Cannot open your terminal ‘/dev/pts/2’ – please check

Normally we see a common error when we switch or sudo to a user to run the screen session and it gets closes with the error ‘Cannot open your terminal ‘/dev/pts/2′ – please check’. fix it very tiny but it took a long for me to find so I thought I will share the quick fix and save our prices time.

Error:

[thedbadmin@testdb01 ~]$ screen -x 12991.screen_testCannot open your terminal ‘/dev/pts/0’ – please check.[thedbadmin@testdb01 ~]$

Step 1: logout from the user that you have logged in.

Step 2: log as your user or from where you want to run screen and just give full privileged to /dev/pts/* 

Fix : 
$ chmod 777 /dev/pts/*


Note: if you get any warning or error after executing the above command,  just ignore it safely.

Now you can start the screen again hopefully you won’t see that error again

Happy programming !!!

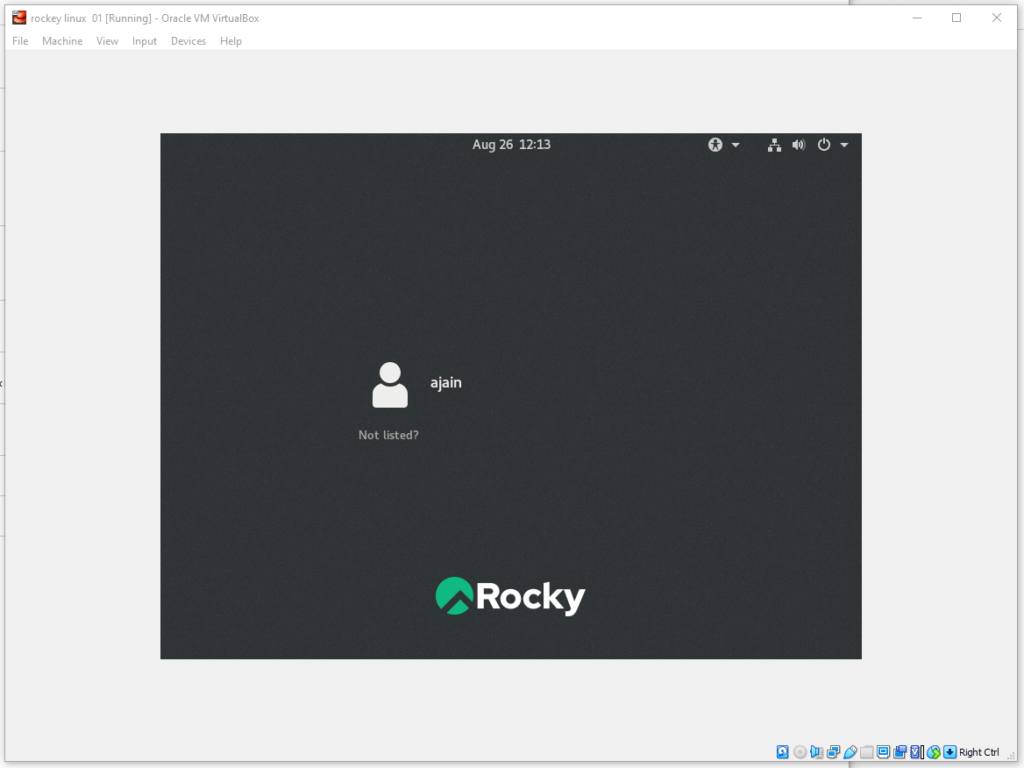
How to fix Rocky Linux full screen issue on Oracle Virtual Box

In this article, we will fix the rocky Linux full-screen issue on the oracle virtual box. Normally after installing rocky Linux on virtual box by default full scree don’t work and some times its annoying because it little hard to work with small screen. Let me give you few simple steps with commands which will fix this issue and you will many option to set screen resolution on rocky Linux.


Step 1: login as root and run following commands.

Commands:

yum install dkms gcc make kernel-devel bzip2 binutils patch libgomp glibc-headers glibc-devel kernel-headers -y

Important Note: In case if you don’t find the yum packages, configure epel yum repository for centos 8


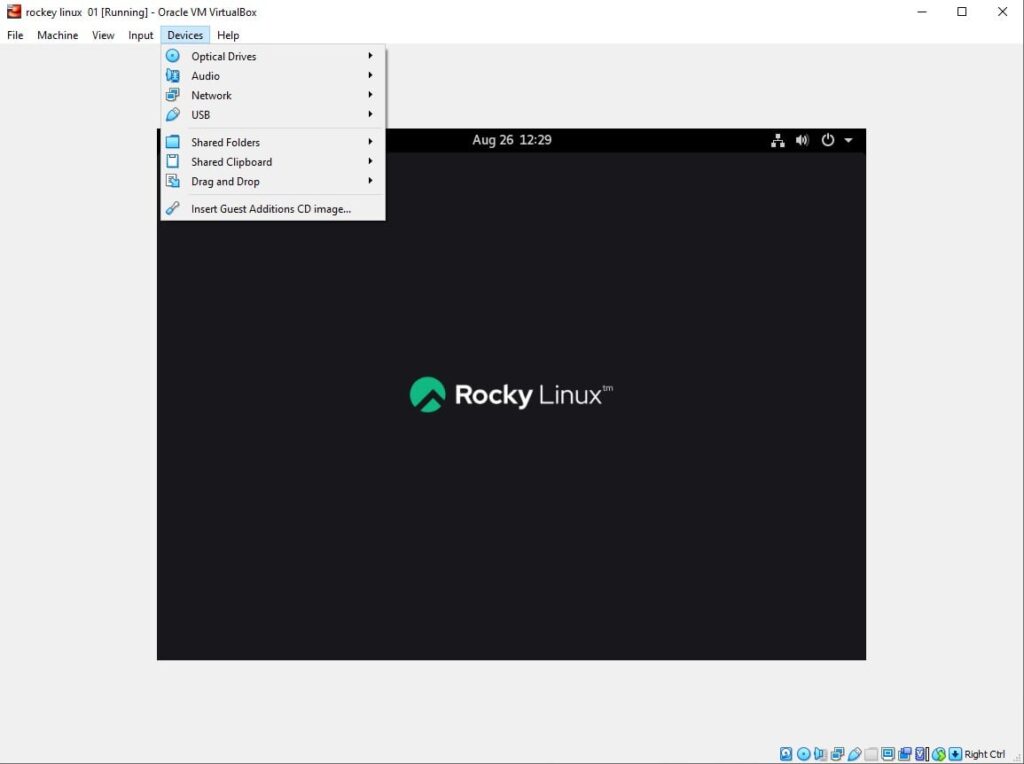
Step 2: Install the virtual box guest addition. You can see the navigation from flowing screenshot

Step 3: restart your rocky Linux virtual machine

Command:

[root@rocky01 ~]# reboot

You are Done !!!


Take MySQL backup From Jenkins Job

Take MySQL Database Backup From Jenkins

In this post, we will explain and practically show how you can configure MySQL database backup using Jenkins jobs. in easy words, you will automate the MySQL database backup process from Jenkins GUI and MySQL dump command. Normally we use MySQL dump from CLI or using the windows option. In this case, just automate the MySQL dump triggering from a shell script which will be called by Jenkins job with parameter. MySQL dump needs few parameters to run just pass them by build with parameter option in jenkins.


1. Log to Jenkins default URL and port: http://192.168.56.21:8080/

If you want to install and setup Jenkins see this article

2. Go to New items
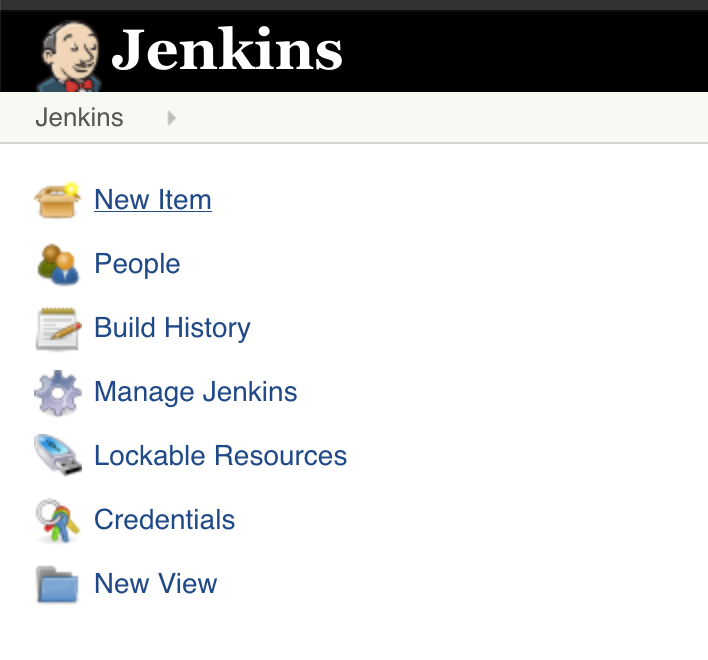
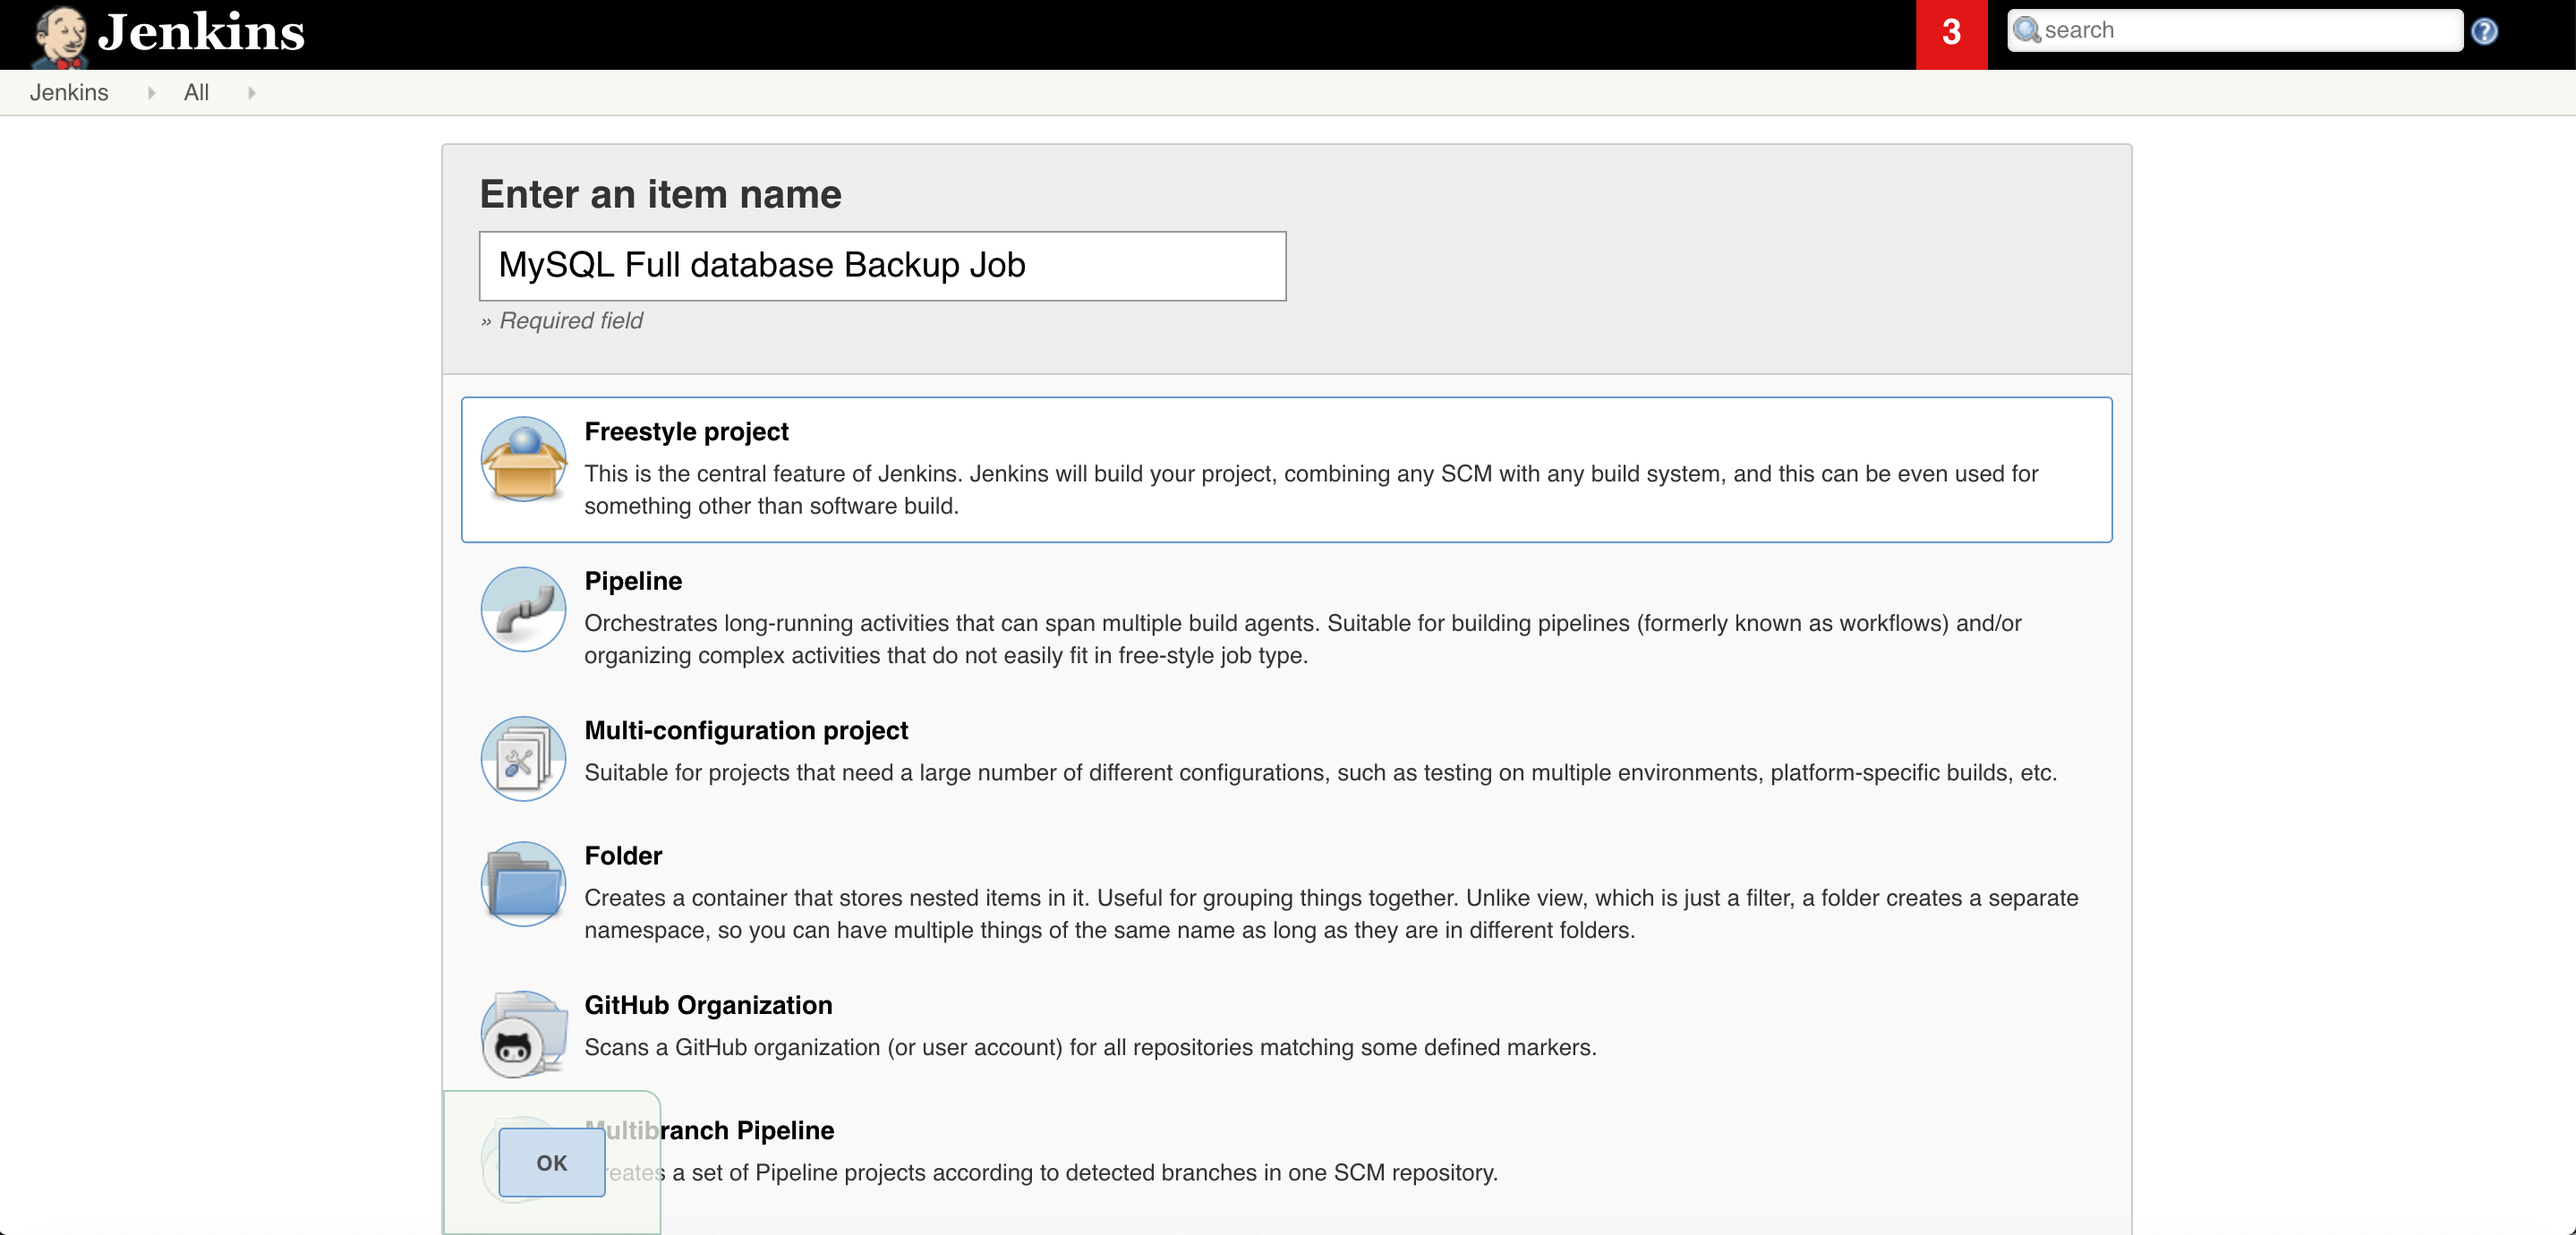
3.  Give some Name and select FreeStyle project
 

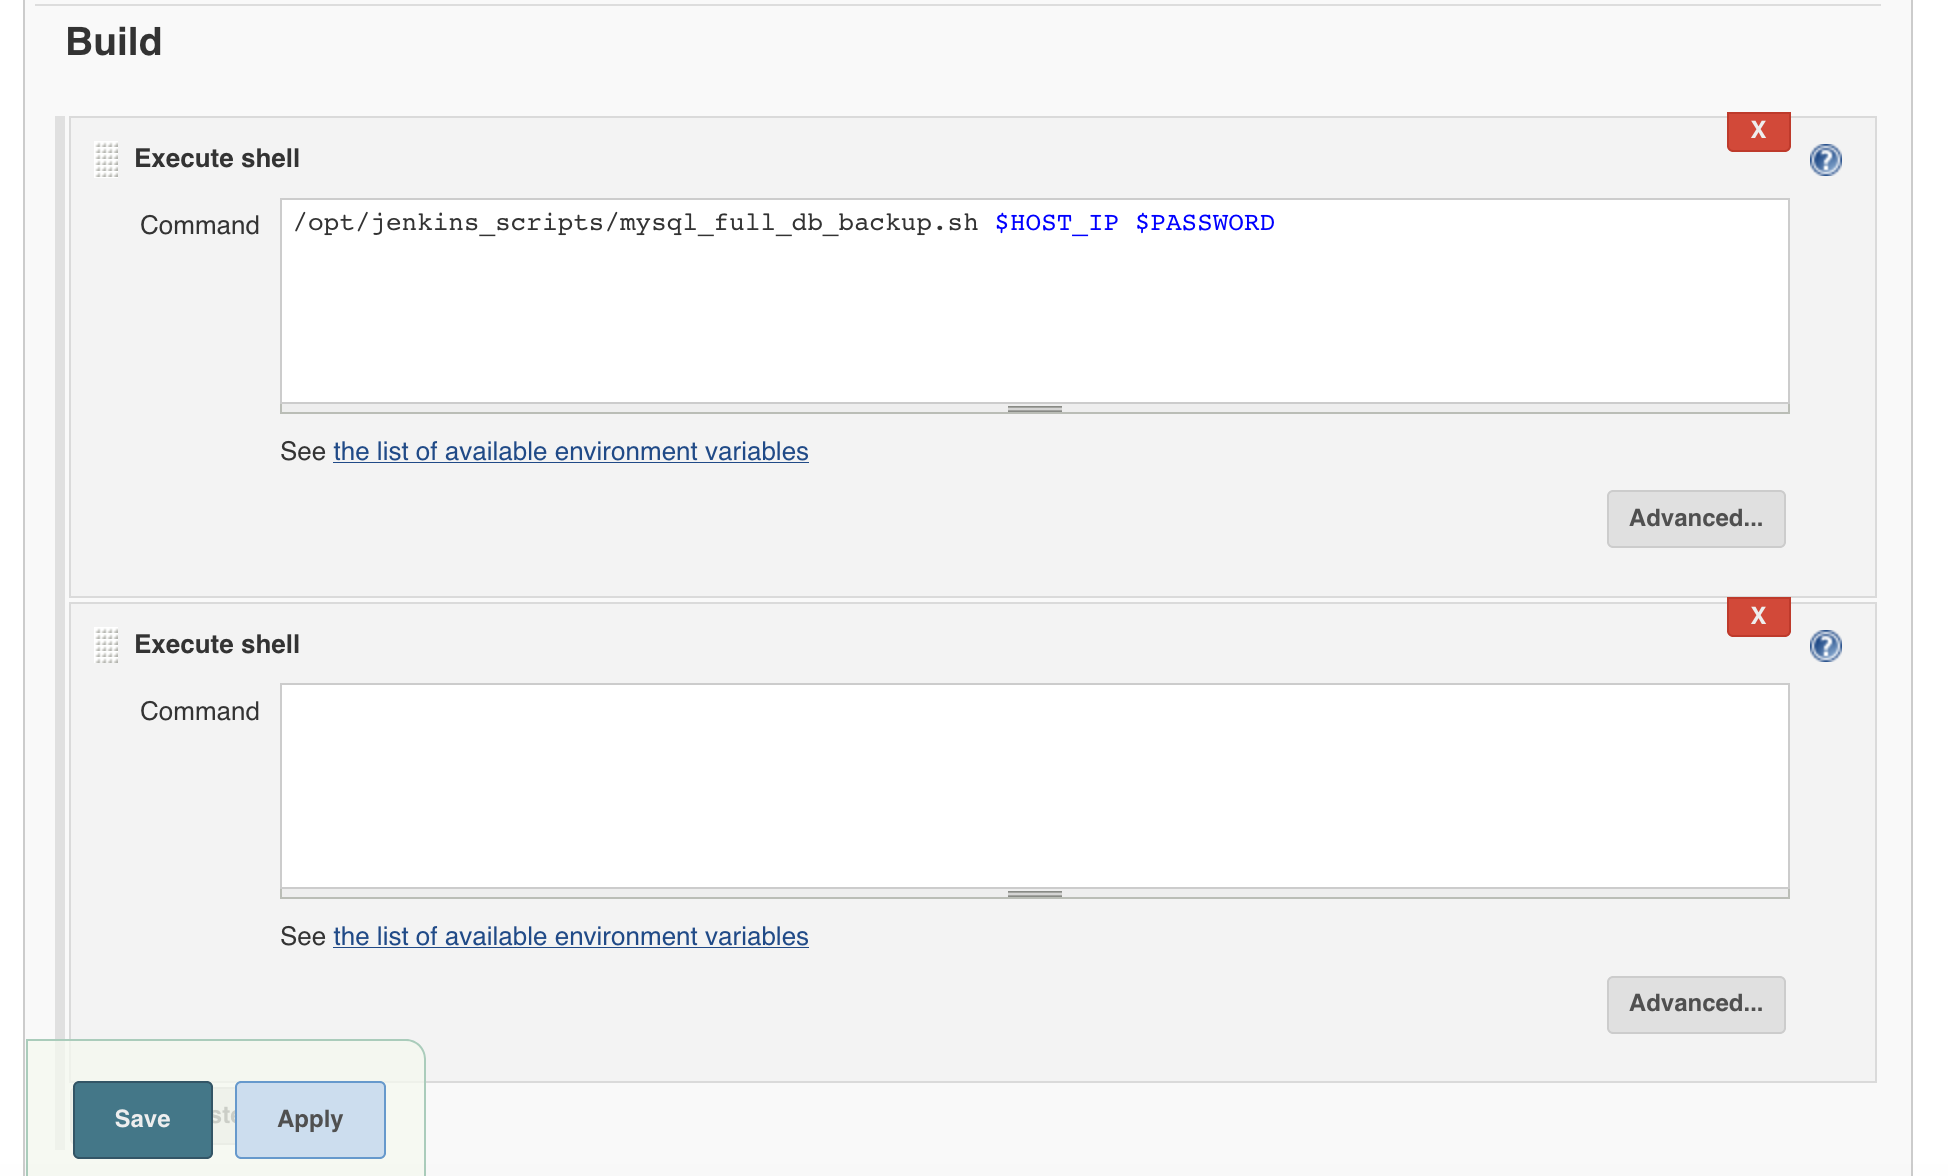
4.  In the build section click on Add build step radio button and select Execute shell.

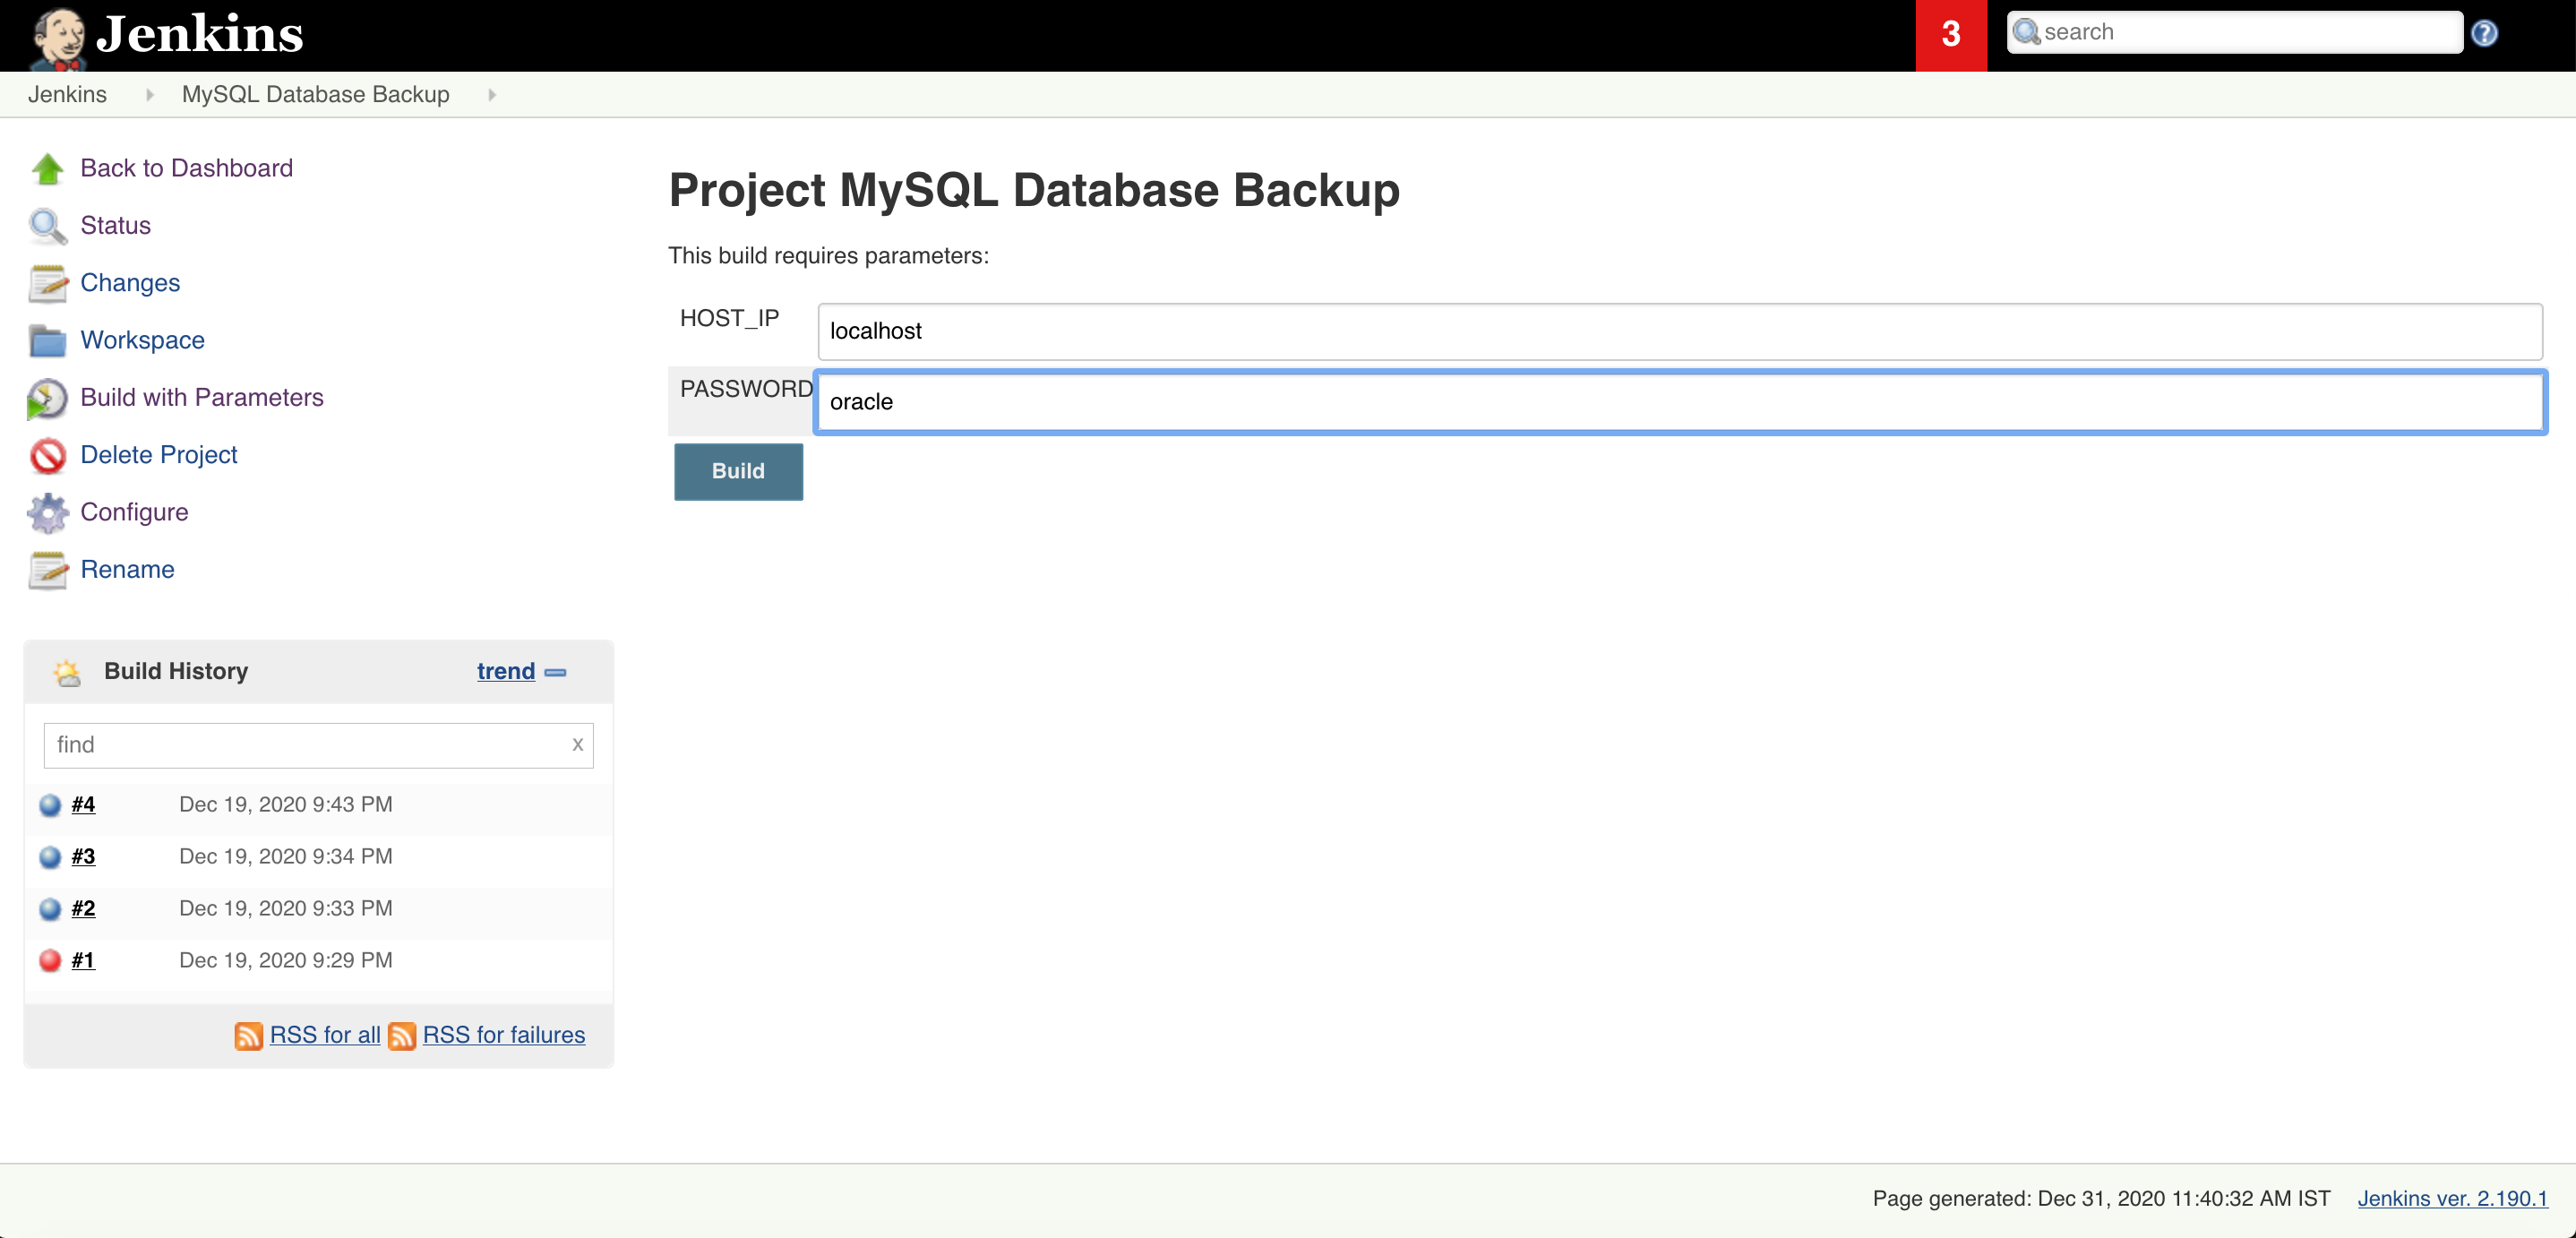
5. Select boolean parameter for MySQL database host and database superuser password which is root password in MySQL database case.
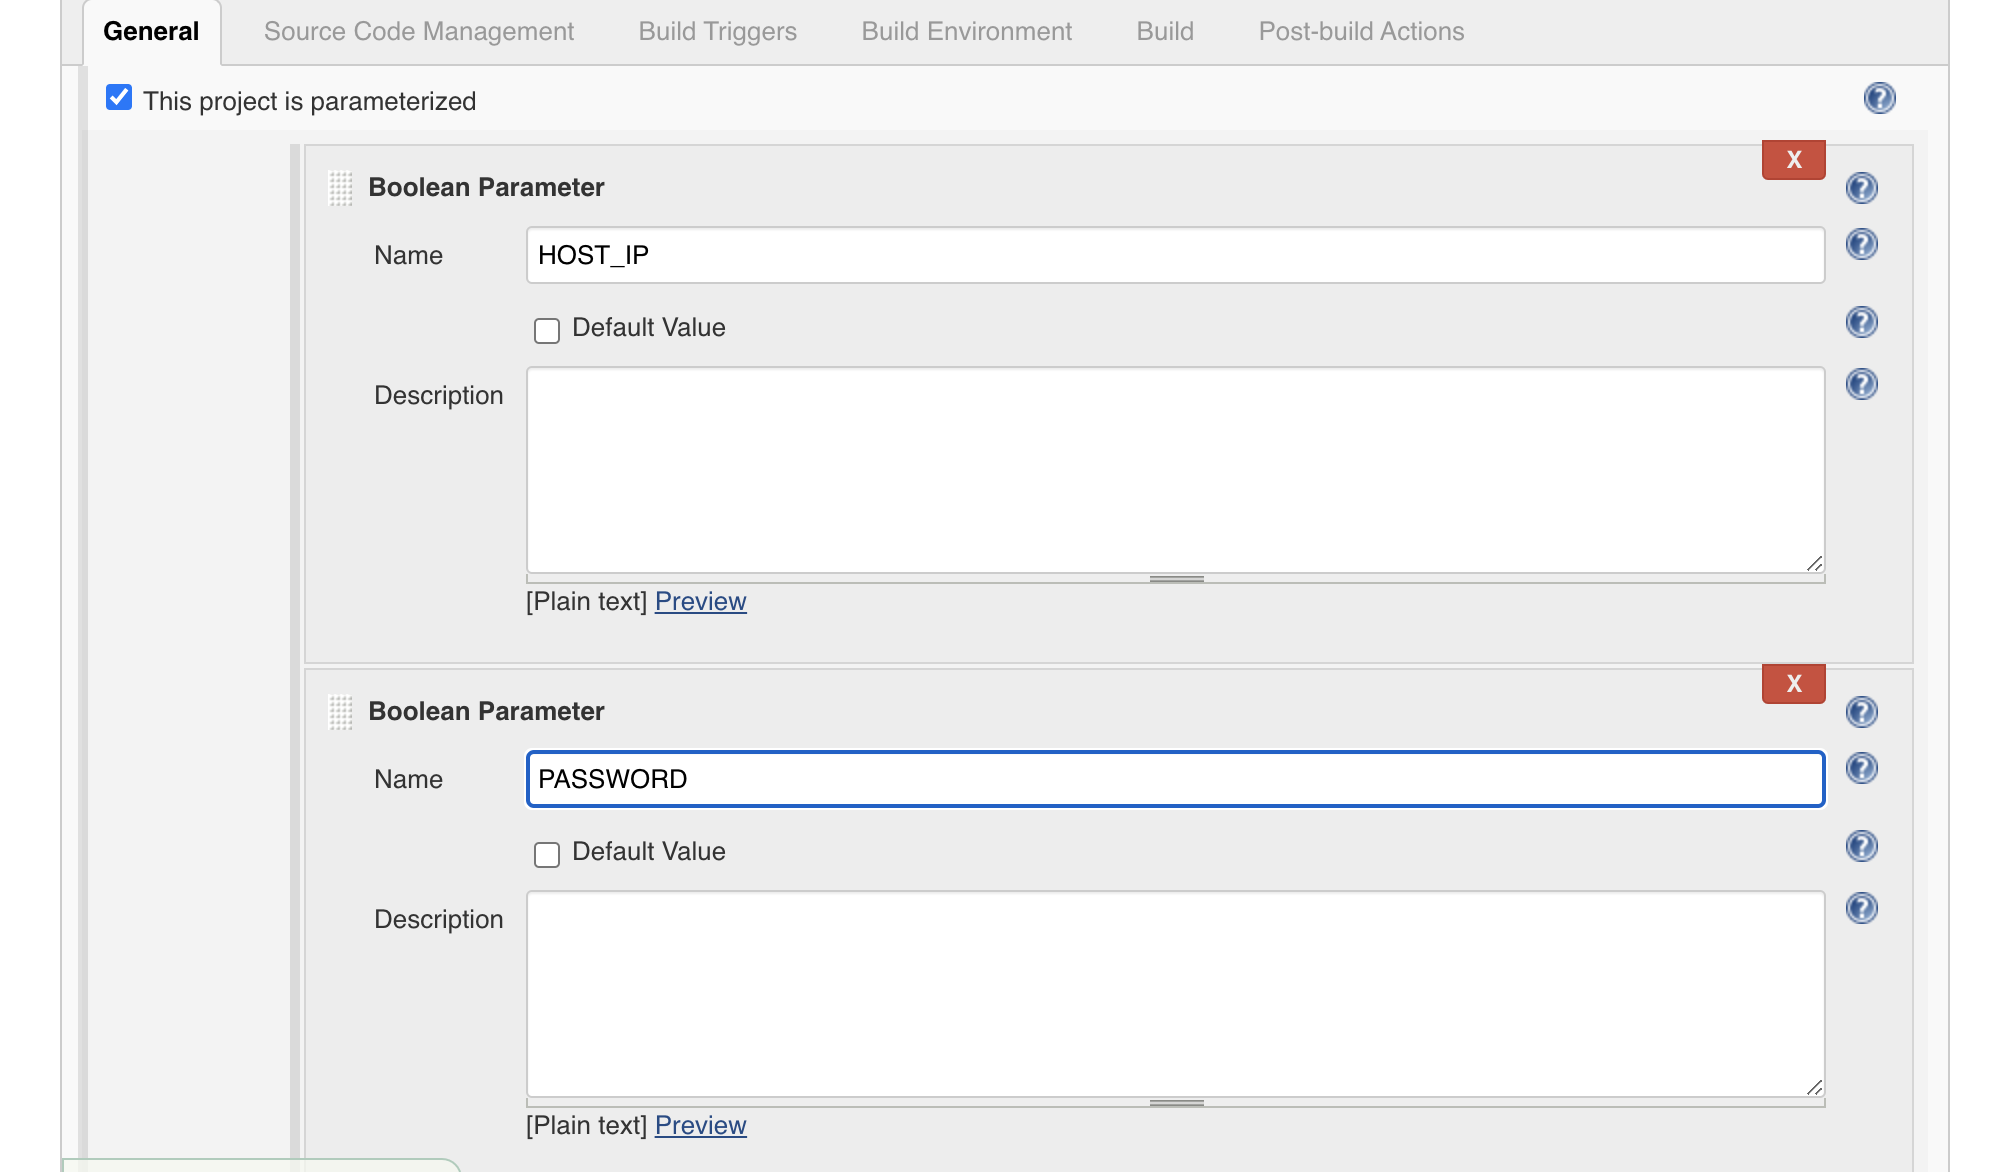
 

6.  In this build part give the shell script name with full path and parameters like $HOST_IP & $Password
 

Shell Script

[root@master01 ~]# cat /opt/jenkins_scripts/mysql_full_db_backup.sh
#!/bin/bash
HOST_IP=$1
PASSWORD=$2
echo "starting mysql database full backup"
mysqldump -h $HOST_IP --all-databases --single-transaction --quick --lock-tables=false > /opt/jenkins_scripts/mysql_backup/full_backup_$(date +%F_%N).sql -u root -p$PASSWORD
echo "Backup has been done"


[su_box title=”IMP Note” box_color=”#fe2227″ title_color=”#101112″]Note: Make sure Jenkins have execute (chmod +x /opt/jenkins_scripts/mysql_full_db_backup.sh)  privilege on script[/su_box]


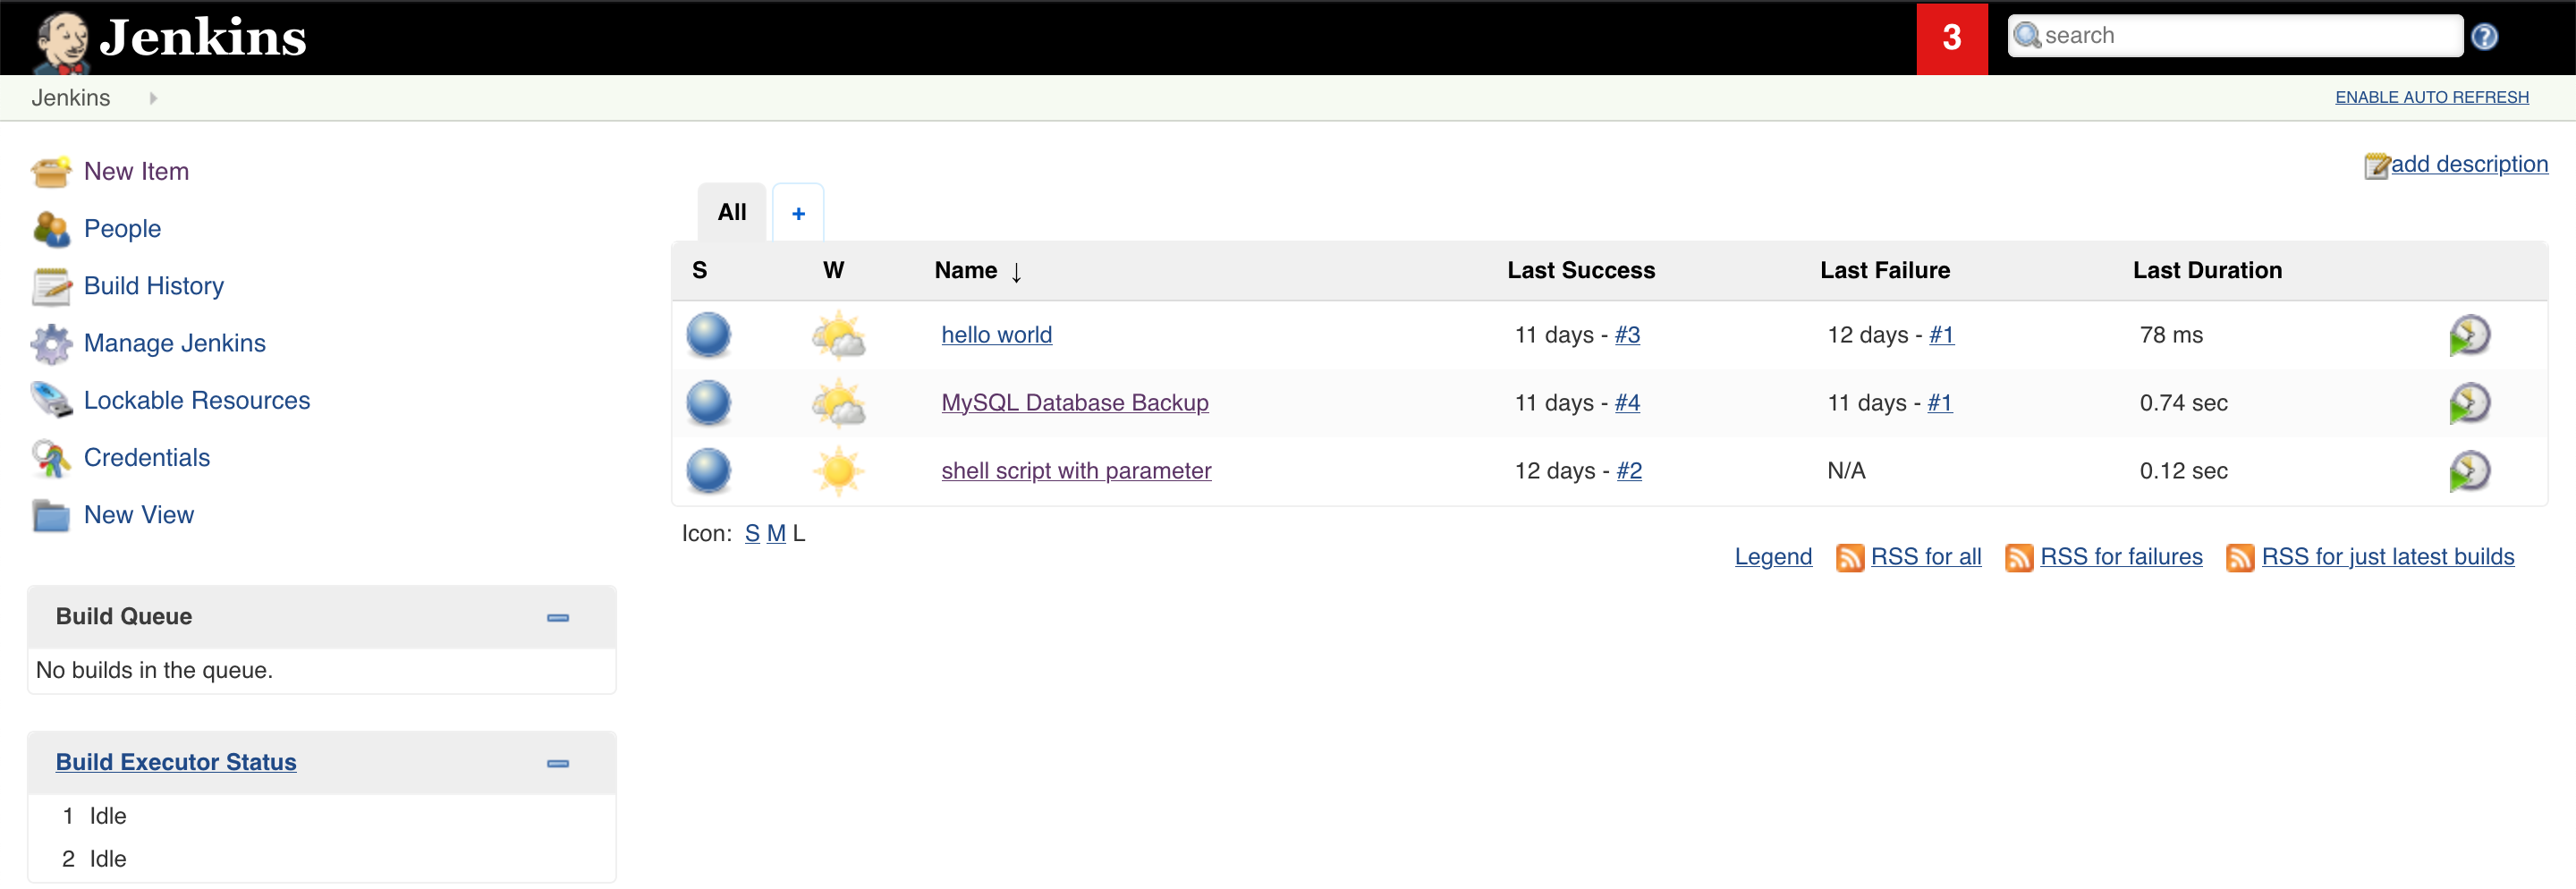
7. Let’s execute the Jenkins job

7.1  click on the the MySQL database backup job
 

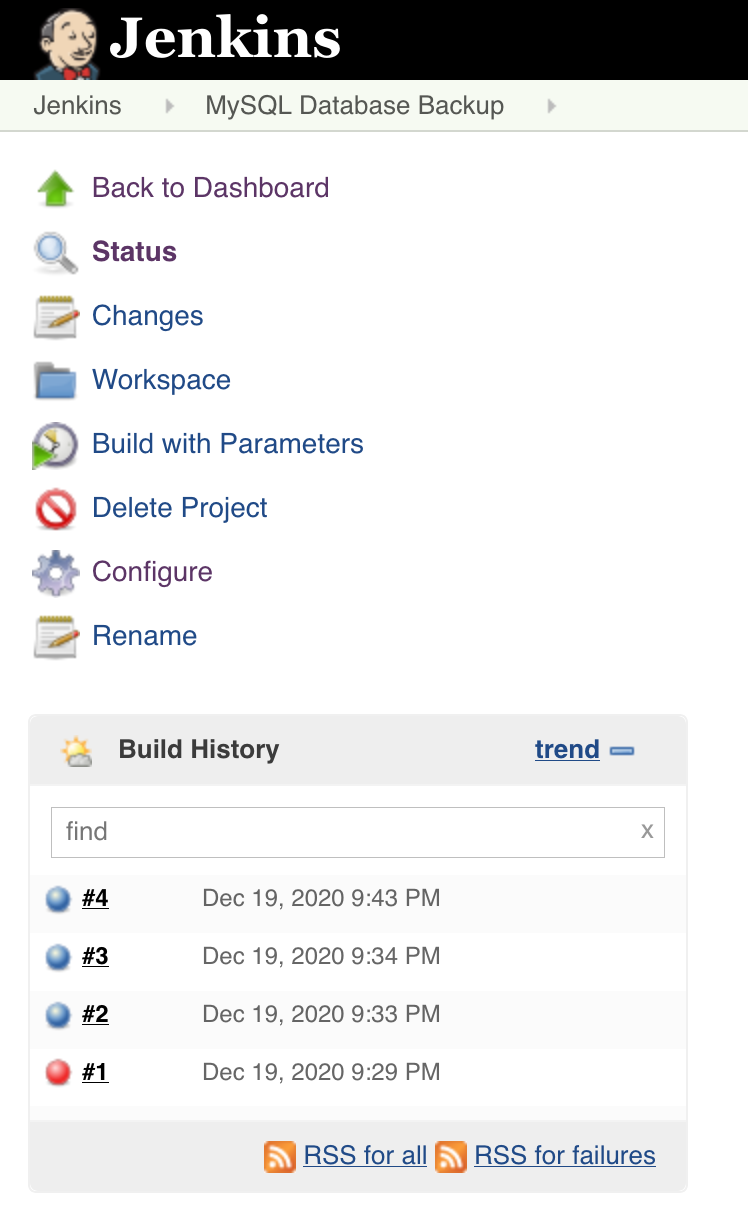
7.2  Click on build with Parameter
 

7.3  Give your database server name or IP. In my case Mysql database running on the same server that’s thy, I will give localhost and database root password
 

7.4 Once your job is executed go to that job open it in console output mode and check the status of the job. And you are DONE!!!

Read More

How to fix ORA-28368: cannot auto-create wallet
AWS Services and their Azure alternatives 
How to Manage AWS S3 Bucket with AWS CLI

How to connect PostgreSQL Database from PgAdmin
How to create AWS rds PostgreSQL Database
Convert pem to ppk
How to Install PuTTy on Window
How to Install and create AWS EC2 Instance using Terraform
AWS MySQL RDS Database Creation using AWSCLI
How to Create MySQL Database with AWS RDS
How to connect to AWS MySQL / MariaDB RDS or EC2 database from MySQL WorkBench

Apache Tomcat: java.net.BindException: Permission denied (Bind failed) :443

How to fix error: Apache tomcat : java.net.BindException: Permission denied (Bind failed) <null>:443


Full Error:

SEVERE: Failed to initialize end point associated with ProtocolHandler ["http-bio-4443"]
java.net.BindException: Permission denied (Bind failed) <null>:4443
	at org.apache.tomcat.util.net.JIoEndpoint.bind(JIoEndpoint.java:413)
	at org.apache.tomcat.util.net.AbstractEndpoint.init(AbstractEndpoint.java:715)
	at org.apache.coyote.AbstractProtocol.init(AbstractProtocol.java:452)
	at org.apache.coyote.http11.AbstractHttp11JsseProtocol.init(AbstractHttp11JsseProtocol.java:119)
	at org.apache.catalina.connector.Connector.initInternal(Connector.java:978)
	at org.apache.catalina.util.LifecycleBase.init(LifecycleBase.java:102)
	at org.apache.catalina.core.StandardService.initInternal(StandardService.java:560)
	at org.apache.catalina.util.LifecycleBase.init(LifecycleBase.java:102)
	at org.apache.catalina.core.StandardServer.initInternal(StandardServer.java:840)
	at org.apache.catalina.util.LifecycleBase.init(LifecycleBase.java:102)
	at org.apache.catalina.startup.Catalina.load(Catalina.java:642)
	at org.apache.catalina.startup.Catalina.load(Catalina.java:667)
	at sun.reflect.NativeMethodAccessorImpl.invoke0(Native Method)
	at sun.reflect.NativeMethodAccessorImpl.invoke(NativeMethodAccessorImpl.java:62)
	at sun.reflect.DelegatingMethodAccessorImpl.invoke(DelegatingMethodAccessorImpl.java:43)
	at java.lang.reflect.Method.invoke(Method.java:498)
	at org.apache.catalina.startup.Bootstrap.load(Bootstrap.java:253)
	at org.apache.catalina.startup.Bootstrap.main(Bootstrap.java:427)
Caused by: java.net.BindException: Permission denied (Bind failed)
	at java.net.PlainSocketImpl.socketBind(Native Method)
	at java.net.AbstractPlainSocketImpl.bind(AbstractPlainSocketImpl.java:387)
	at java.net.ServerSocket.bind(ServerSocket.java:390)
	at java.net.ServerSocket.<init>(ServerSocket.java:252)
	at java.net.ServerSocket.<init>(ServerSocket.java:196)
	at javax.net.ssl.SSLServerSocket.<init>(SSLServerSocket.java:136)
	at sun.security.ssl.SSLServerSocketImpl.<init>(SSLServerSocketImpl.java:71)
	at sun.security.ssl.SSLServerSocketFactoryImpl.createServerSocket(SSLServerSocketFactoryImpl.java:80)
	at org.apache.tomcat.util.net.jsse.JSSESocketFactory.createSocket(JSSESocketFactory.java:256)
	at org.apache.tomcat.util.net.JIoEndpoint.bind(JIoEndpoint.java:400)
	... 17 more


Why, when, and where we get this error?


We get this issue while starting Apache tomcat on secure port 443. The error “java.net.BindException: Permission denied (Bind failed) :443 ” is visible in /usr/share/tomcat/logs/catalina.2016-12-02.log


How to fix it

This error occurs when your Linux firewall levels are set to ‘enforcing‘.To fix this error make it ‘permissive

  1. Check current firewall status using the command ‘getenforce
  2. Edit the file ‘vi /etc/selinux/config’ and make it ‘permissive’ from ‘enforcing’
    # This file controls the state of SELinux on the system.
    # SELINUX= can take one of these three values:
    #       enforcing - SELinux security policy is enforced.
    #       permissive - SELinux prints warnings instead of enforcing.
    #       disabled - No SELinux policy is loaded.
    SELINUX=permissive
    # SELINUXTYPE= can take one of these two values:
    #       targeted - Targeted processes are protected,
    #       mls - Multi Level Security protection.
    SELINUXTYPE=targeted
  3. Reboot the system using ‘reboot‘ as the root
  4. After reboot check, if tomcat is up with 443 port
    netstat -plan| grep 443
  5. And check the tomcat URL with ssl/https  (https://localhost:443)

Leave a comment if you find the article helpful.


Read More

How to fix ORA-28368: cannot auto-create wallet
AWS Services and their Azure alternatives 
How to Manage AWS S3 Bucket with AWS CLI

How to connect PostgreSQL Database from PgAdmin
How to create AWS rds PostgreSQL Database
Convert pem to ppk
How to Install PuTTy on Window
How to Install and create AWS EC2 Instance using Terraform
AWS MySQL RDS Database Creation using AWSCLI
How to Create MySQL Database with AWS RDS
How to connect to AWS MySQL / MariaDB RDS or EC2 database from MySQL WorkBench