fbpx

What is the Kubernetes Operator For Database?

A Kubernetes operator is a software extension to Kubernetes that helps manage complex applications or infrastructure. Operators use custom resources and controllers to automate tasks such as deploying, scaling, and backing up applications.

One of the main benefits of using Kubernetes operators is that they allow you to use the same API and tooling as Kubernetes to manage your applications, rather than having to use custom scripts or processes. This can make it easier to deploy and manage applications in a Kubernetes cluster.

Operators can be developed for a wide range of applications and infrastructure, including databases, messaging systems, and machine learning frameworks. They can be used to automate tasks such as creating and managing database clusters, deploying message brokers, and training and deploying machine learning models.

I hope this helps! Let me know if you have any questions.

There are several Kubernetes operators available for managing databases, including operators for MySQL, PostgreSQL, and MongoDB.

Here is an example of how you can use the MySQL Operator to deploy a MySQL cluster on Kubernetes:

  1. Install the MySQL Operator on your Kubernetes cluster. You can do this using the Kubernetes command-line tool kubectl.

  2. Create a configuration file for the MySQL cluster. This file should specify the number of MySQL instances you want to deploy, the size of the instances, and any other desired configuration options.

  3. Use kubectl to apply the configuration file and create the MySQL cluster. The MySQL Operator will handle the process of deploying the MySQL instances and setting up the cluster.

  4. Use kubectl to create a Kubernetes service for the MySQL cluster. This will allow other applications in the cluster to access the MySQL instances.

  5. Use the MySQL command-line client or another MySQL client to connect to the MySQL cluster and create databases and tables as needed.

I hope this gives you an idea of how you can use a Kubernetes operator to manage a database in a Kubernetes cluster. There are many other operators available for different types of databases, so you may want to research the specific operator that is best suited for your needs.

I hope this helps! Let me know if you have
How to ssh a Remote Linux Server?

To connect to a remote Linux server using Secure Shell (SSH), you will need to do the following:

  1. Install an SSH client on your local machine. If you are using a Unix-like operating system (e.g., Linux, macOS), you can use the built-in ssh command. If you are using Windows, you can use a program like PuTTY or MobaXterm.

  2. Determine the hostname or IP address of the remote server. This is the address that you will use to connect to the server. You can usually find the hostname or IP address in the server’s documentation or by contacting the server’s administrator.

  3. Open a terminal window on your local machine and enter the following command:

				
					ssh username@hostname


Replace username with your username on the remote server and hostname with the hostname or IP address of the server. For example:

				
					ssh john@server.example.com


  1. If this is the first time you have connected to the server, you may see a message asking you to confirm the authenticity of the server’s host key. Type yes and press Enter to continue.

  2. Enter your password when prompted. If you have entered the correct username and password, you should be logged into the remote server.

I hope this helps! Let me know if you have any questions.
How to Fix Cannot open your terminal ‘/dev/pts/2’ – please check

Normally we see a common error when we switch or sudo to a user to run the screen session and it gets closes with the error ‘Cannot open your terminal ‘/dev/pts/2′ – please check’. fix it very tiny but it took a long for me to find so I thought I will share the quick fix and save our prices time.

Error:

[thedbadmin@testdb01 ~]$ screen -x 12991.screen_testCannot open your terminal ‘/dev/pts/0’ – please check.[thedbadmin@testdb01 ~]$

Step 1: logout from the user that you have logged in.

Step 2: log as your user or from where you want to run screen and just give full privileged to /dev/pts/* 

Fix : 
$ chmod 777 /dev/pts/*


Note: if you get any warning or error after executing the above command,  just ignore it safely.

Now you can start the screen again hopefully you won’t see that error again

Happy programming !!!

How to fix Rocky Linux full screen issue on Oracle Virtual Box

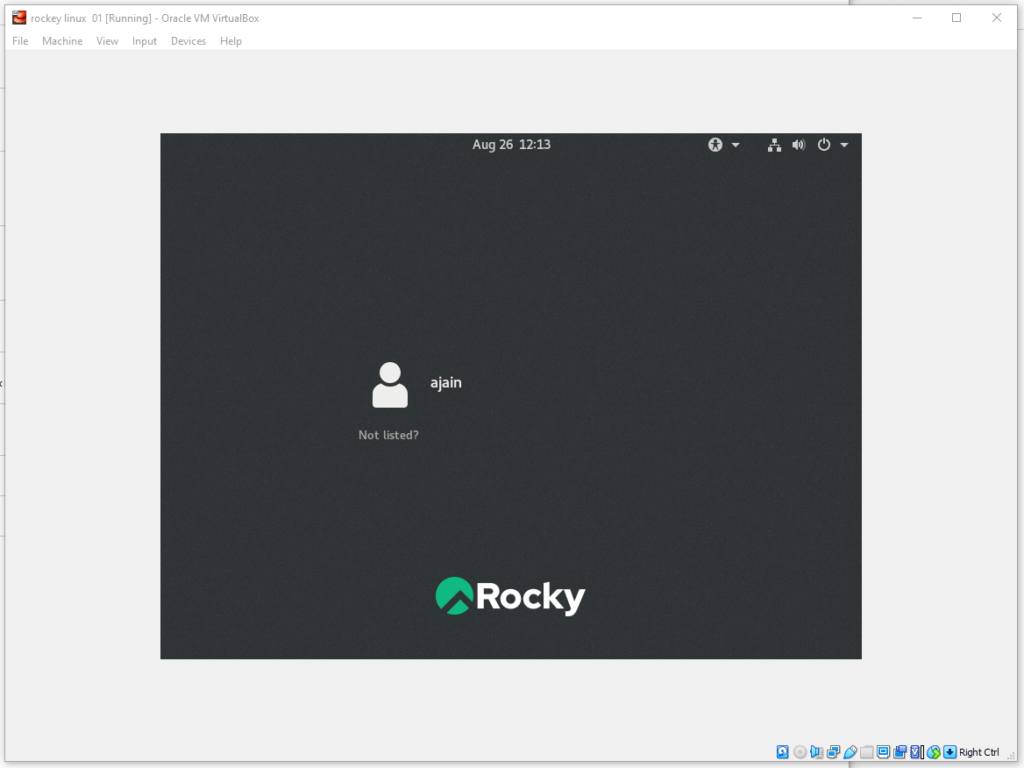
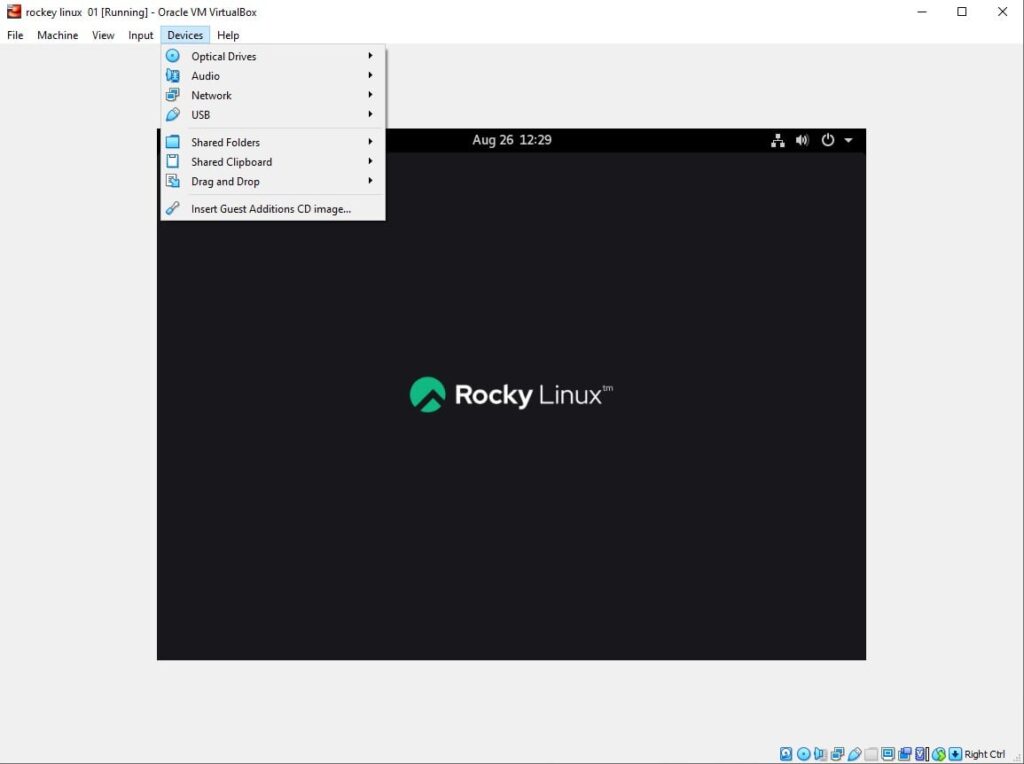
In this article, we will fix the rocky Linux full-screen issue on the oracle virtual box. Normally after installing rocky Linux on virtual box by default full scree don’t work and some times its annoying because it little hard to work with small screen. Let me give you few simple steps with commands which will fix this issue and you will many option to set screen resolution on rocky Linux.


Step 1: login as root and run following commands.

Commands:

yum install dkms gcc make kernel-devel bzip2 binutils patch libgomp glibc-headers glibc-devel kernel-headers -y

Important Note: In case if you don’t find the yum packages, configure epel yum repository for centos 8


Step 2: Install the virtual box guest addition. You can see the navigation from flowing screenshot

Step 3: restart your rocky Linux virtual machine

Command:

[root@rocky01 ~]# reboot

You are Done !!!


Take MySQL backup From Jenkins Job

Take MySQL Database Backup From Jenkins

In this post, we will explain and practically show how you can configure MySQL database backup using Jenkins jobs. in easy words, you will automate the MySQL database backup process from Jenkins GUI and MySQL dump command. Normally we use MySQL dump from CLI or using the windows option. In this case, just automate the MySQL dump triggering from a shell script which will be called by Jenkins job with parameter. MySQL dump needs few parameters to run just pass them by build with parameter option in jenkins.


1. Log to Jenkins default URL and port: http://192.168.56.21:8080/

If you want to install and setup Jenkins see this article

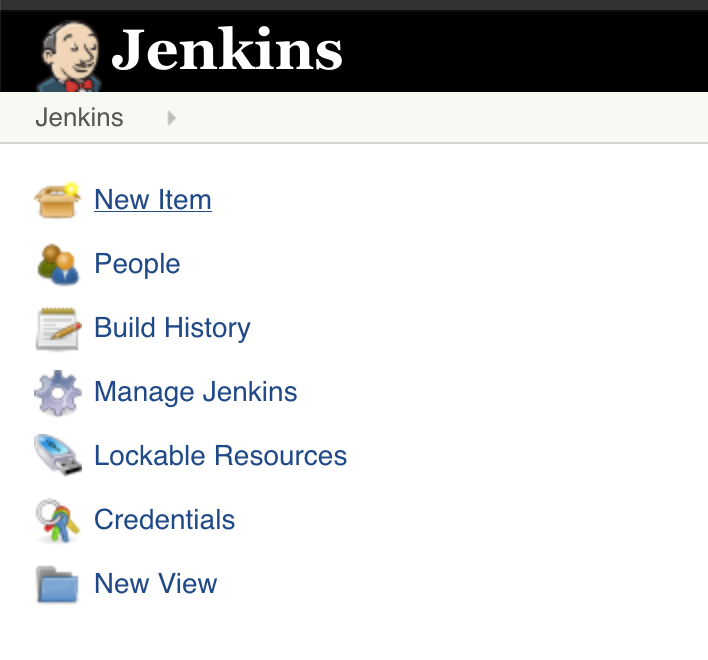
2. Go to New items

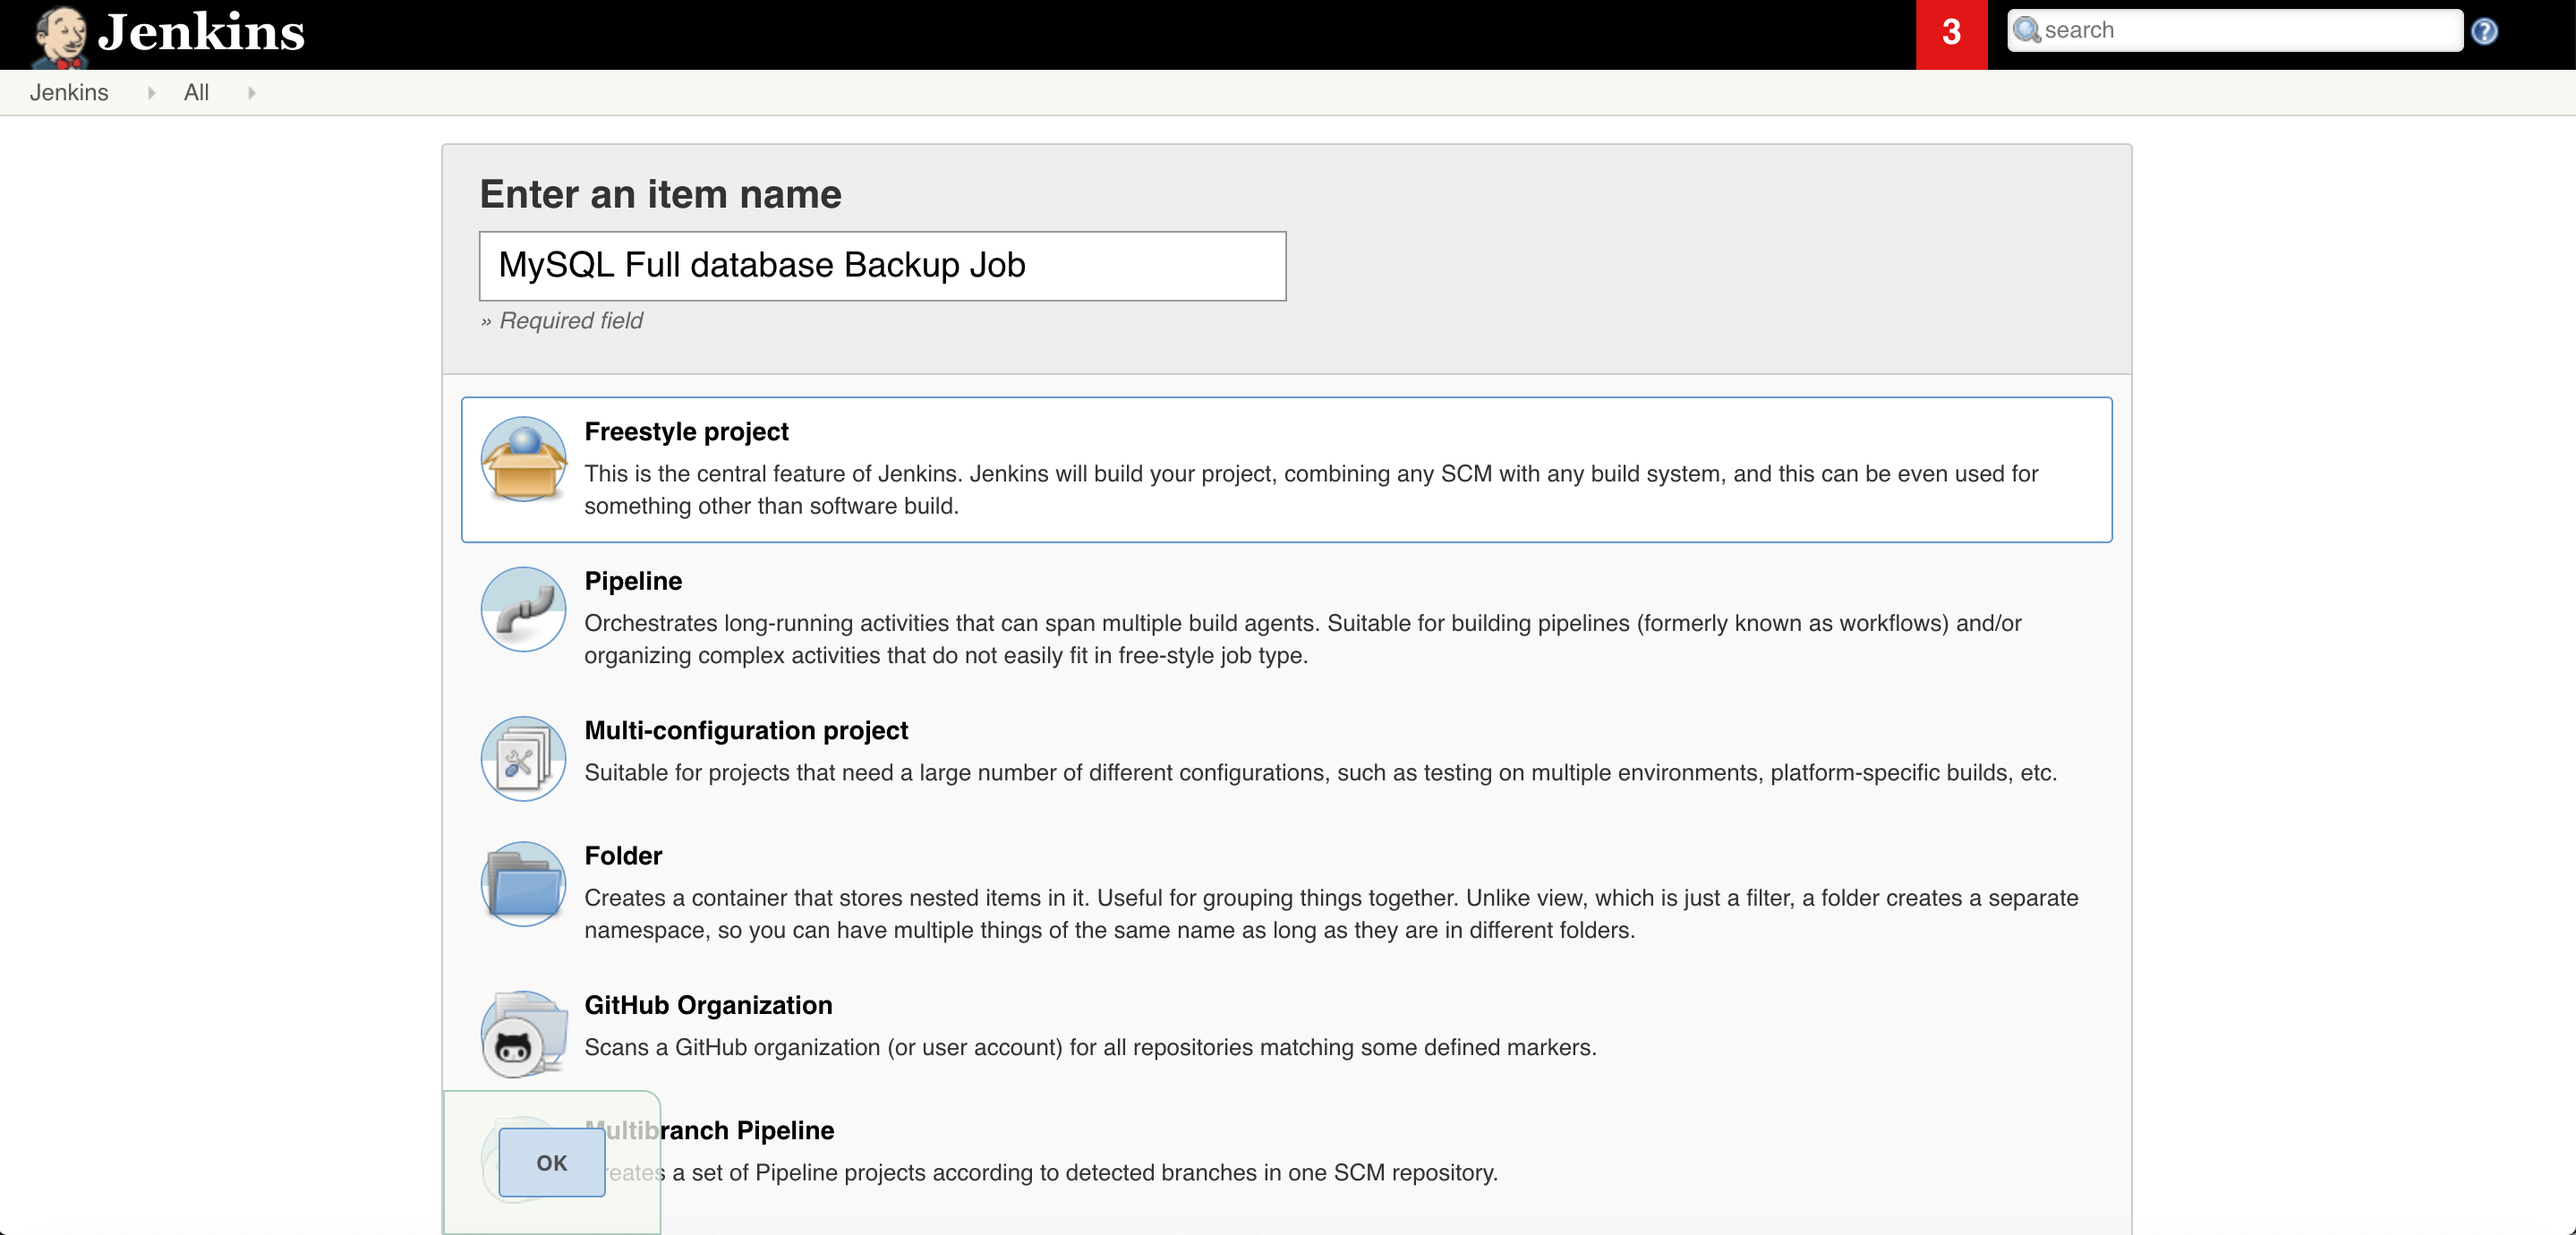
3.  Give some Name and select FreeStyle project


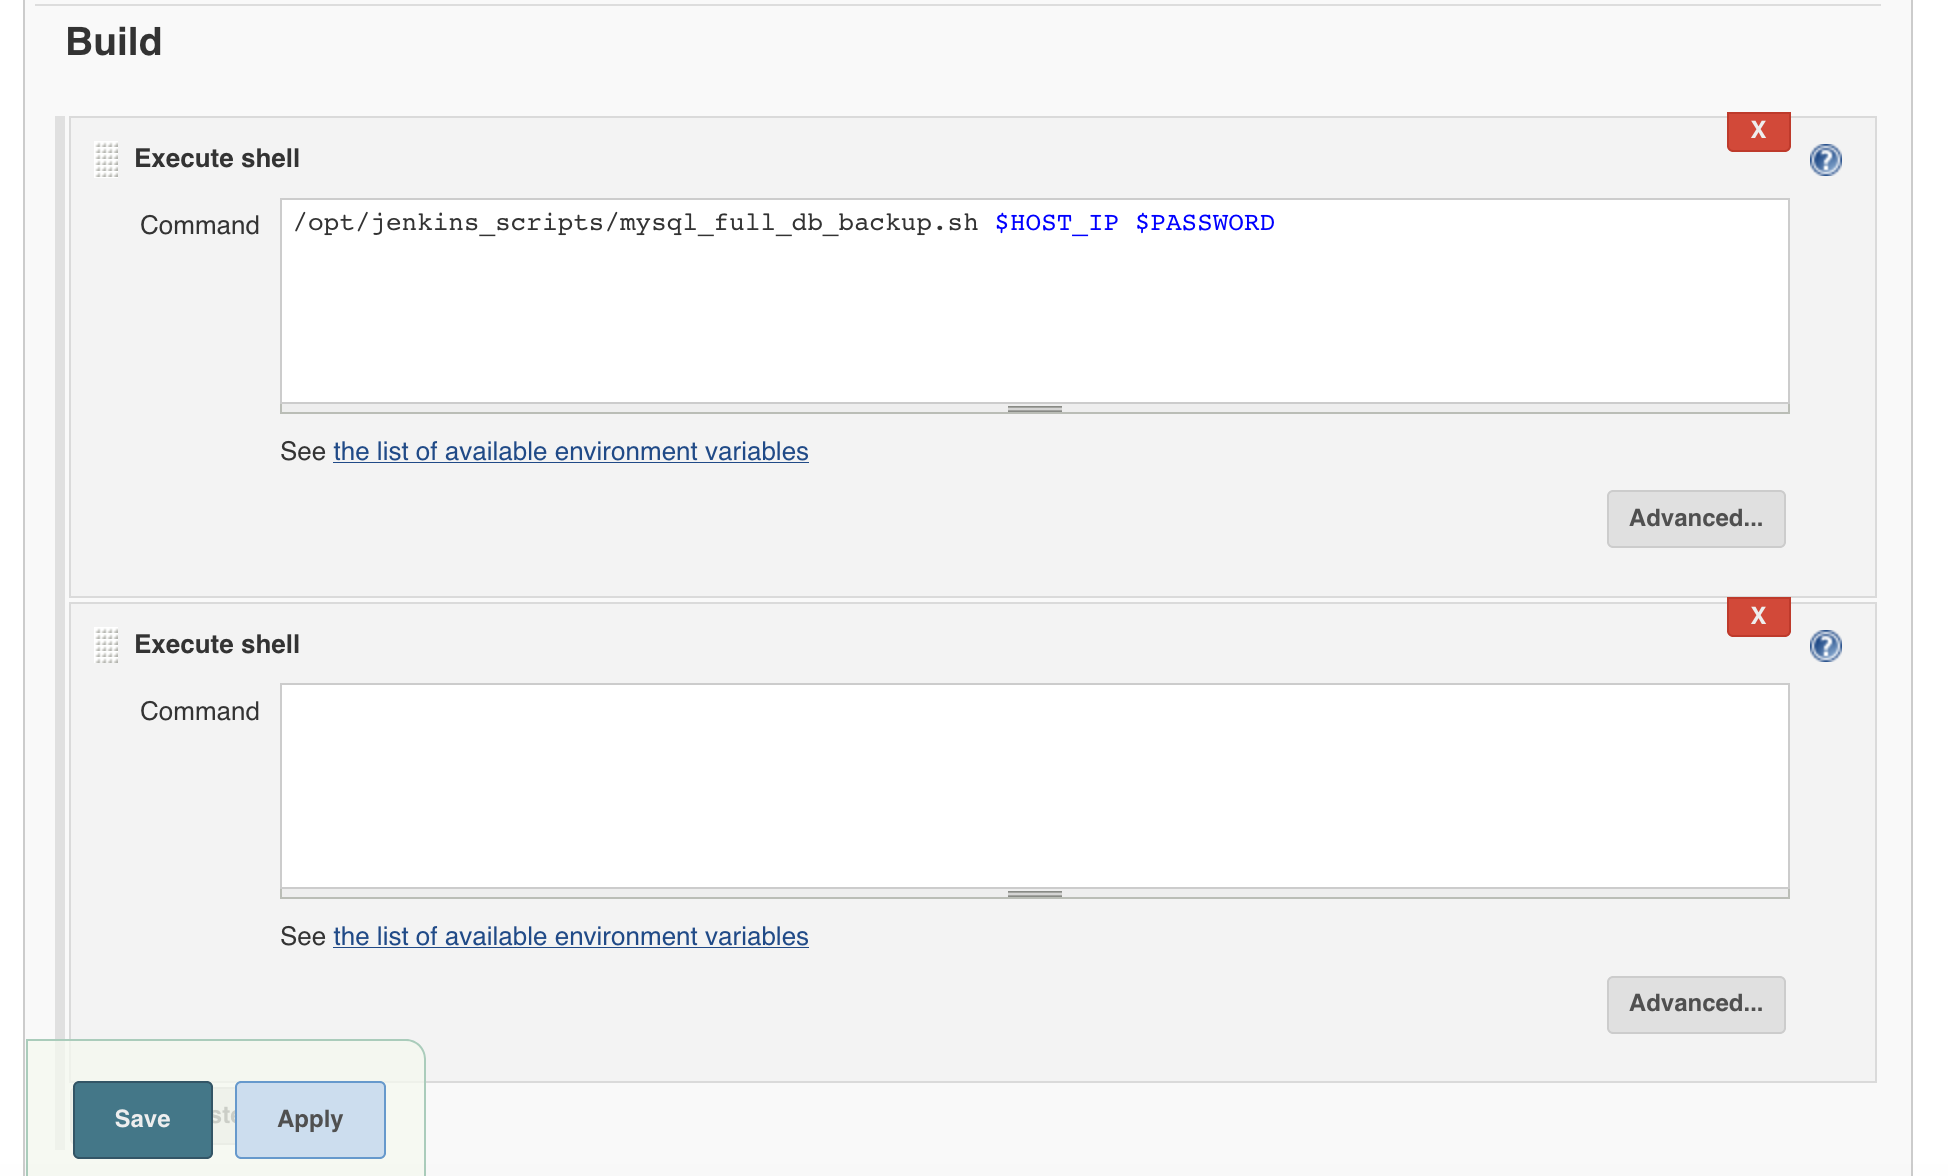
4.  In the build section click on Add build step radio button and select Execute shell.

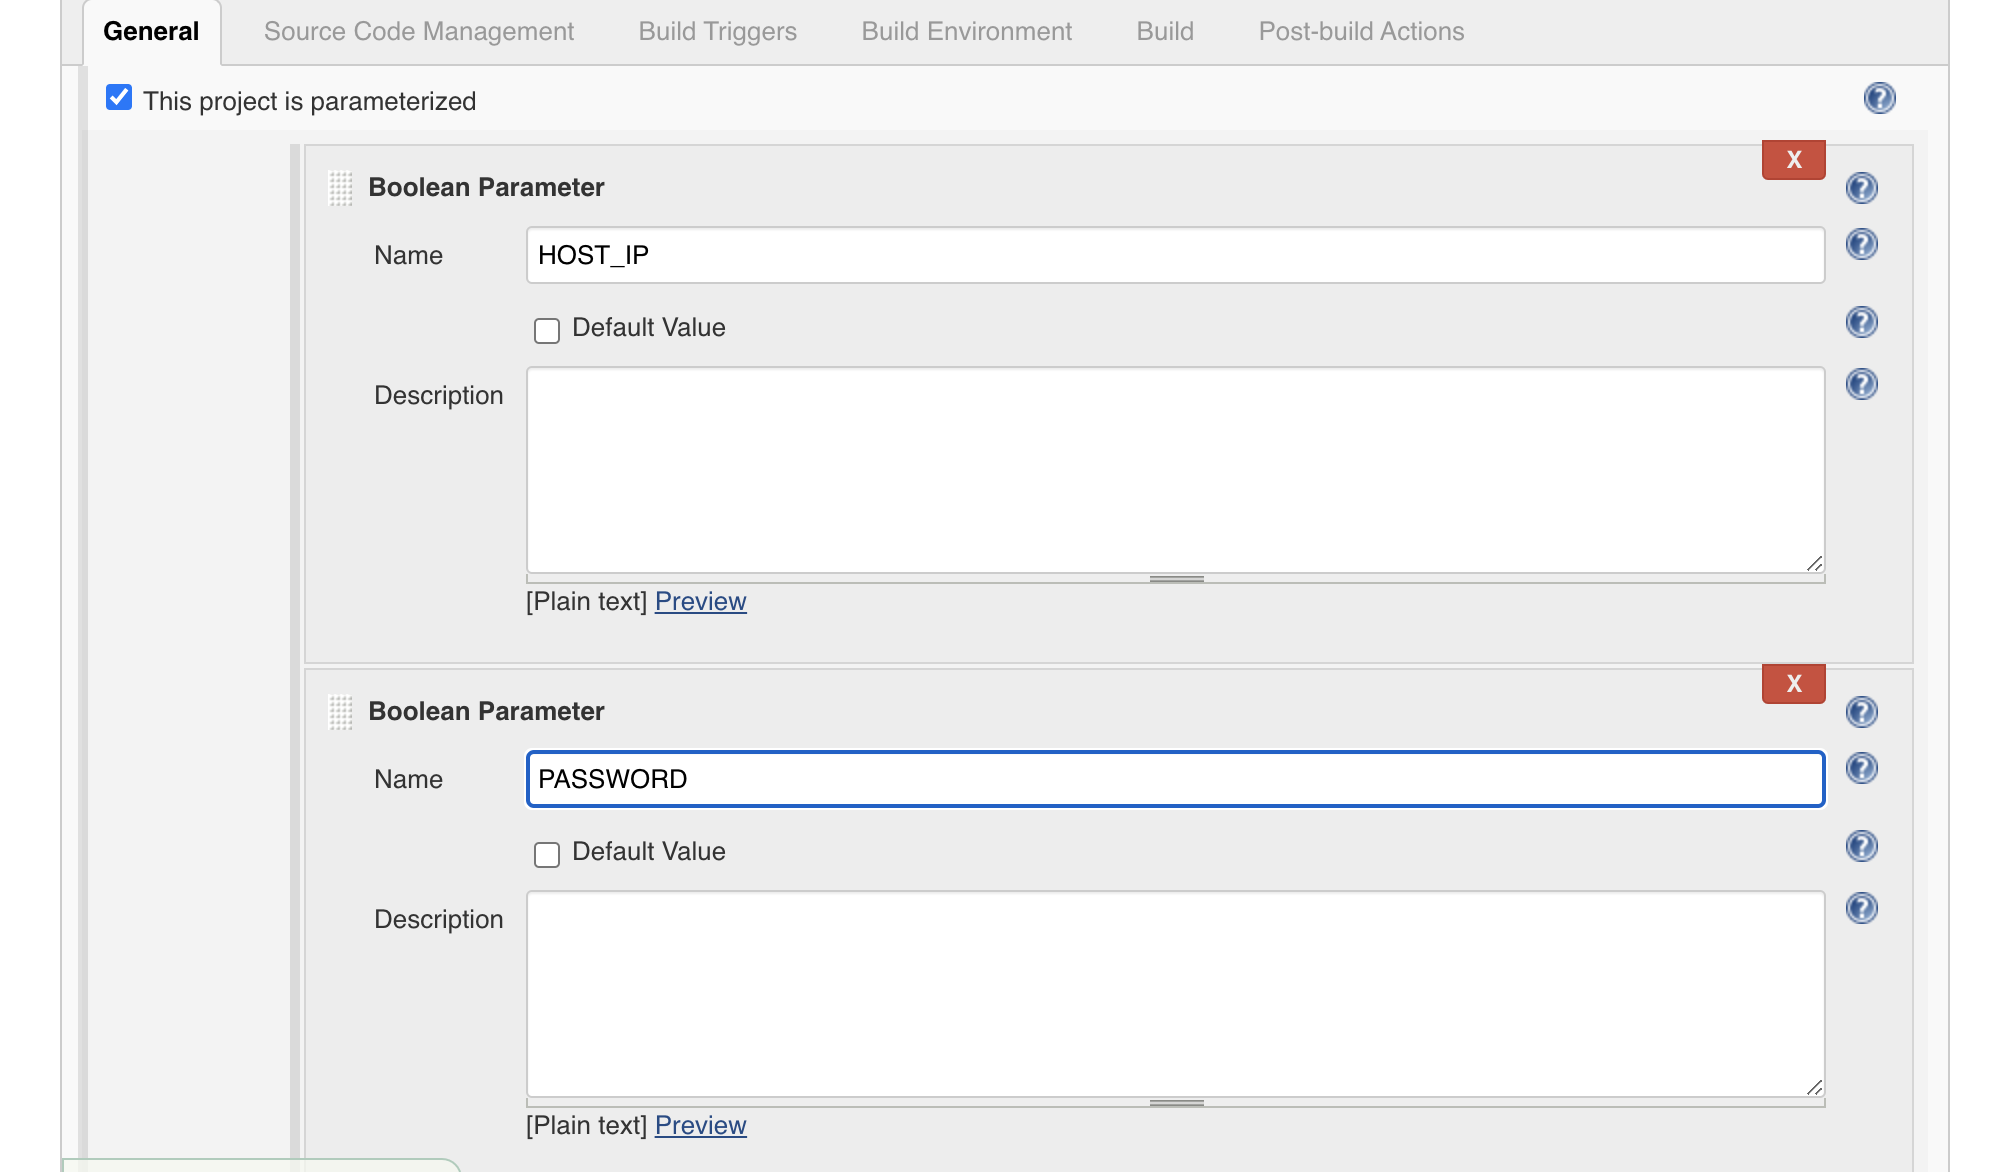
5. Select boolean parameter for MySQL database host and database superuser password which is root password in MySQL database case.


6.  In this build part give the shell script name with full path and parameters like $HOST_IP & $Password


Shell Script

[root@master01 ~]# cat /opt/jenkins_scripts/mysql_full_db_backup.sh
#!/bin/bash
HOST_IP=$1
PASSWORD=$2
echo "starting mysql database full backup"
mysqldump -h $HOST_IP --all-databases --single-transaction --quick --lock-tables=false > /opt/jenkins_scripts/mysql_backup/full_backup_$(date +%F_%N).sql -u root -p$PASSWORD
echo "Backup has been done"


[su_box title=”IMP Note” box_color=”#fe2227″ title_color=”#101112″]Note: Make sure Jenkins have execute (chmod +x /opt/jenkins_scripts/mysql_full_db_backup.sh)  privilege on script[/su_box]


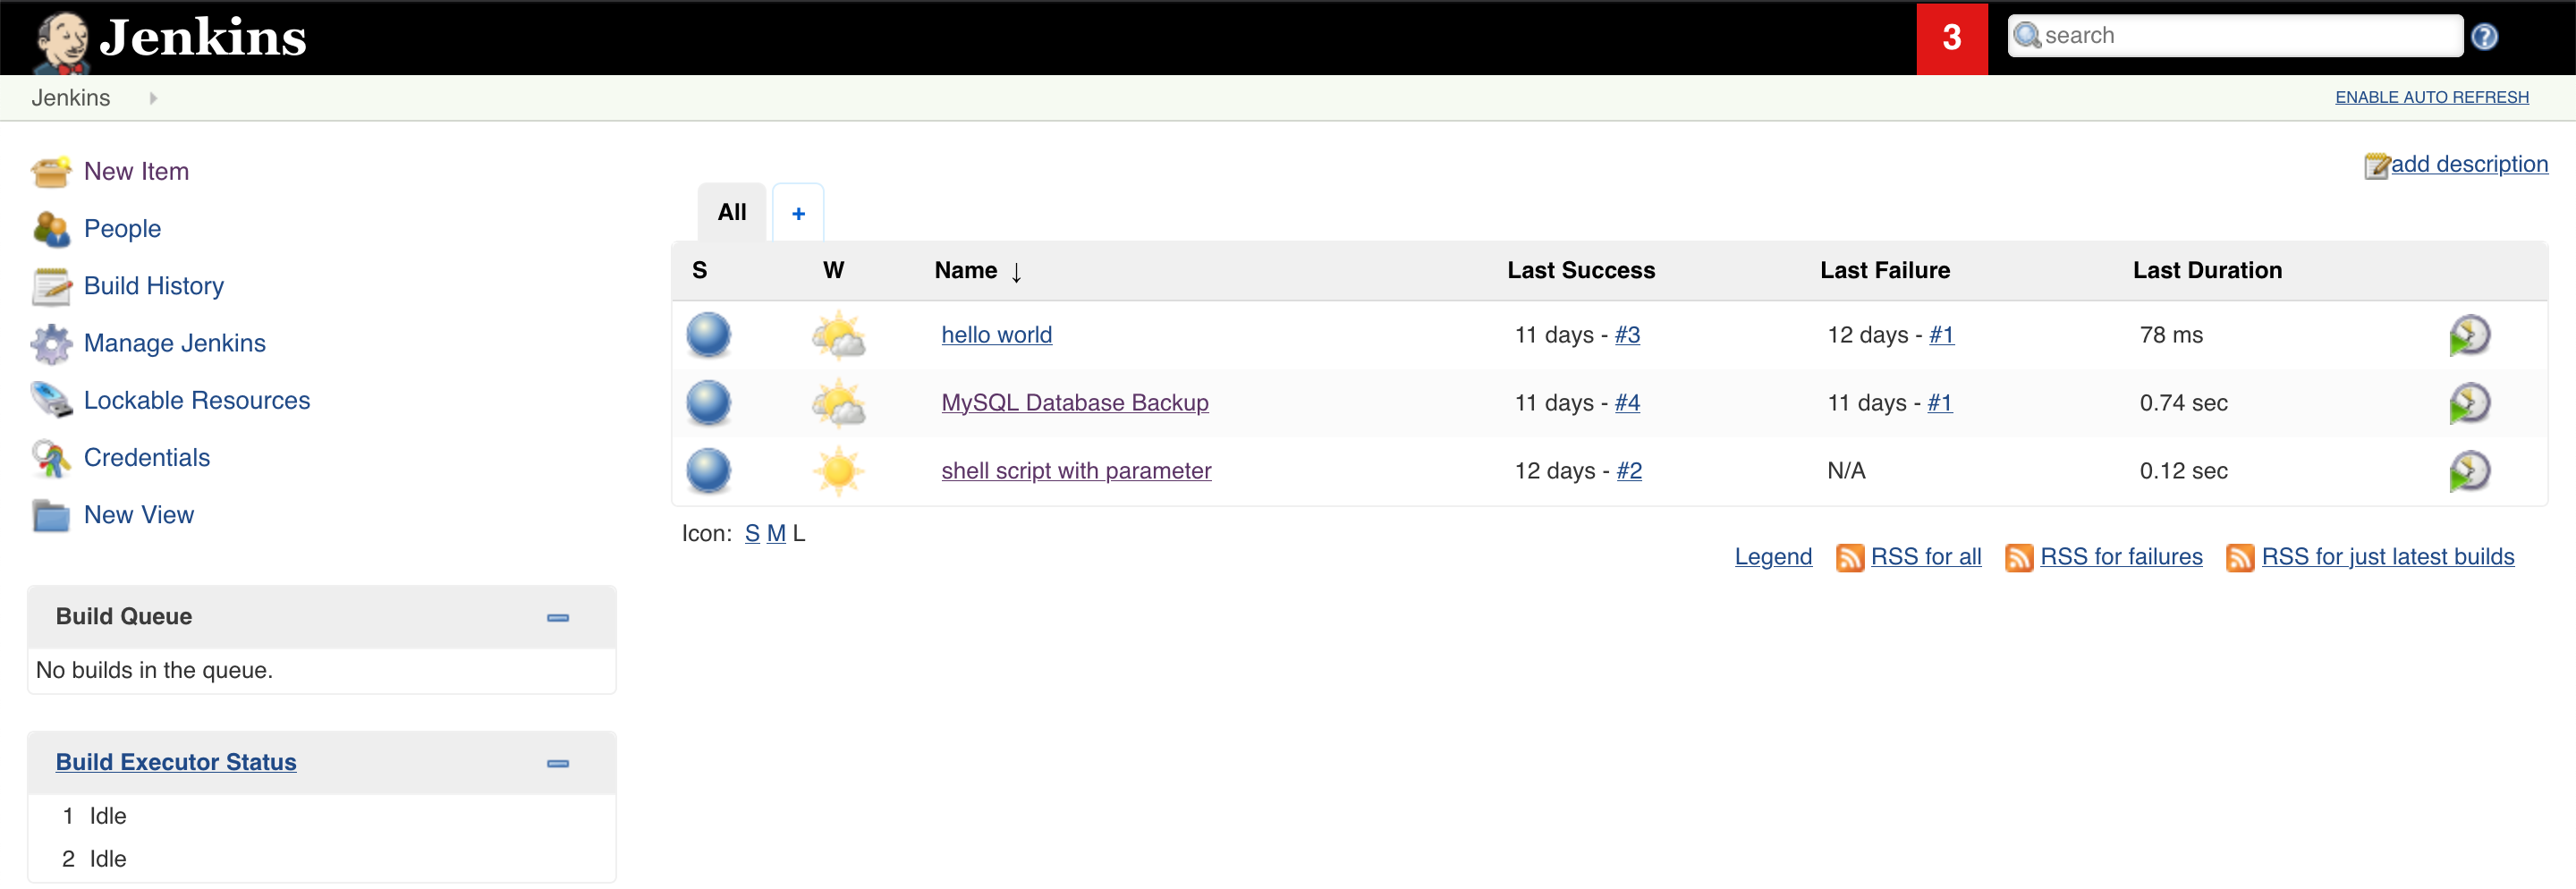
7. Let’s execute the Jenkins job

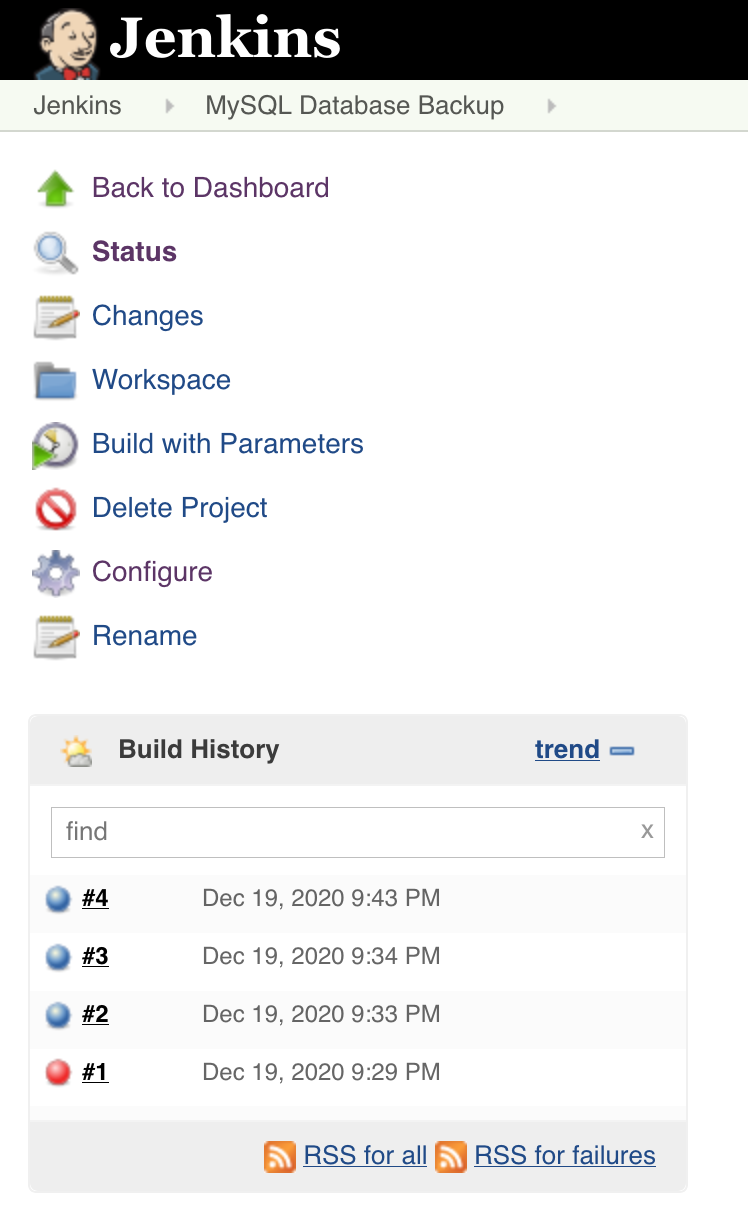
7.1  click on the the MySQL database backup job


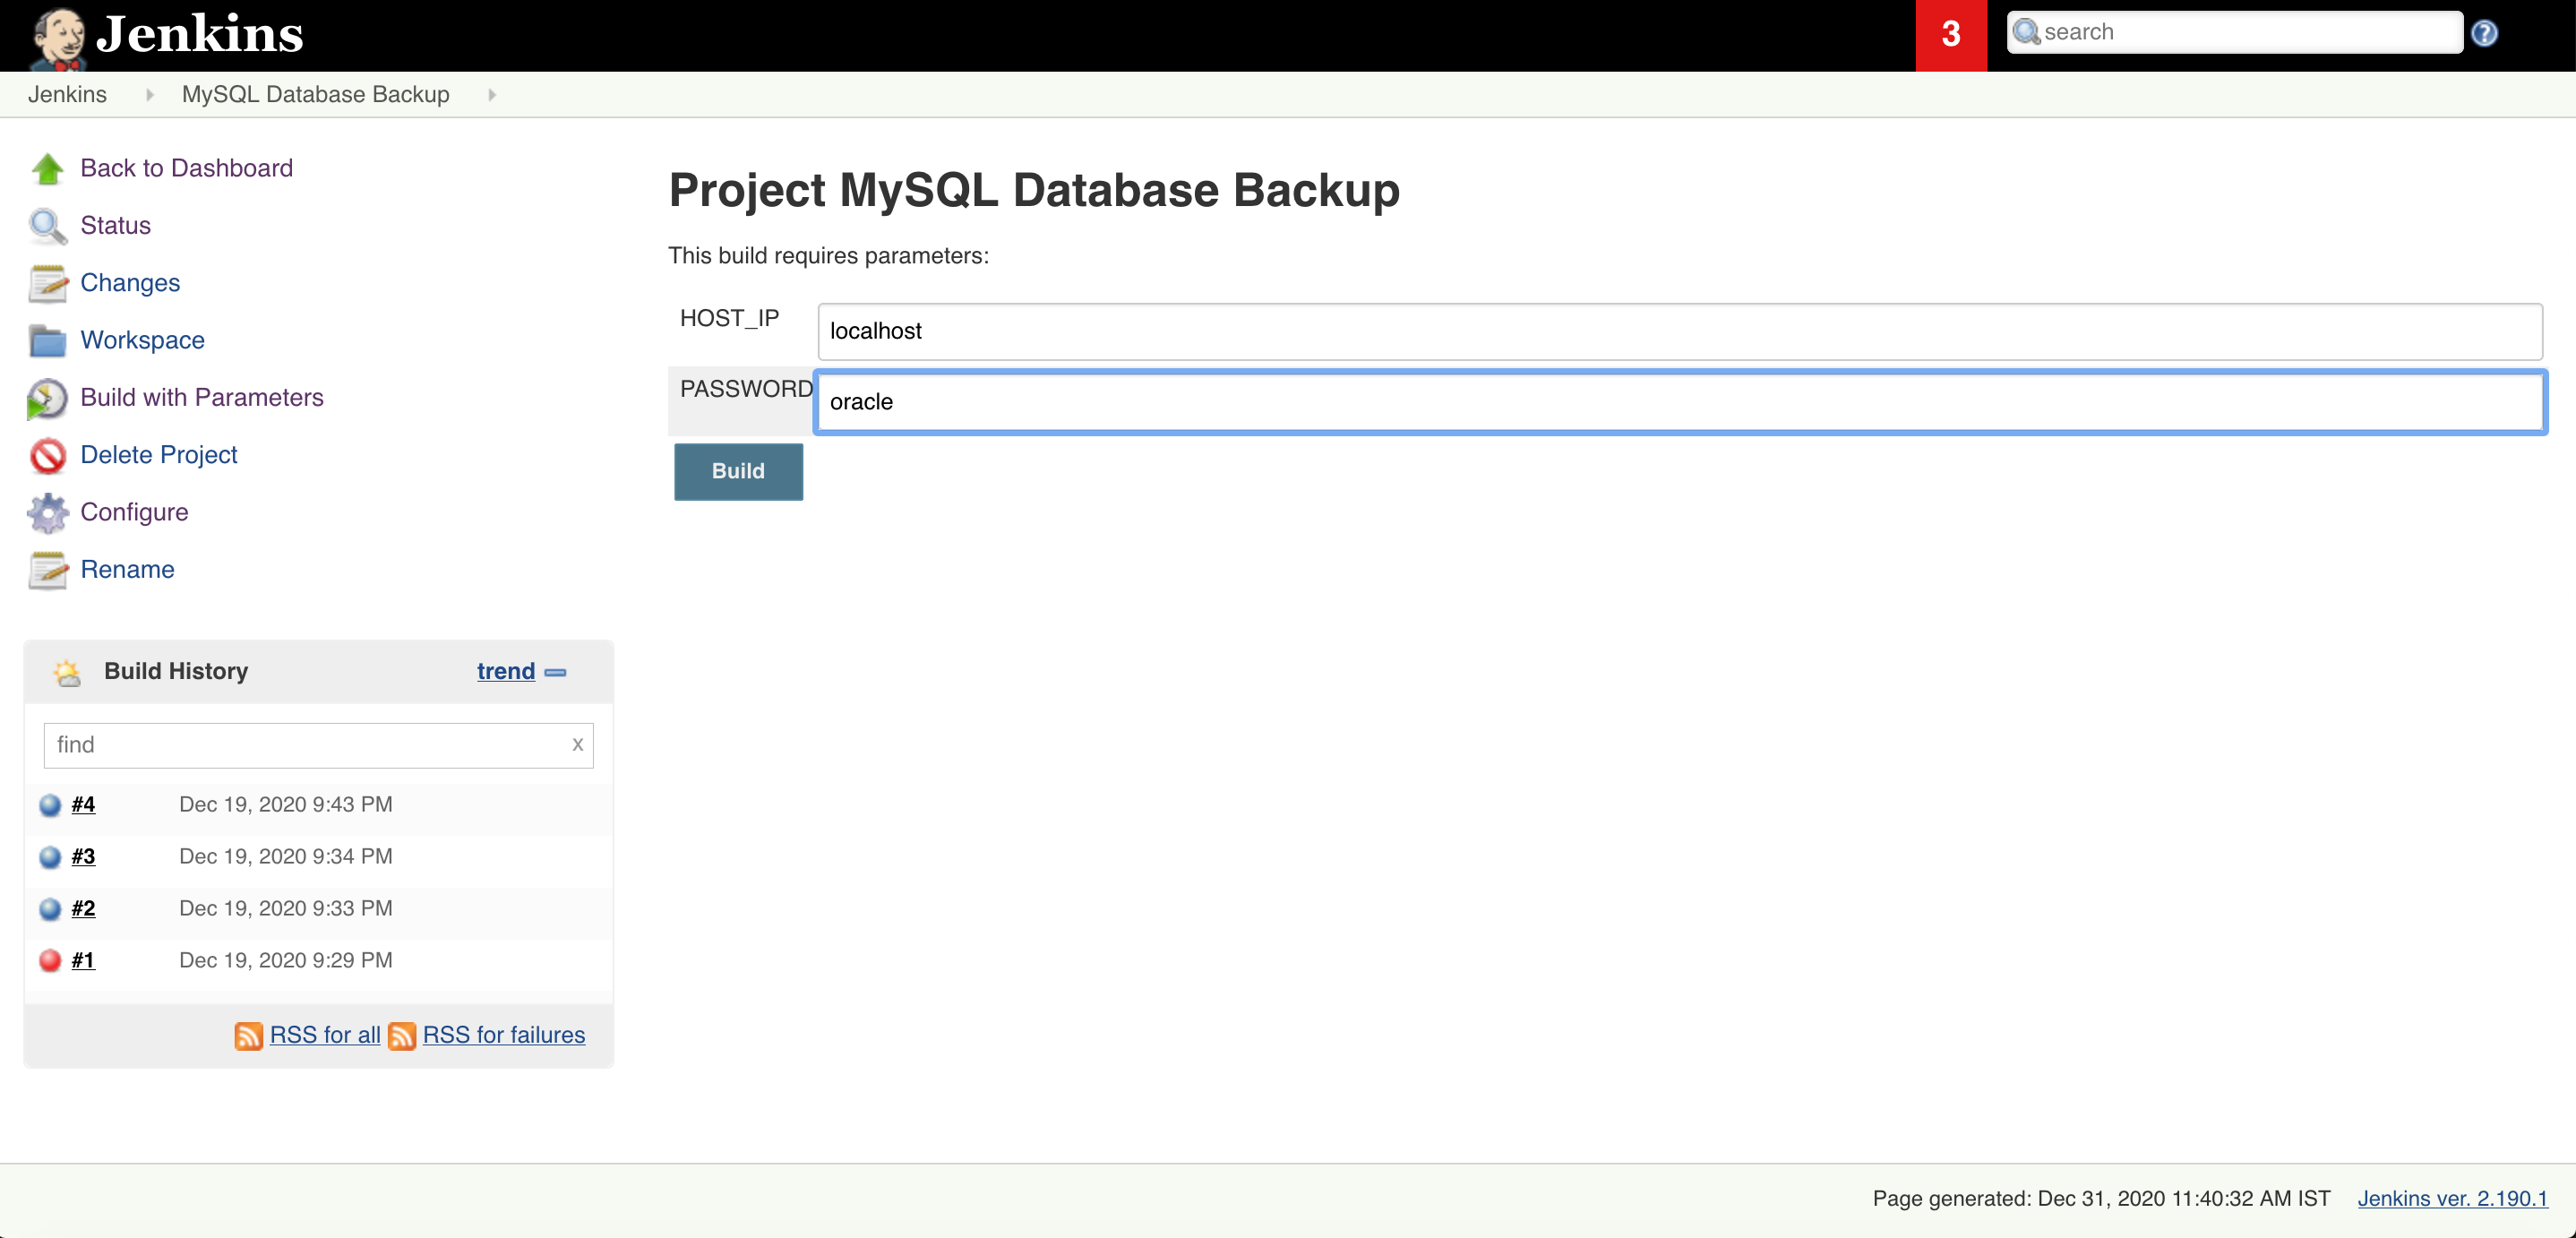
7.2  Click on build with Parameter


7.3  Give your database server name or IP. In my case Mysql database running on the same server that’s thy, I will give localhost and database root password


7.4 Once your job is executed go to that job open it in console output mode and check the status of the job. And you are DONE!!!

Read More

How to fix ORA-28368: cannot auto-create wallet
AWS Services and their Azure alternatives 
How to Manage AWS S3 Bucket with AWS CLI

How to connect PostgreSQL Database from PgAdmin
How to create AWS rds PostgreSQL Database
Convert pem to ppk
How to Install PuTTy on Window
How to Install and create AWS EC2 Instance using Terraform
AWS MySQL RDS Database Creation using AWSCLI
How to Create MySQL Database with AWS RDS
How to connect to AWS MySQL / MariaDB RDS or EC2 database from MySQL WorkBench

Apache Tomcat: java.net.BindException: Permission denied (Bind failed) :443

How to fix error: Apache tomcat : java.net.BindException: Permission denied (Bind failed) <null>:443


Full Error:

SEVERE: Failed to initialize end point associated with ProtocolHandler ["http-bio-4443"]
java.net.BindException: Permission denied (Bind failed) <null>:4443
	at org.apache.tomcat.util.net.JIoEndpoint.bind(JIoEndpoint.java:413)
	at org.apache.tomcat.util.net.AbstractEndpoint.init(AbstractEndpoint.java:715)
	at org.apache.coyote.AbstractProtocol.init(AbstractProtocol.java:452)
	at org.apache.coyote.http11.AbstractHttp11JsseProtocol.init(AbstractHttp11JsseProtocol.java:119)
	at org.apache.catalina.connector.Connector.initInternal(Connector.java:978)
	at org.apache.catalina.util.LifecycleBase.init(LifecycleBase.java:102)
	at org.apache.catalina.core.StandardService.initInternal(StandardService.java:560)
	at org.apache.catalina.util.LifecycleBase.init(LifecycleBase.java:102)
	at org.apache.catalina.core.StandardServer.initInternal(StandardServer.java:840)
	at org.apache.catalina.util.LifecycleBase.init(LifecycleBase.java:102)
	at org.apache.catalina.startup.Catalina.load(Catalina.java:642)
	at org.apache.catalina.startup.Catalina.load(Catalina.java:667)
	at sun.reflect.NativeMethodAccessorImpl.invoke0(Native Method)
	at sun.reflect.NativeMethodAccessorImpl.invoke(NativeMethodAccessorImpl.java:62)
	at sun.reflect.DelegatingMethodAccessorImpl.invoke(DelegatingMethodAccessorImpl.java:43)
	at java.lang.reflect.Method.invoke(Method.java:498)
	at org.apache.catalina.startup.Bootstrap.load(Bootstrap.java:253)
	at org.apache.catalina.startup.Bootstrap.main(Bootstrap.java:427)
Caused by: java.net.BindException: Permission denied (Bind failed)
	at java.net.PlainSocketImpl.socketBind(Native Method)
	at java.net.AbstractPlainSocketImpl.bind(AbstractPlainSocketImpl.java:387)
	at java.net.ServerSocket.bind(ServerSocket.java:390)
	at java.net.ServerSocket.<init>(ServerSocket.java:252)
	at java.net.ServerSocket.<init>(ServerSocket.java:196)
	at javax.net.ssl.SSLServerSocket.<init>(SSLServerSocket.java:136)
	at sun.security.ssl.SSLServerSocketImpl.<init>(SSLServerSocketImpl.java:71)
	at sun.security.ssl.SSLServerSocketFactoryImpl.createServerSocket(SSLServerSocketFactoryImpl.java:80)
	at org.apache.tomcat.util.net.jsse.JSSESocketFactory.createSocket(JSSESocketFactory.java:256)
	at org.apache.tomcat.util.net.JIoEndpoint.bind(JIoEndpoint.java:400)
	... 17 more


Why, when, and where we get this error?


We get this issue while starting Apache tomcat on secure port 443. The error “java.net.BindException: Permission denied (Bind failed) :443 ” is visible in /usr/share/tomcat/logs/catalina.2016-12-02.log


How to fix it

This error occurs when your Linux firewall levels are set to ‘enforcing‘.To fix this error make it ‘permissive

  1. Check current firewall status using the command ‘getenforce
  2. Edit the file ‘vi /etc/selinux/config’ and make it ‘permissive’ from ‘enforcing’
    # This file controls the state of SELinux on the system.
    # SELINUX= can take one of these three values:
    #       enforcing - SELinux security policy is enforced.
    #       permissive - SELinux prints warnings instead of enforcing.
    #       disabled - No SELinux policy is loaded.
    SELINUX=permissive
    # SELINUXTYPE= can take one of these two values:
    #       targeted - Targeted processes are protected,
    #       mls - Multi Level Security protection.
    SELINUXTYPE=targeted
  3. Reboot the system using ‘reboot‘ as the root
  4. After reboot check, if tomcat is up with 443 port
    netstat -plan| grep 443
  5. And check the tomcat URL with ssl/https  (https://localhost:443)

Leave a comment if you find the article helpful.


Read More

How to fix ORA-28368: cannot auto-create wallet
AWS Services and their Azure alternatives 
How to Manage AWS S3 Bucket with AWS CLI

How to connect PostgreSQL Database from PgAdmin
How to create AWS rds PostgreSQL Database
Convert pem to ppk
How to Install PuTTy on Window
How to Install and create AWS EC2 Instance using Terraform
AWS MySQL RDS Database Creation using AWSCLI
How to Create MySQL Database with AWS RDS
How to connect to AWS MySQL / MariaDB RDS or EC2 database from MySQL WorkBench